
Outdoor vertical gardens
Outdoor vertical gardens allow greenery to come to the most unexpected of places. From the side of buildings in the heart of a city to a free-standing vertical garden integrated into city furniture. There are many possibilities for vertical gardens outside.
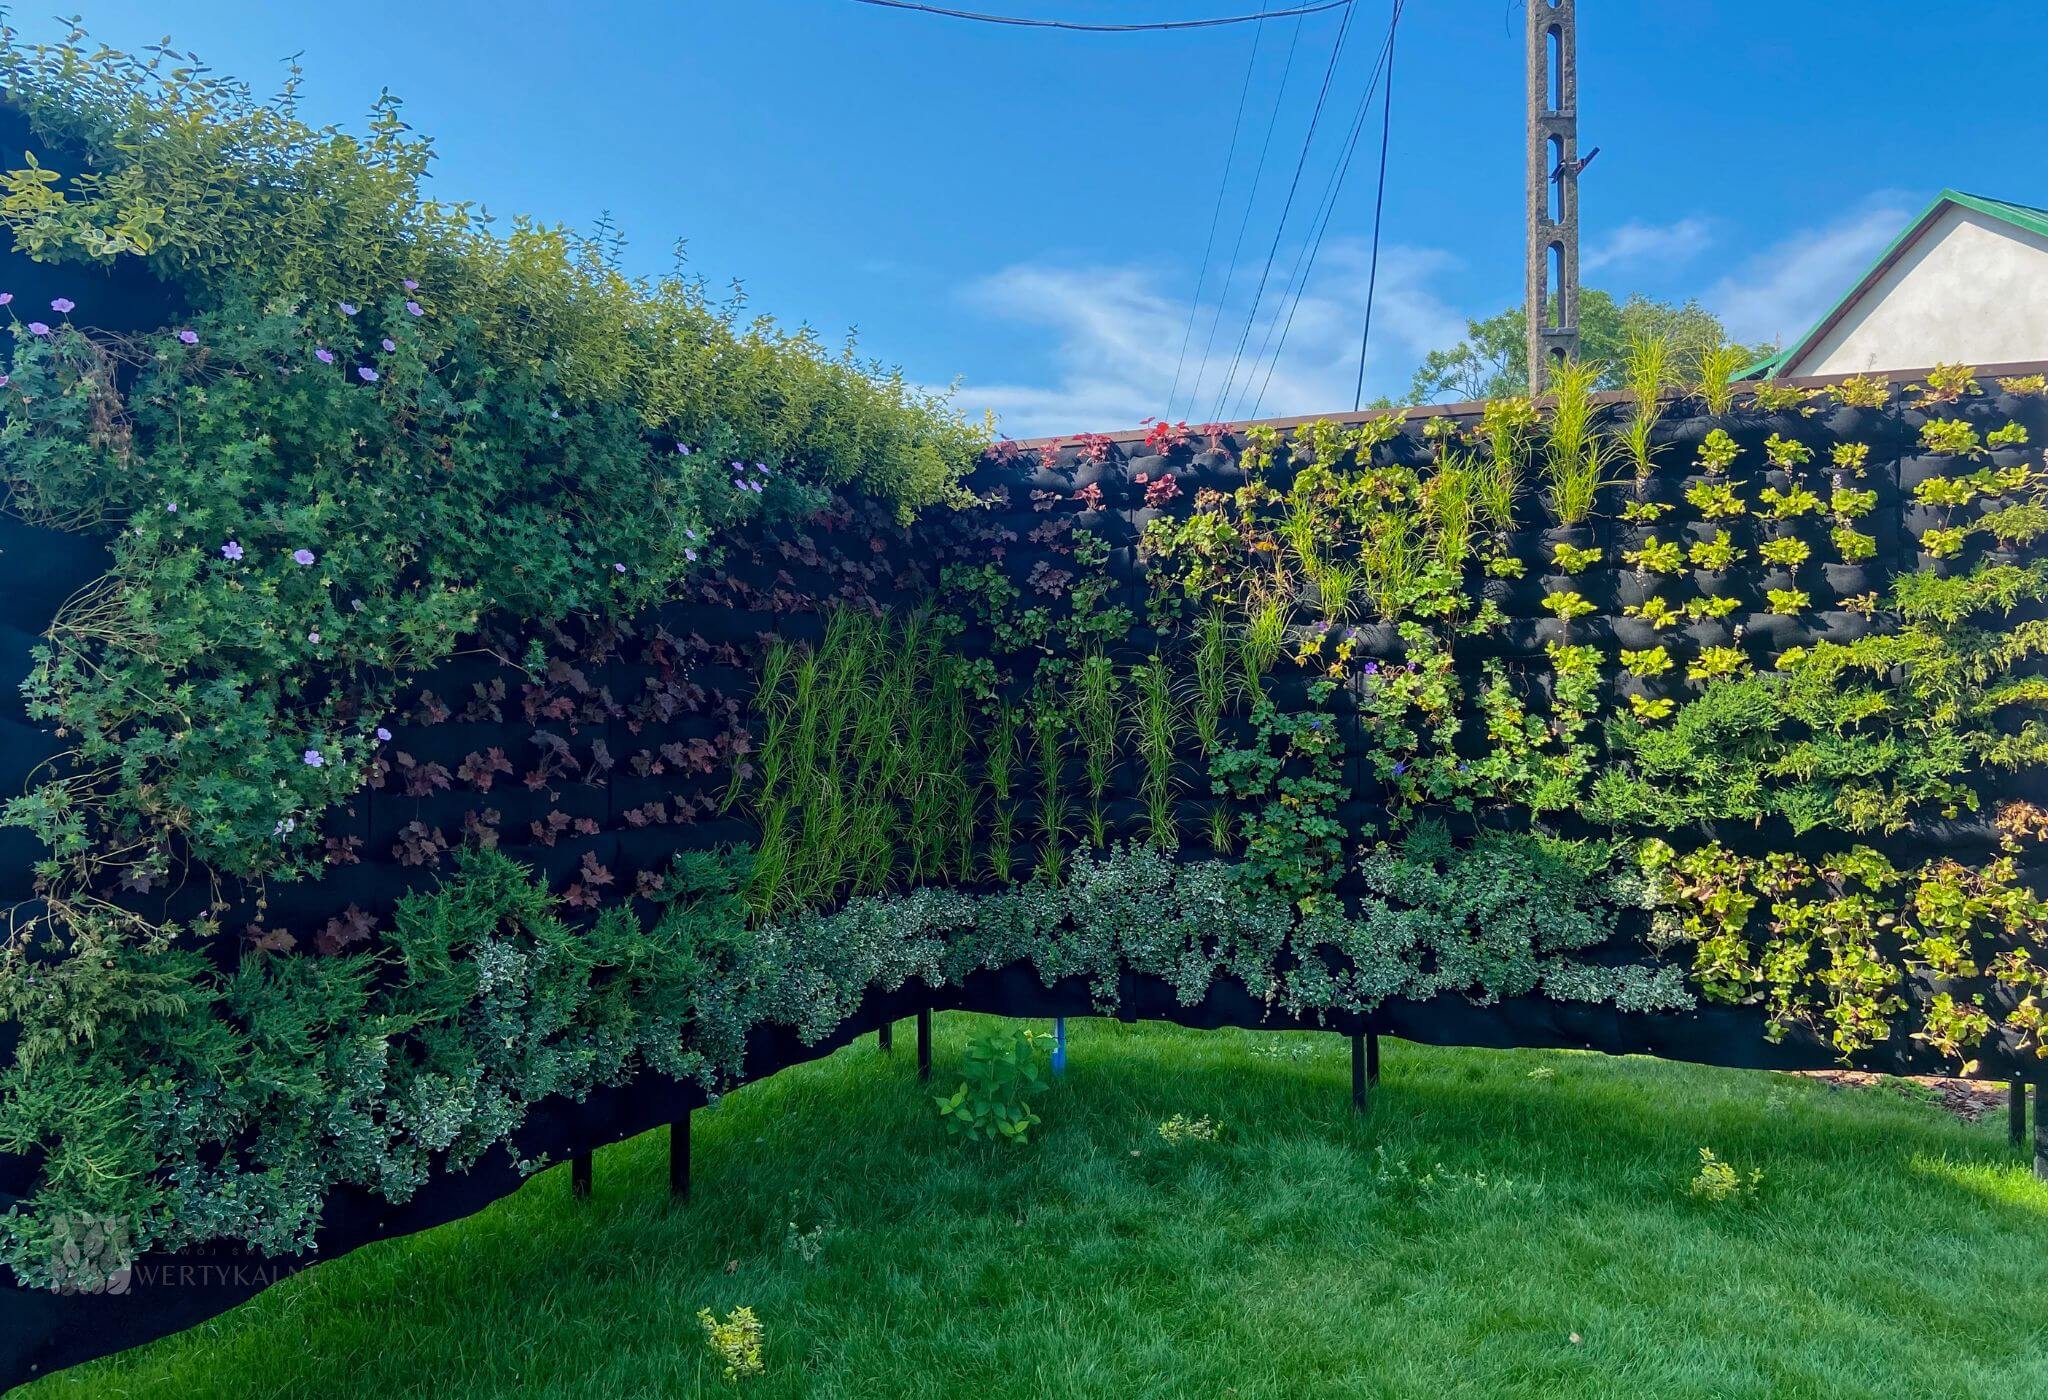
Watch, as we discuss with our clients in Kamionka how they found the installation of one of our largest projects and the impact the wall has had on the city.
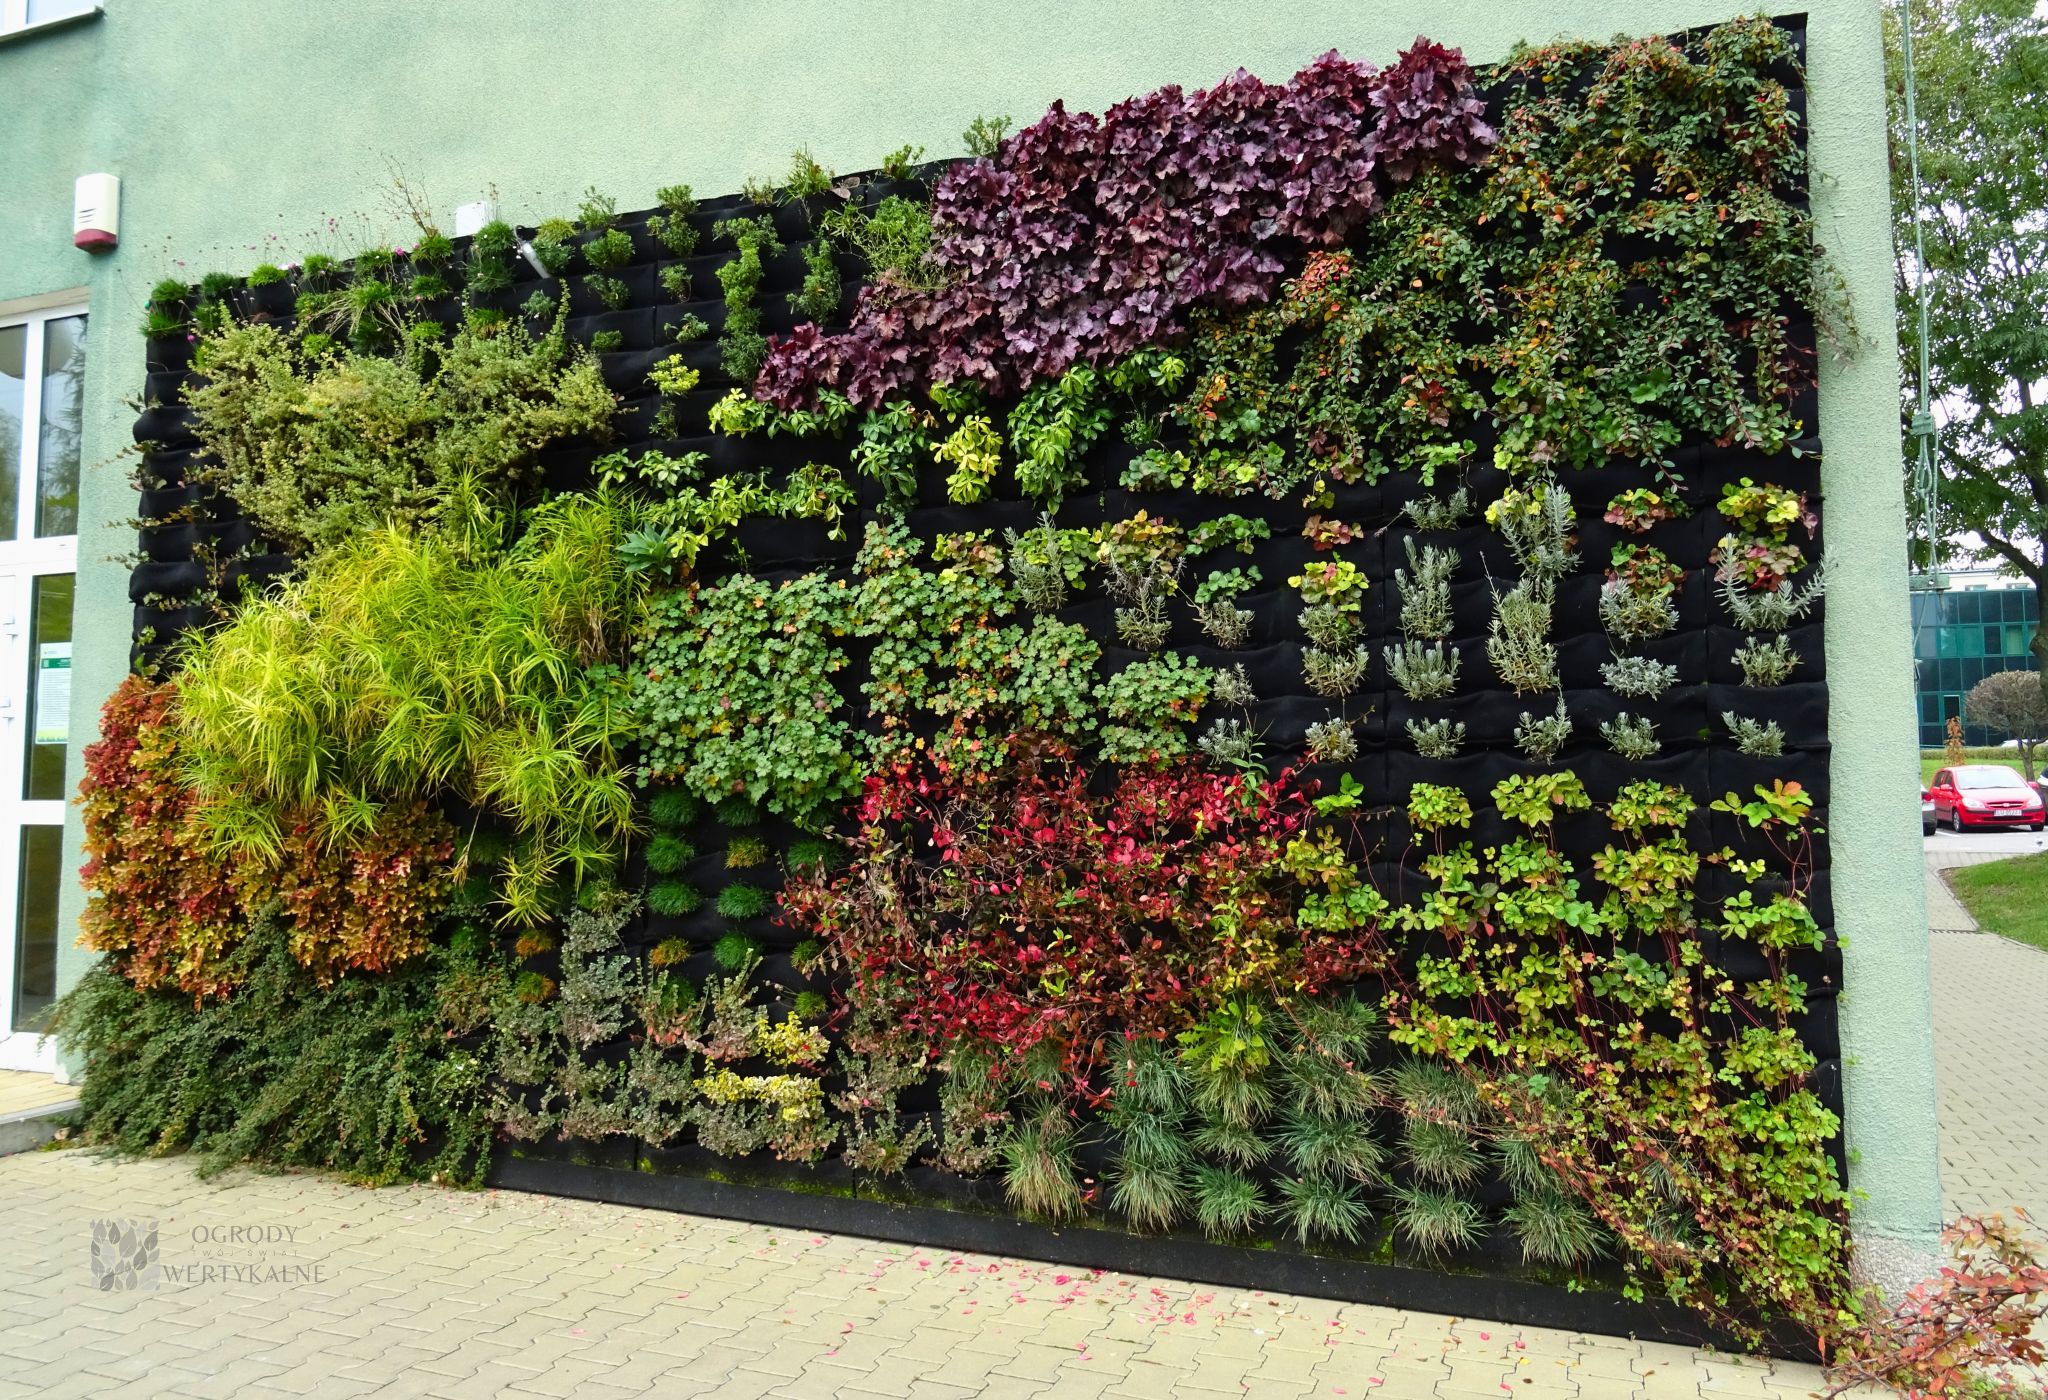
Outdoor green wall in Lublin
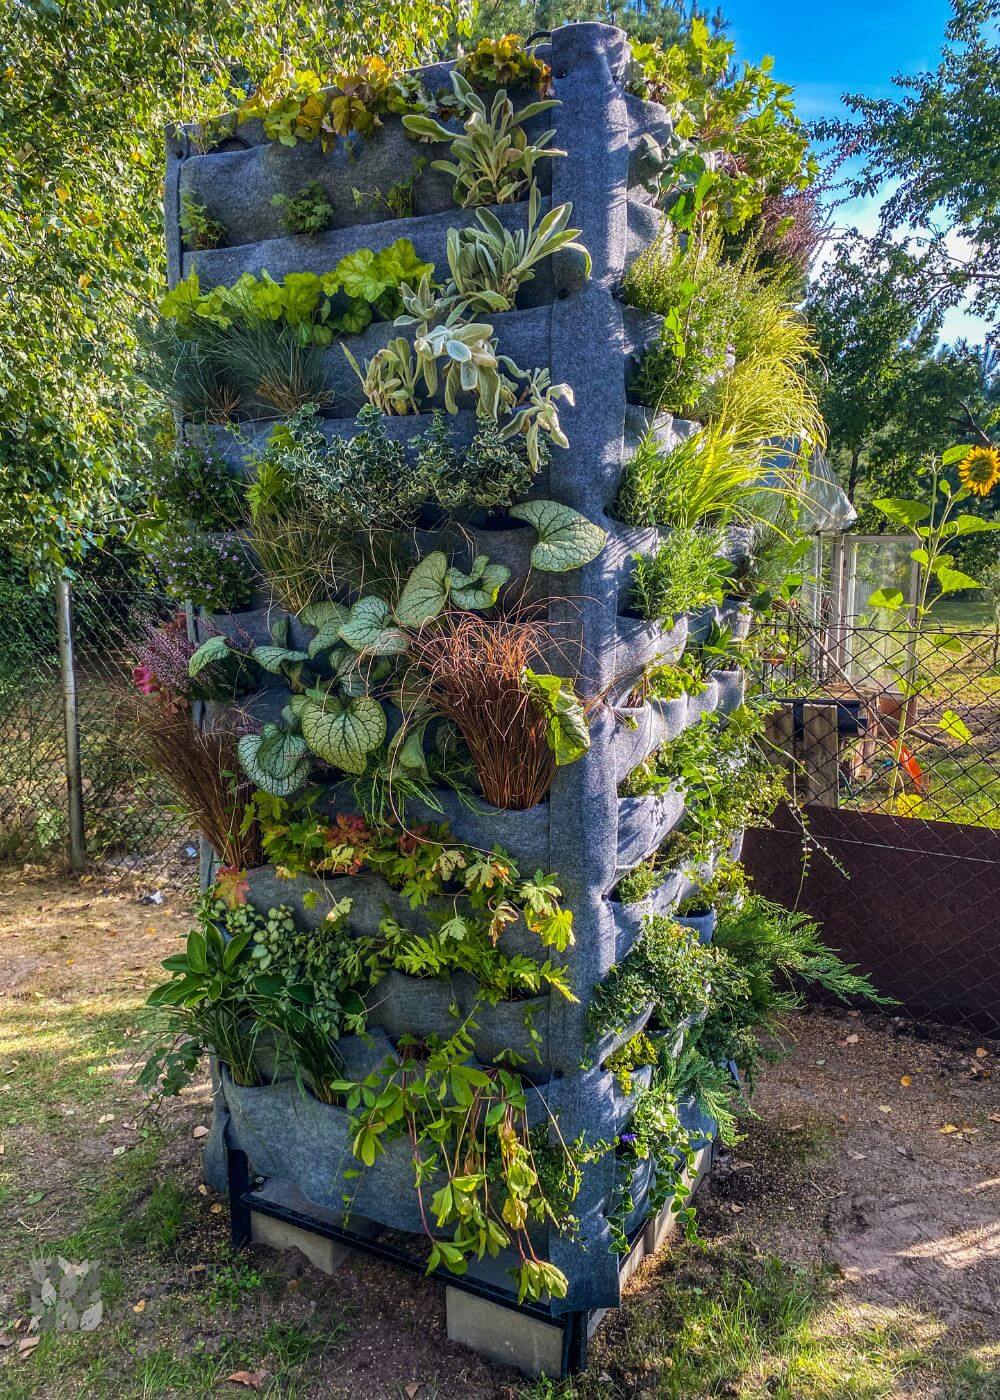
Freestanding outdoor vertical garden
Outdoor green wall with plants
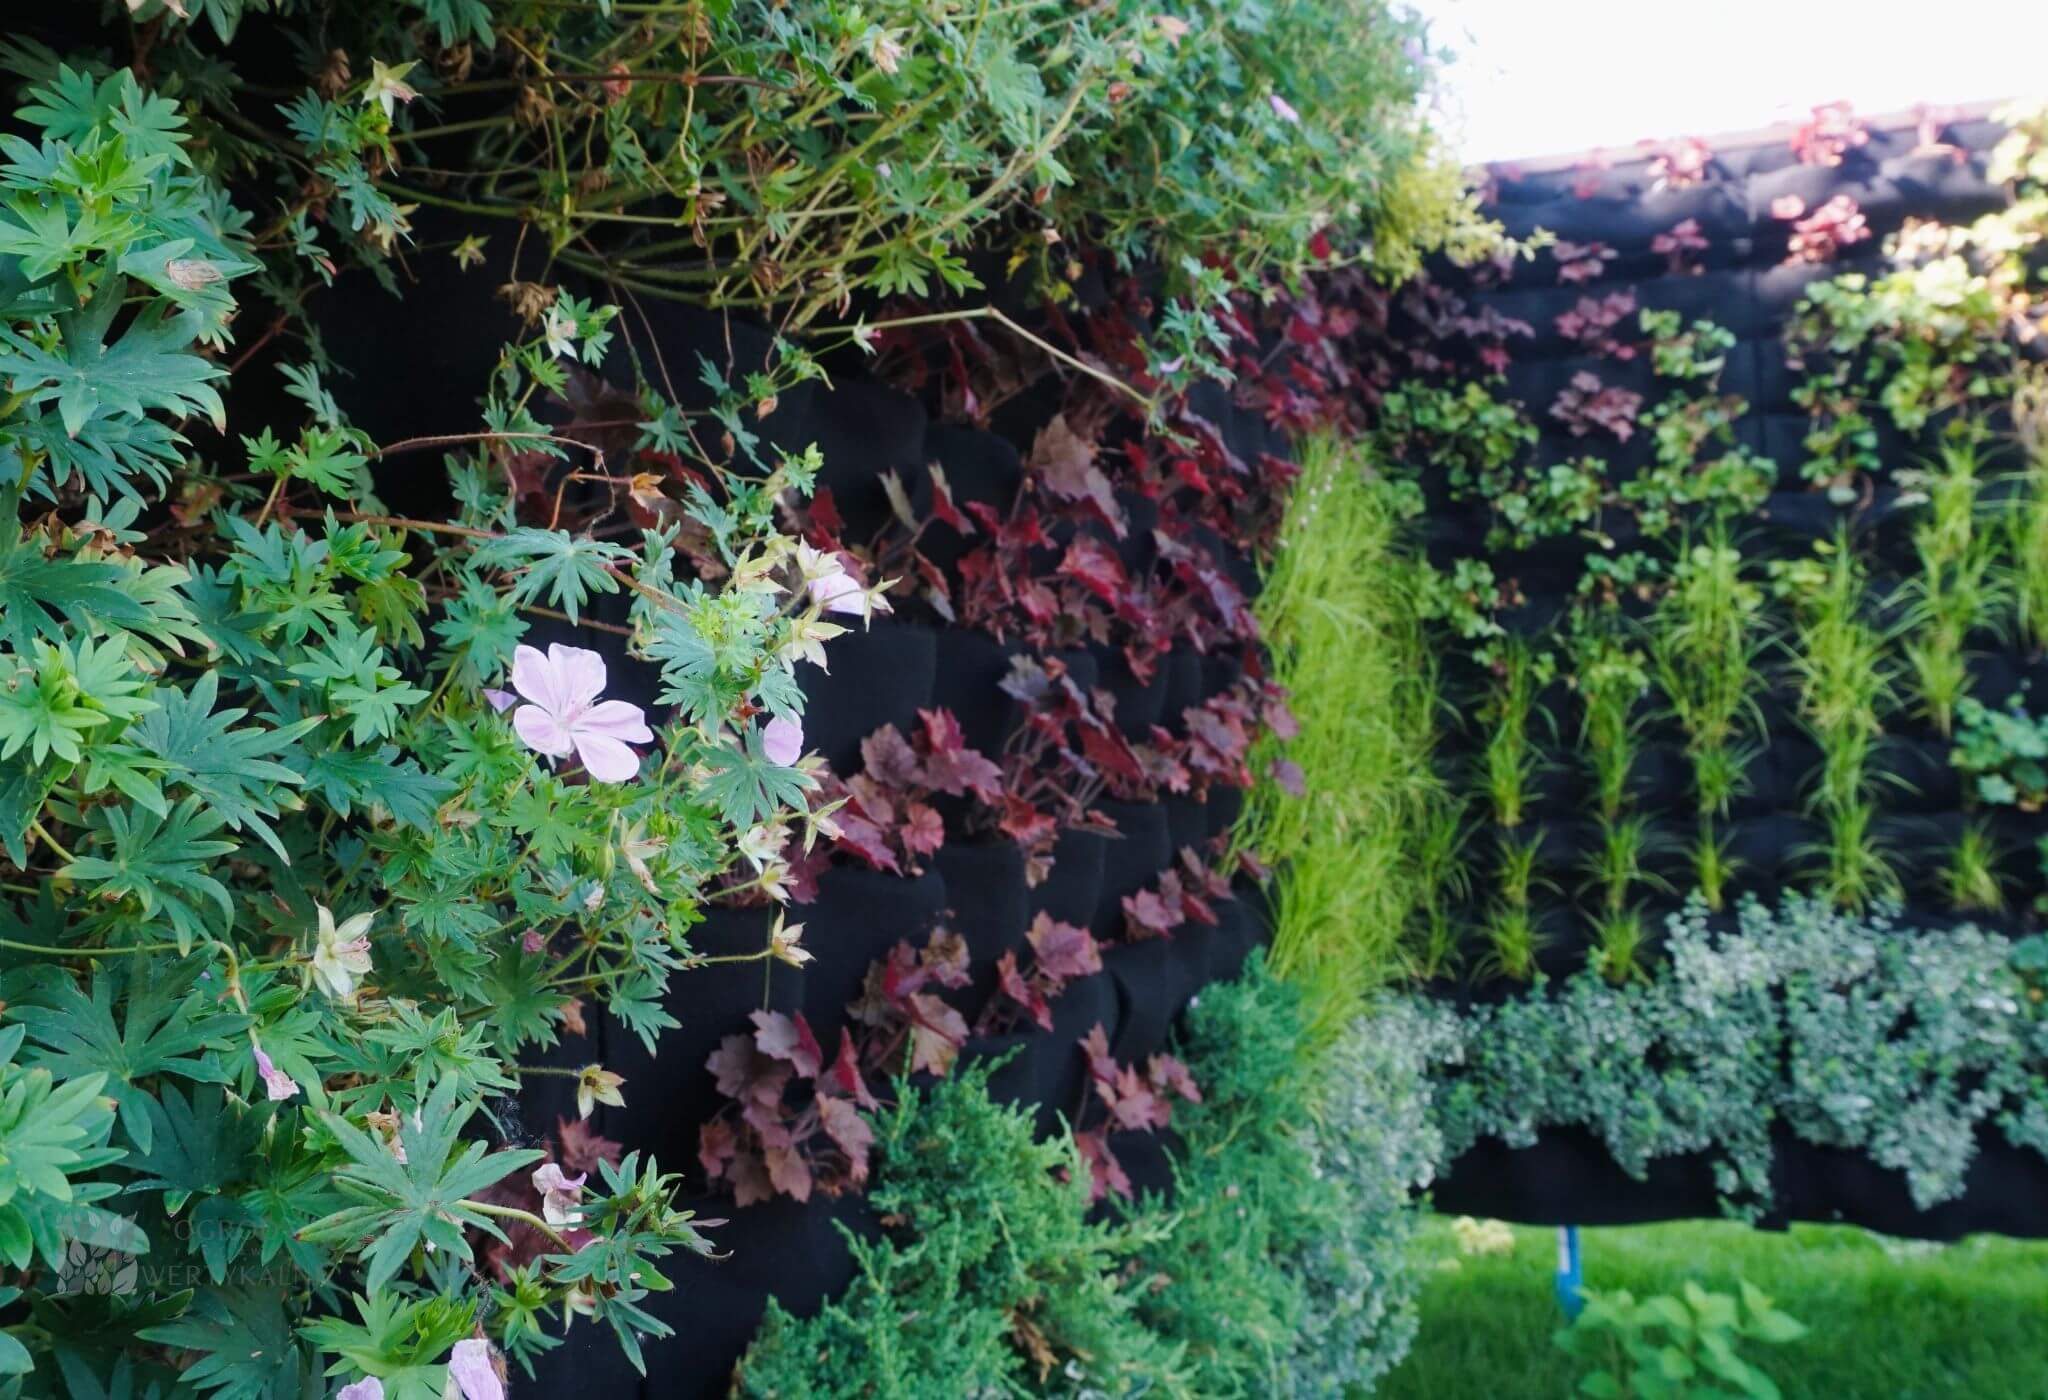
Plants in the outdoor vertical garden
What do I need to install an outdoor vertical garden?
- Water supply.
- Drainage connection.
- Indoor location for the control panel.
- Cable for the temperature sensor.
- Cable for gutter heating.

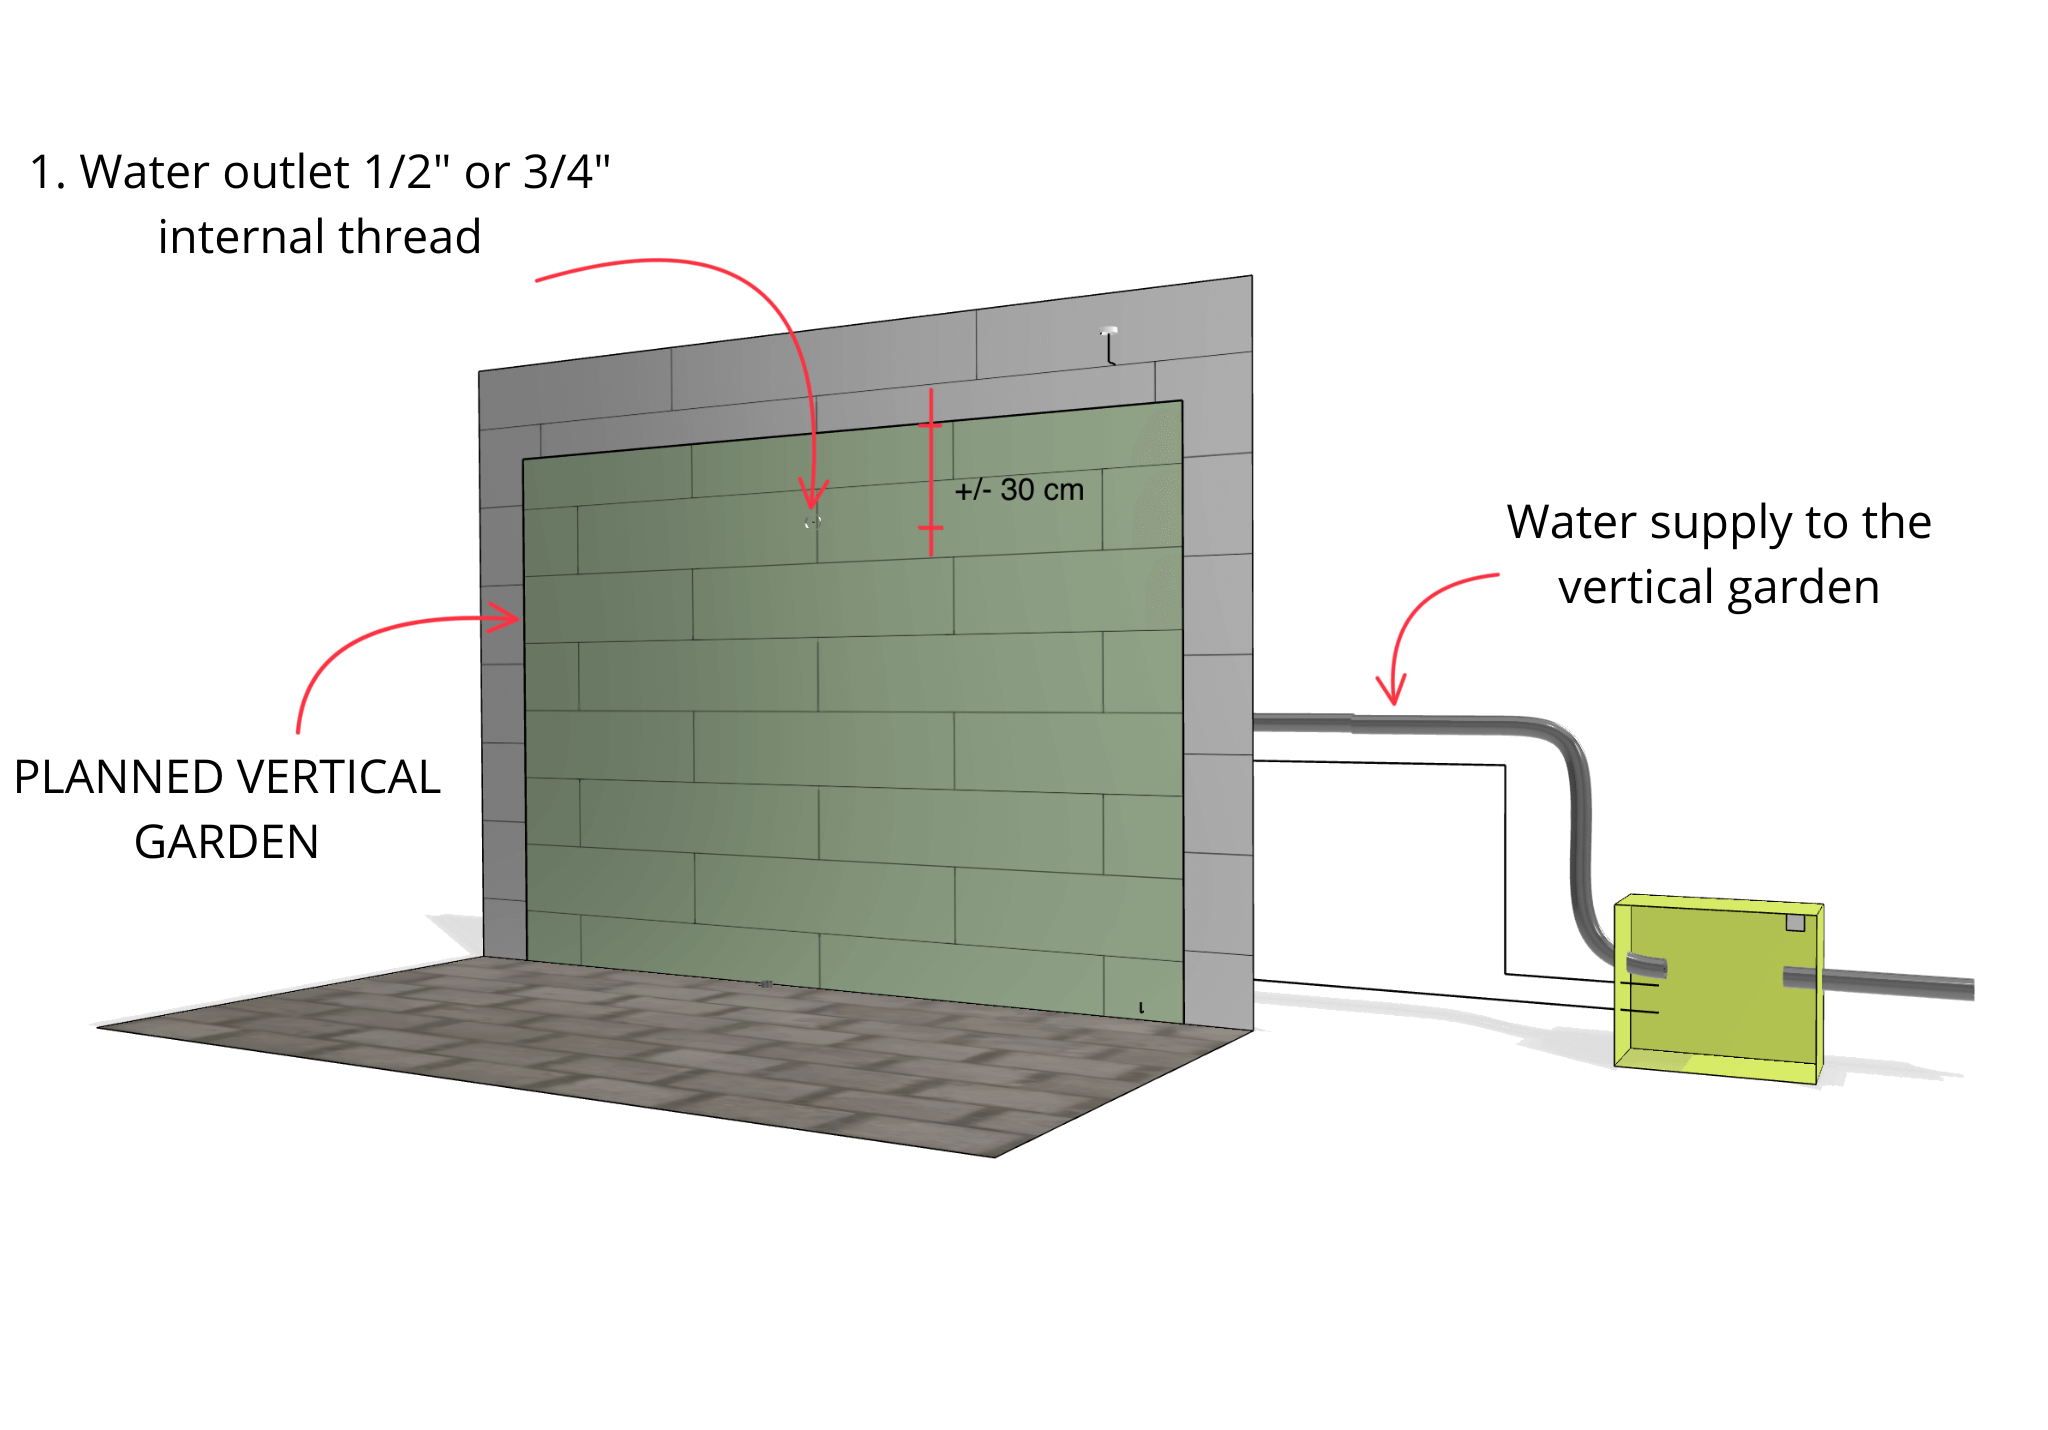
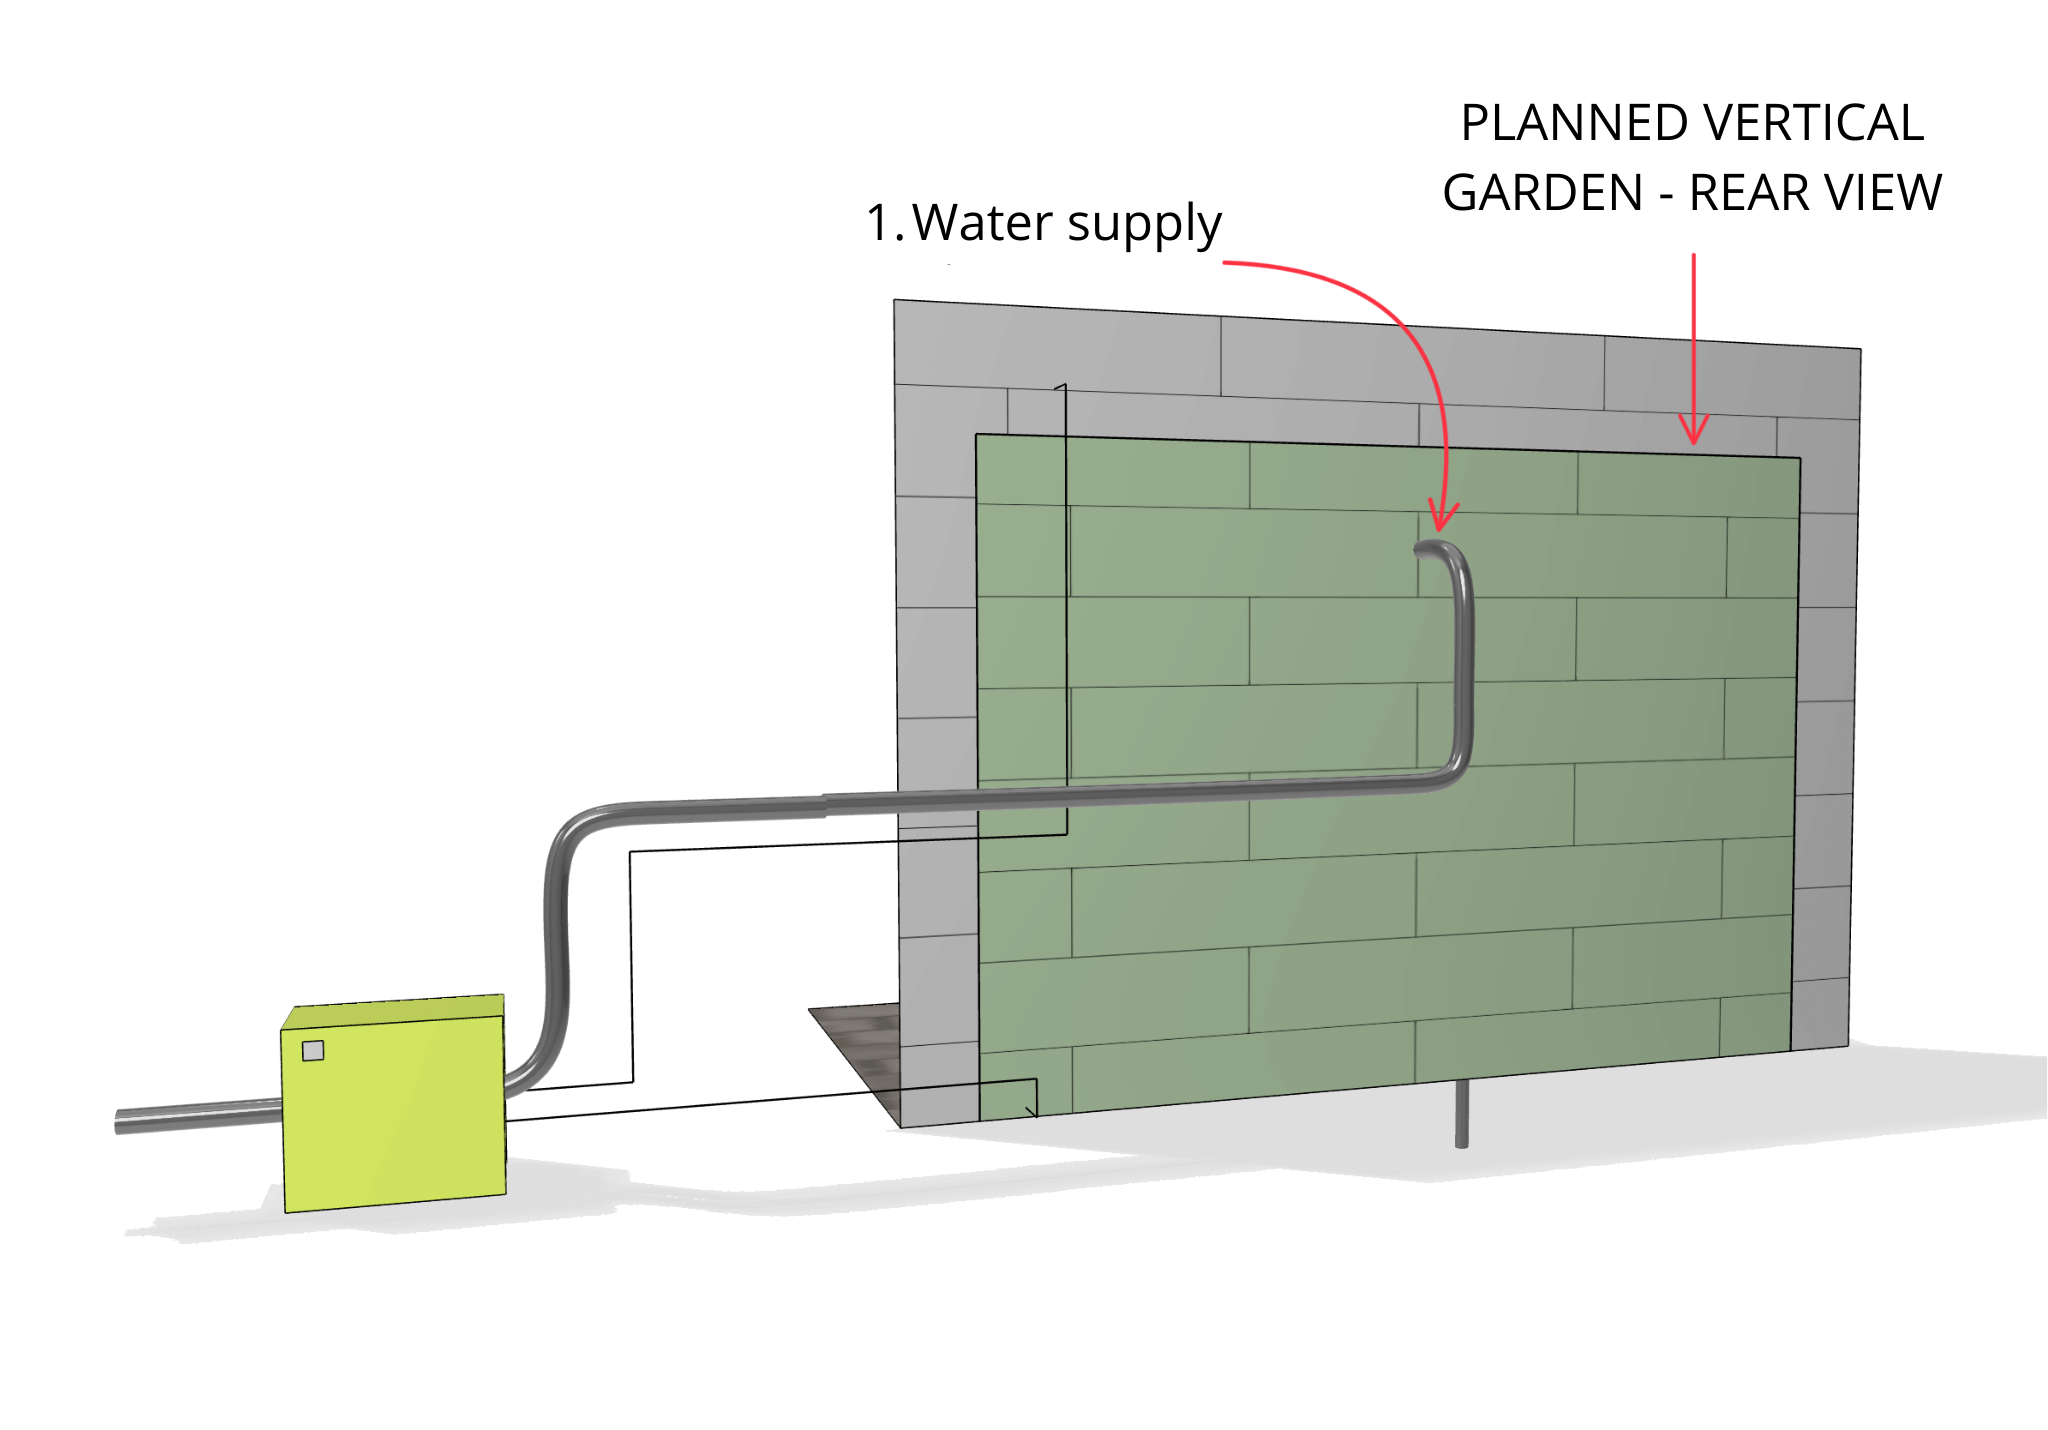
1. Water supply
The water supply for feeding the vertical garden is typically installed approximately 30 centimetres from the top edge of the green wall and terminated with a 1/2″ or 3/4″ internal threaded connector.
However, another option is to bring the water supply as close as possible to the centre of the garden. The water supply is then installed under the floor.
When planning a large green wall, the water supply is recommended to be made at the top of the garden and terminated with a 3/4″, 1″, or GW/GZ valve.
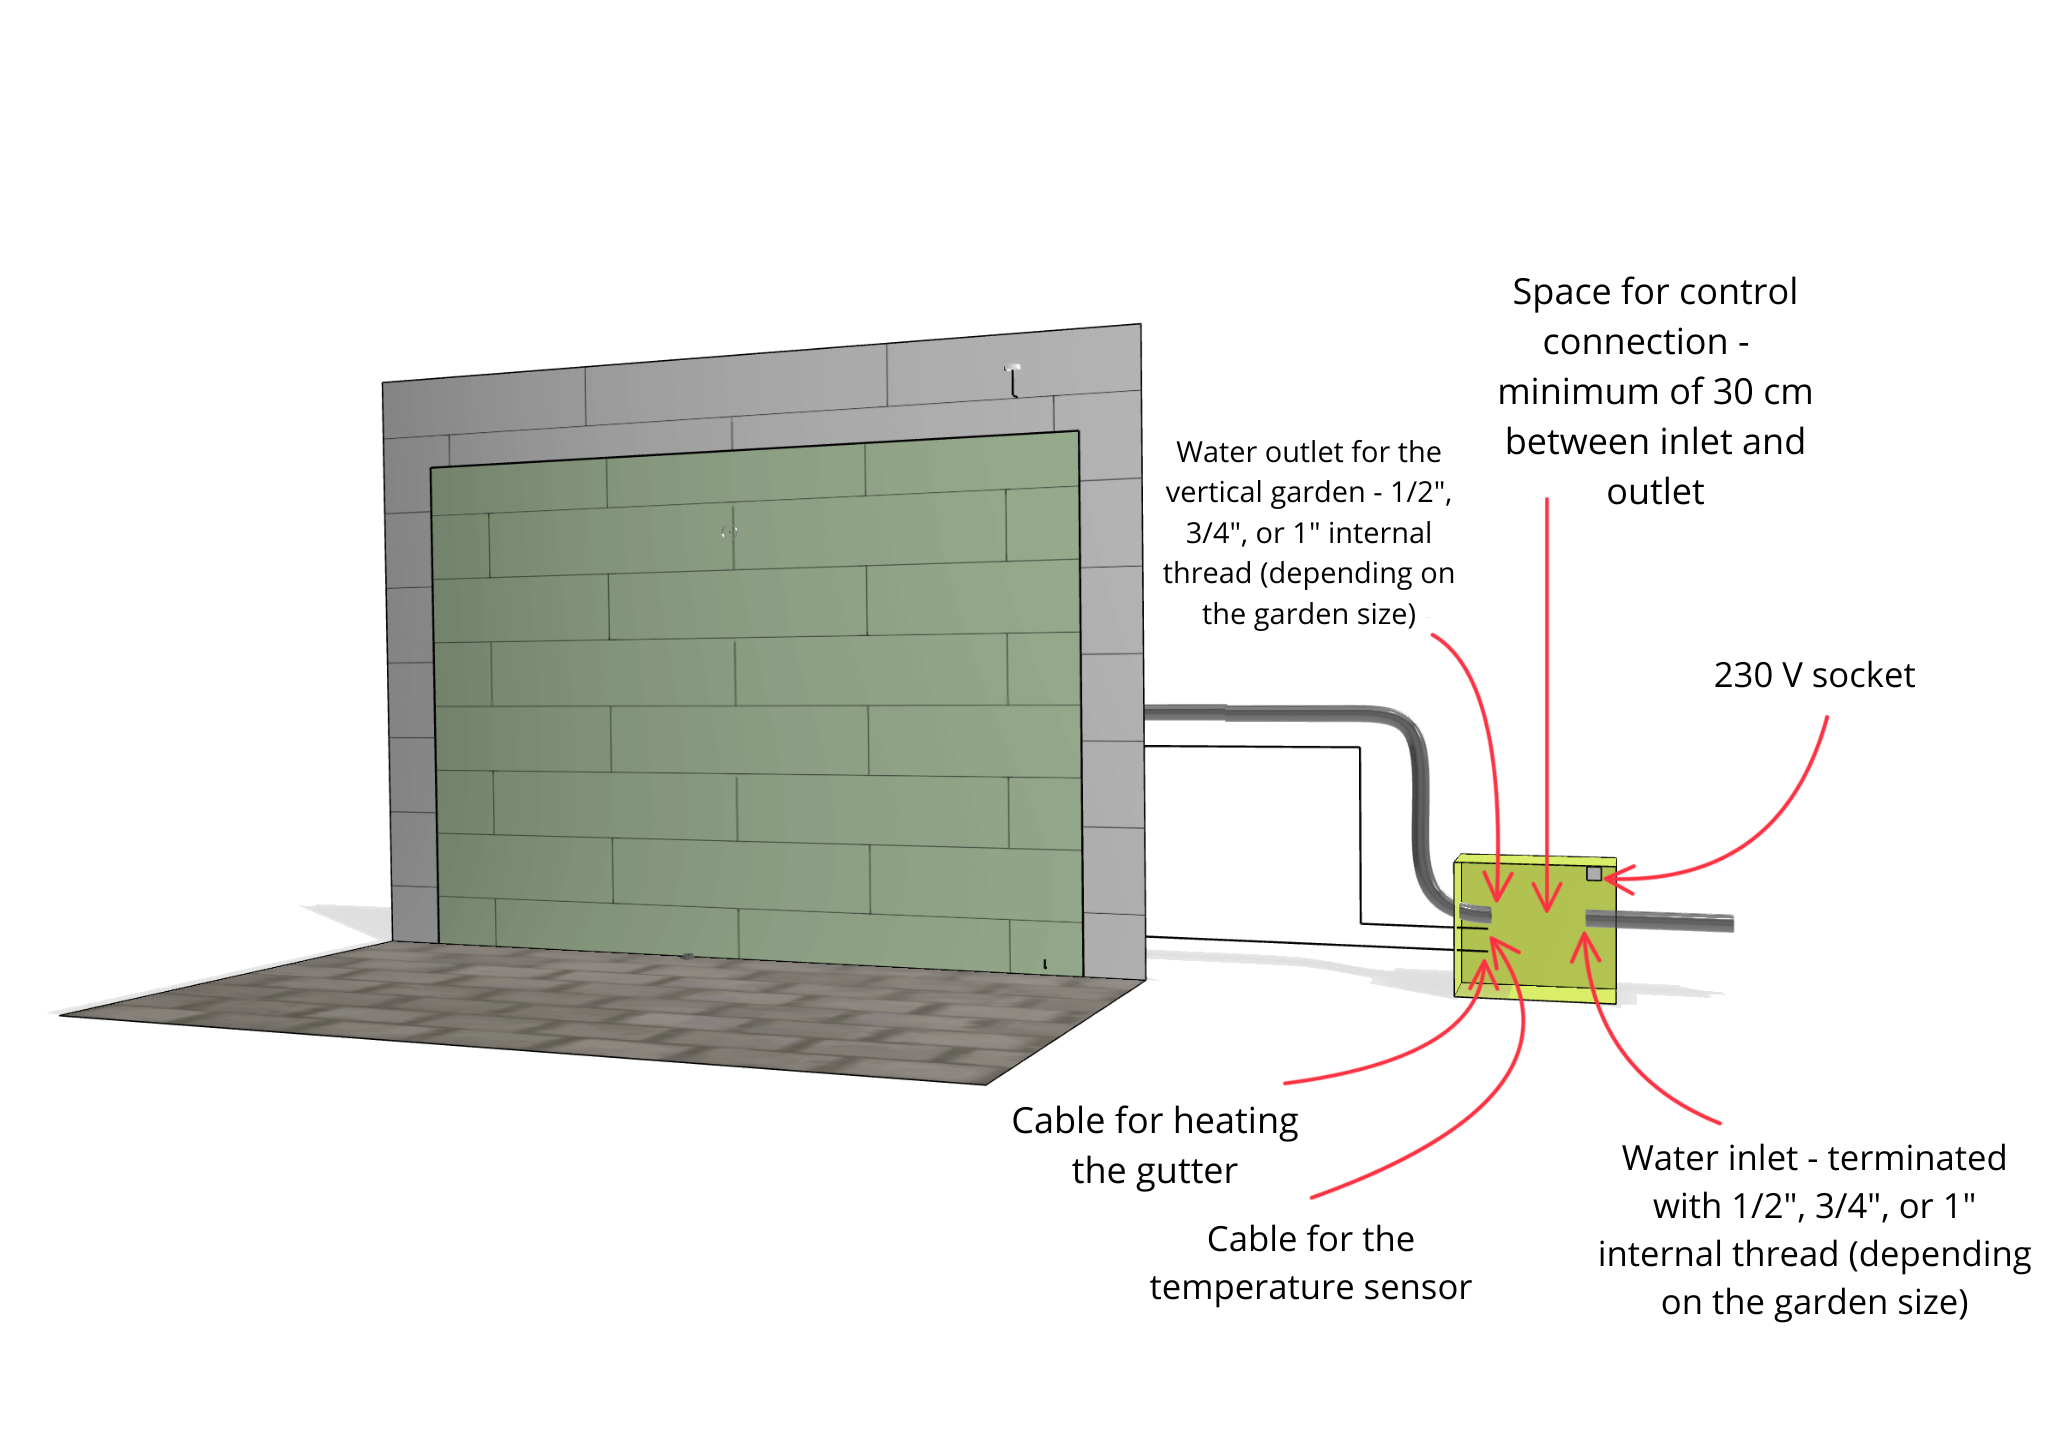
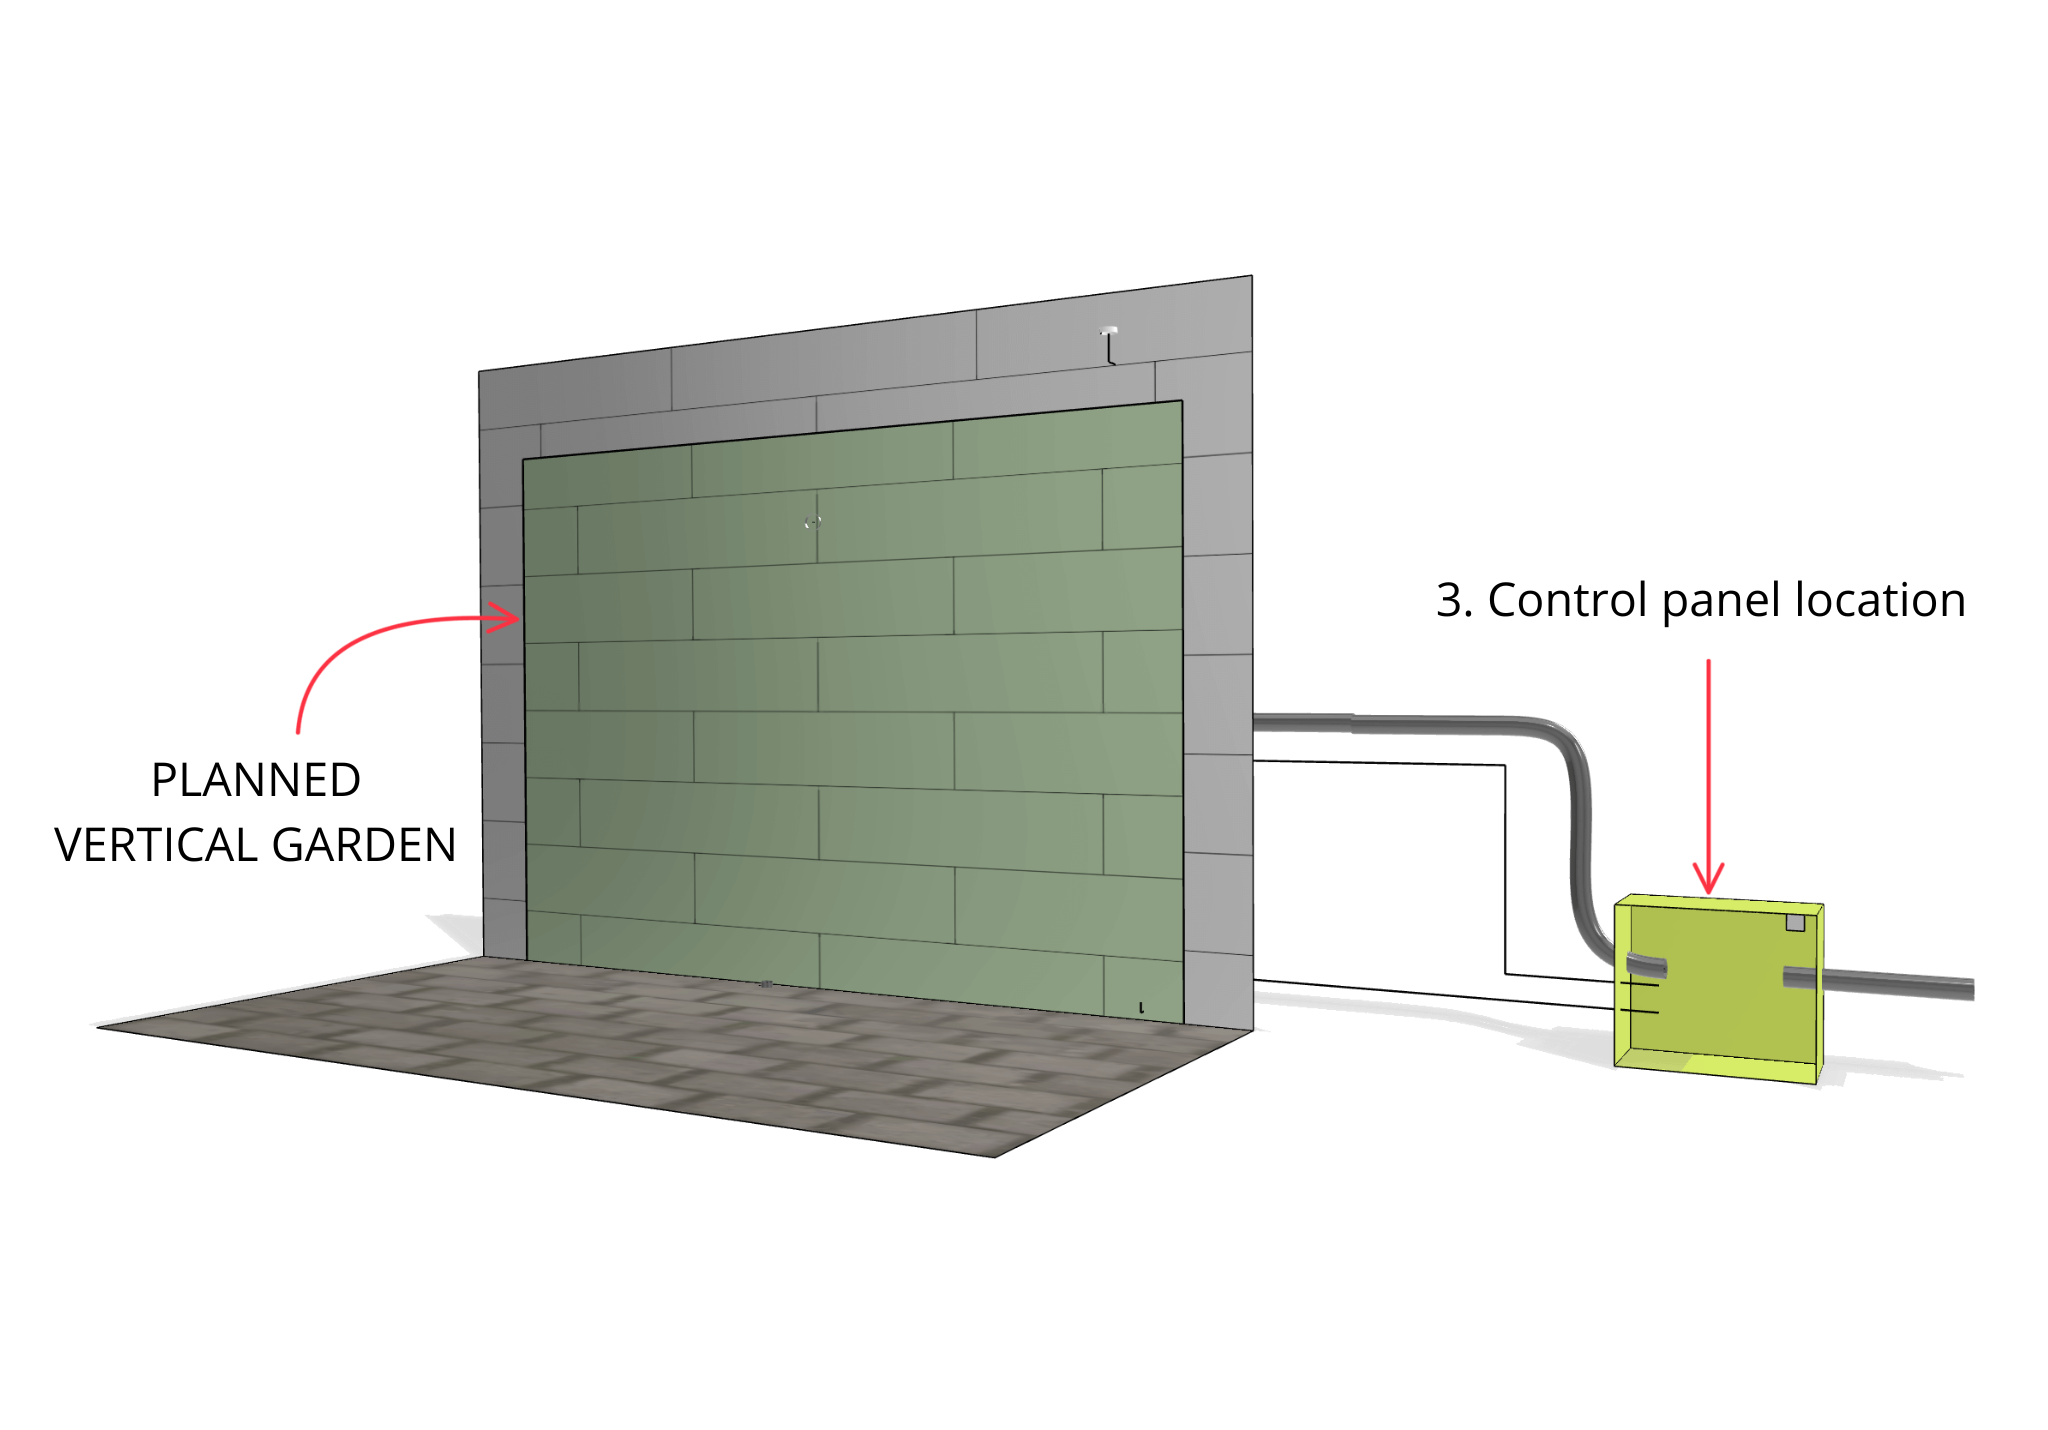
2. Control location
The control must be installed inside a building. External vertical gardens are irrigated even in winter. Therefore, it is important that the control system is in a warm place. This will prevent any avoidable damage such as from water from freezing in the solenoid valves.
When planning where to install the solenoid valve and irrigation controller you need to ensure there is a water supply. This is vital to ensure the wall can function properly and that all the plants are watered.
The connection is terminated with a 1/2″, 3/4″, or 1″ GW/GZ valve, depending on the size of the wall. It is from this location the solenoid valve, which is responsible for irrigation will be installed. From this point, we direct the watering system behind the vertical garden. The water supply should be independently installed using a single pipe.
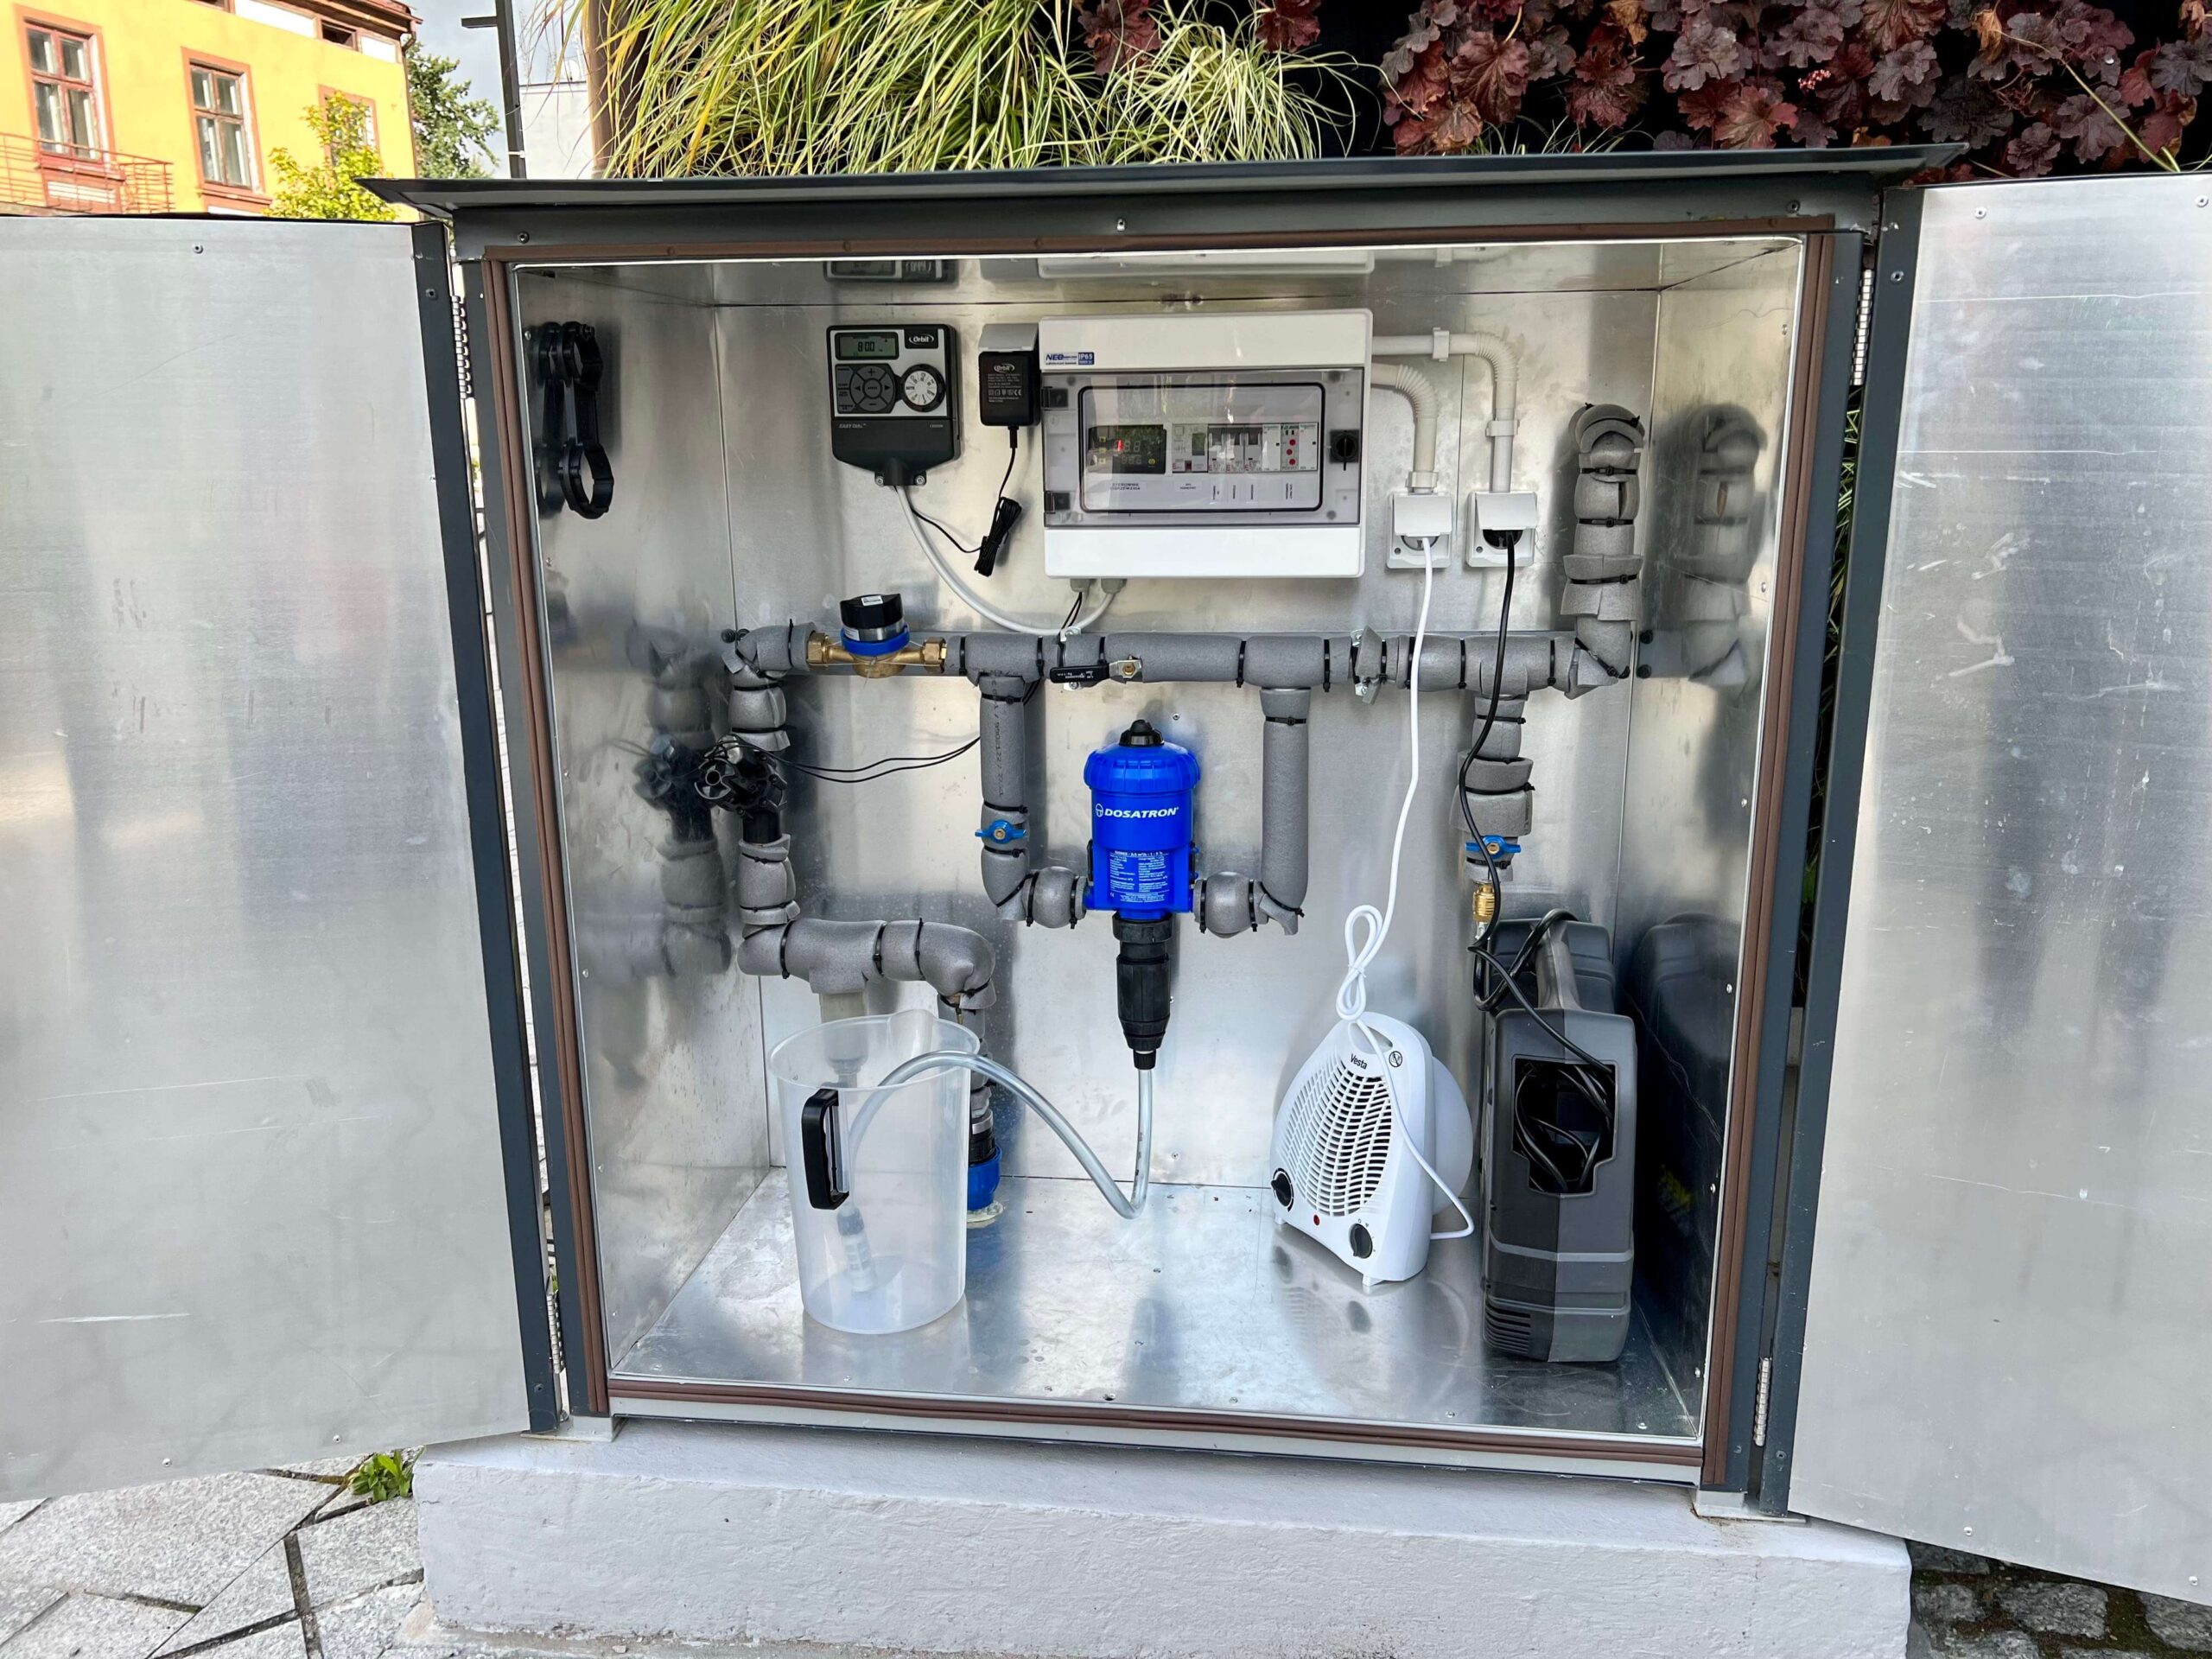
Control panel for the outdoor green wall – front
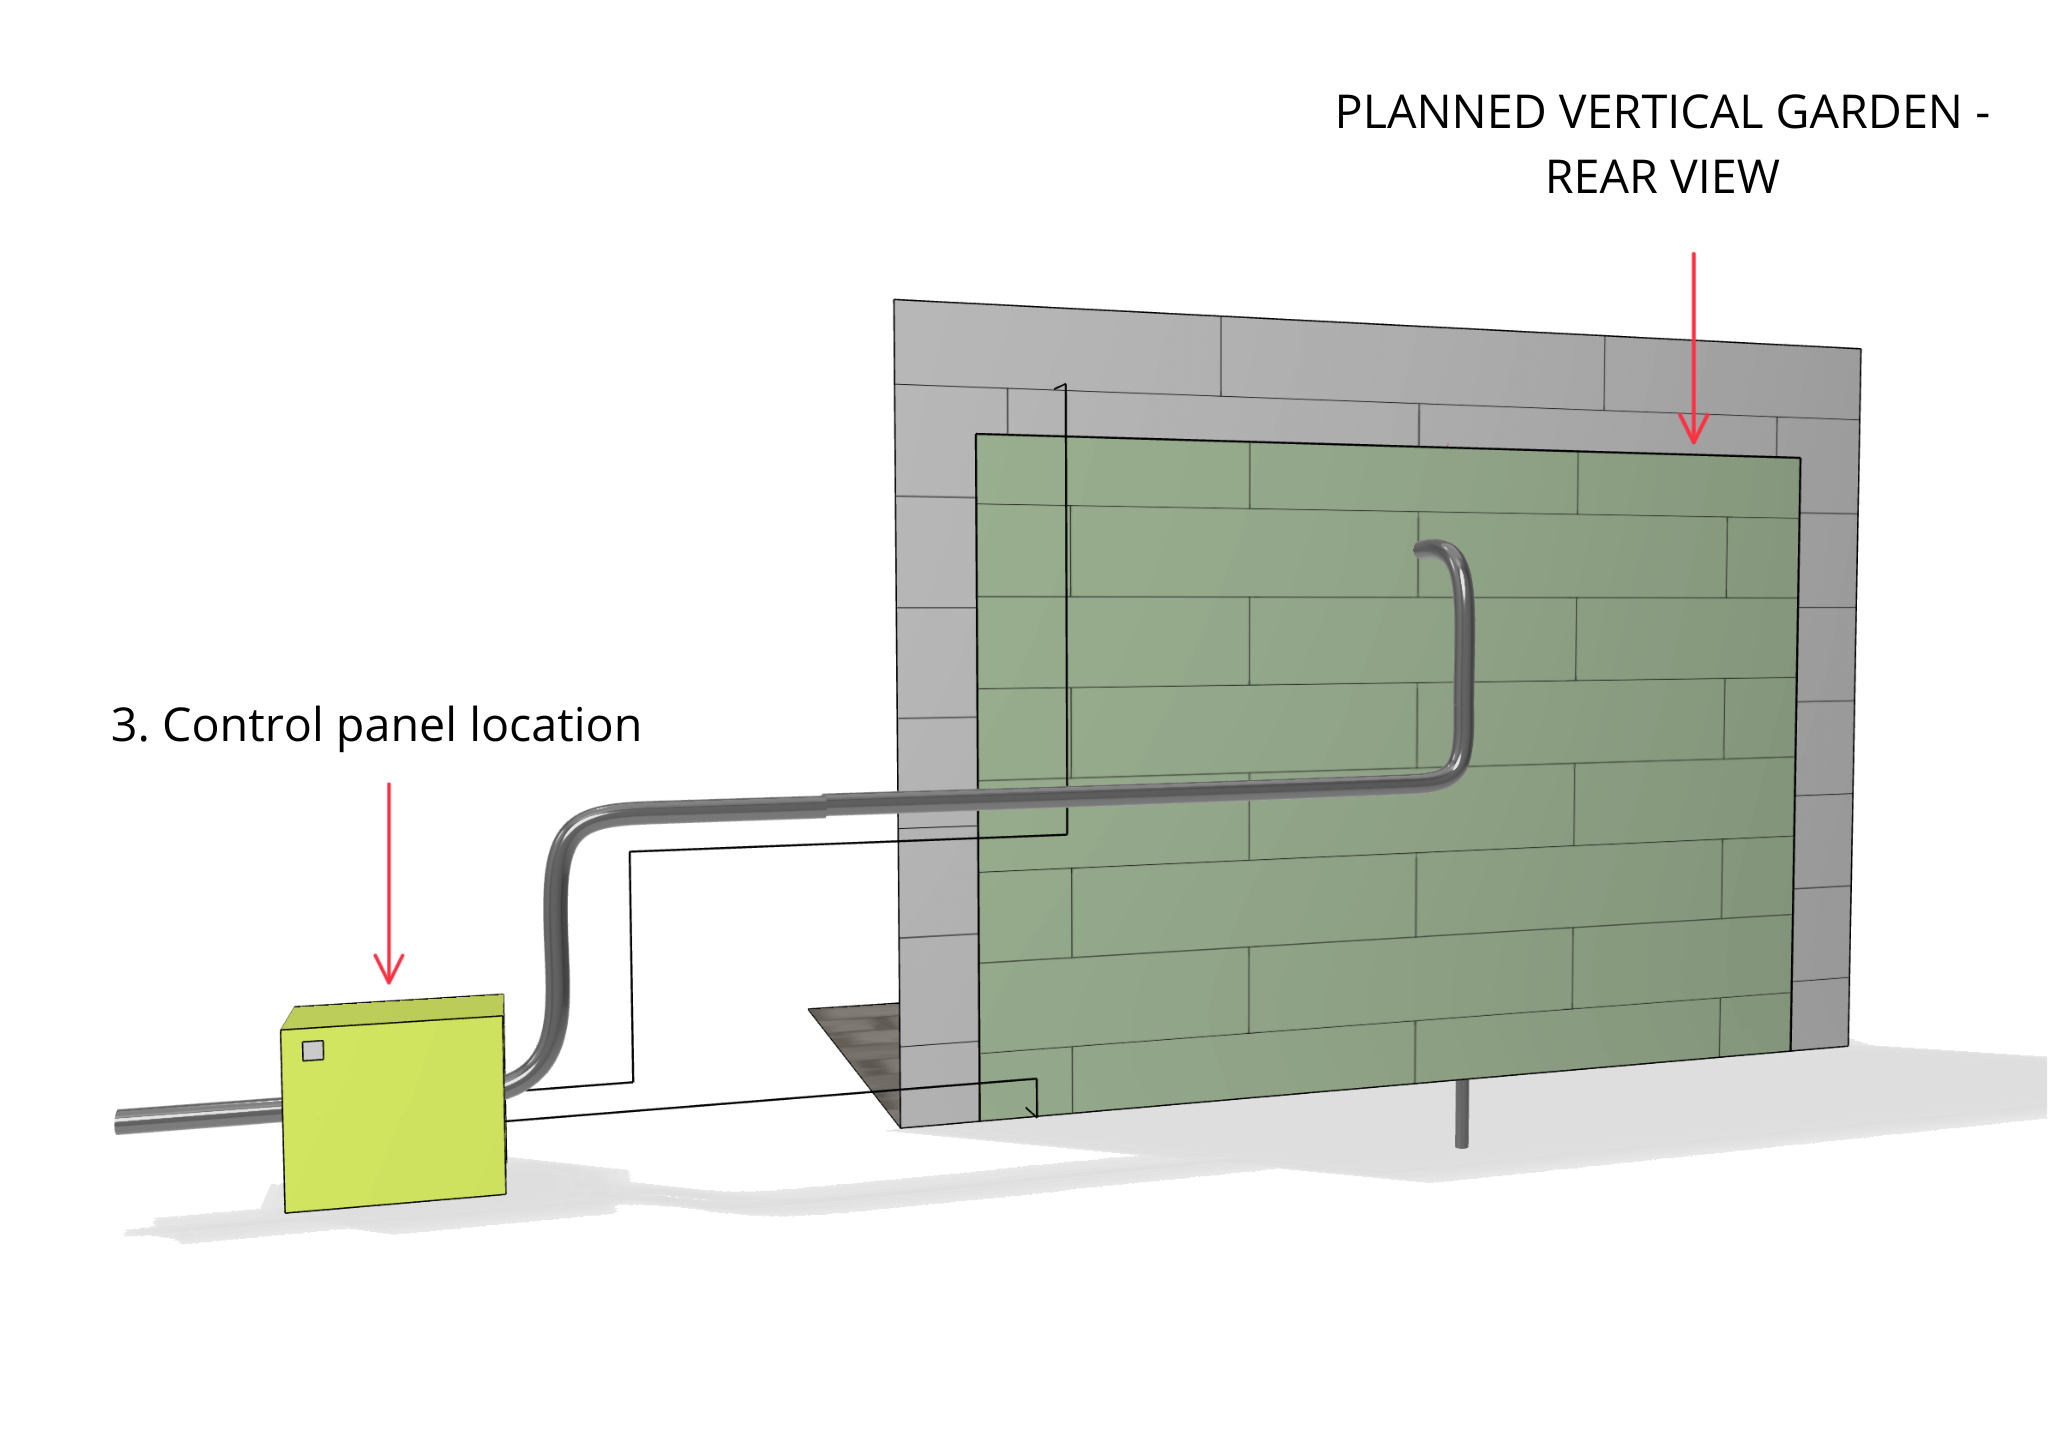
Control panel for the outdoor green wall – rear
Control system for an outdoor green wall
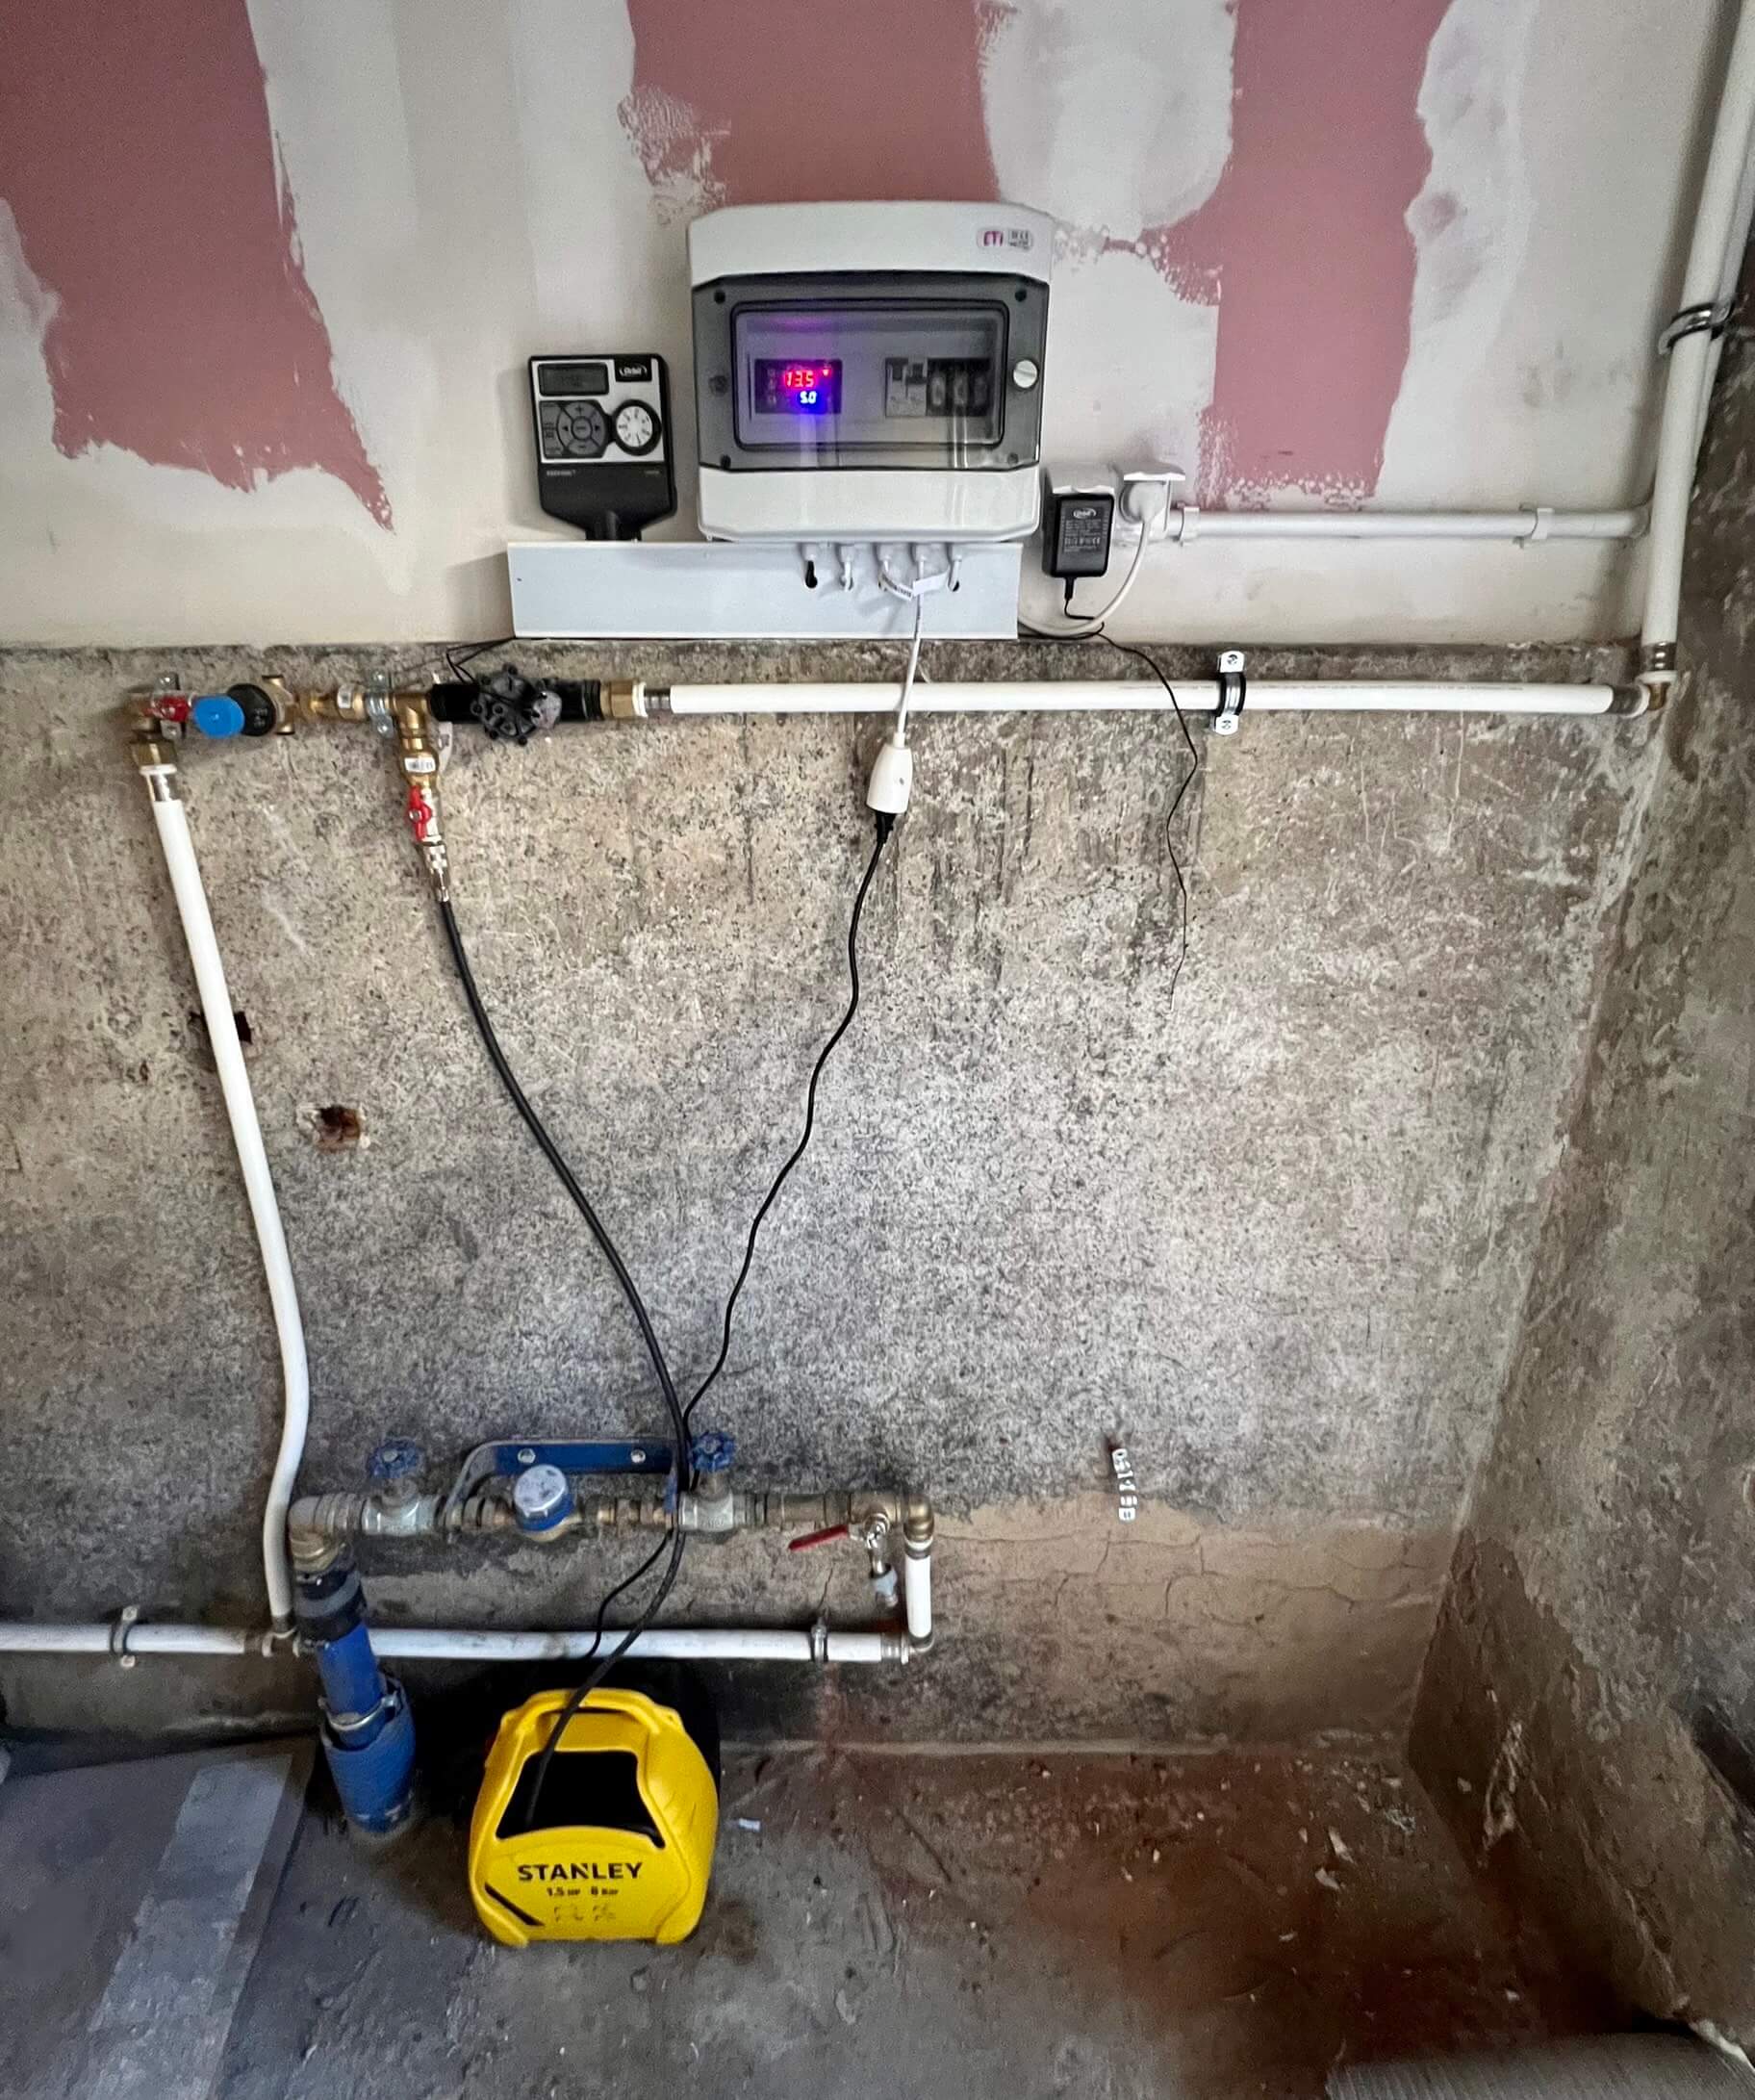
Control system for an outdoor vertical garden
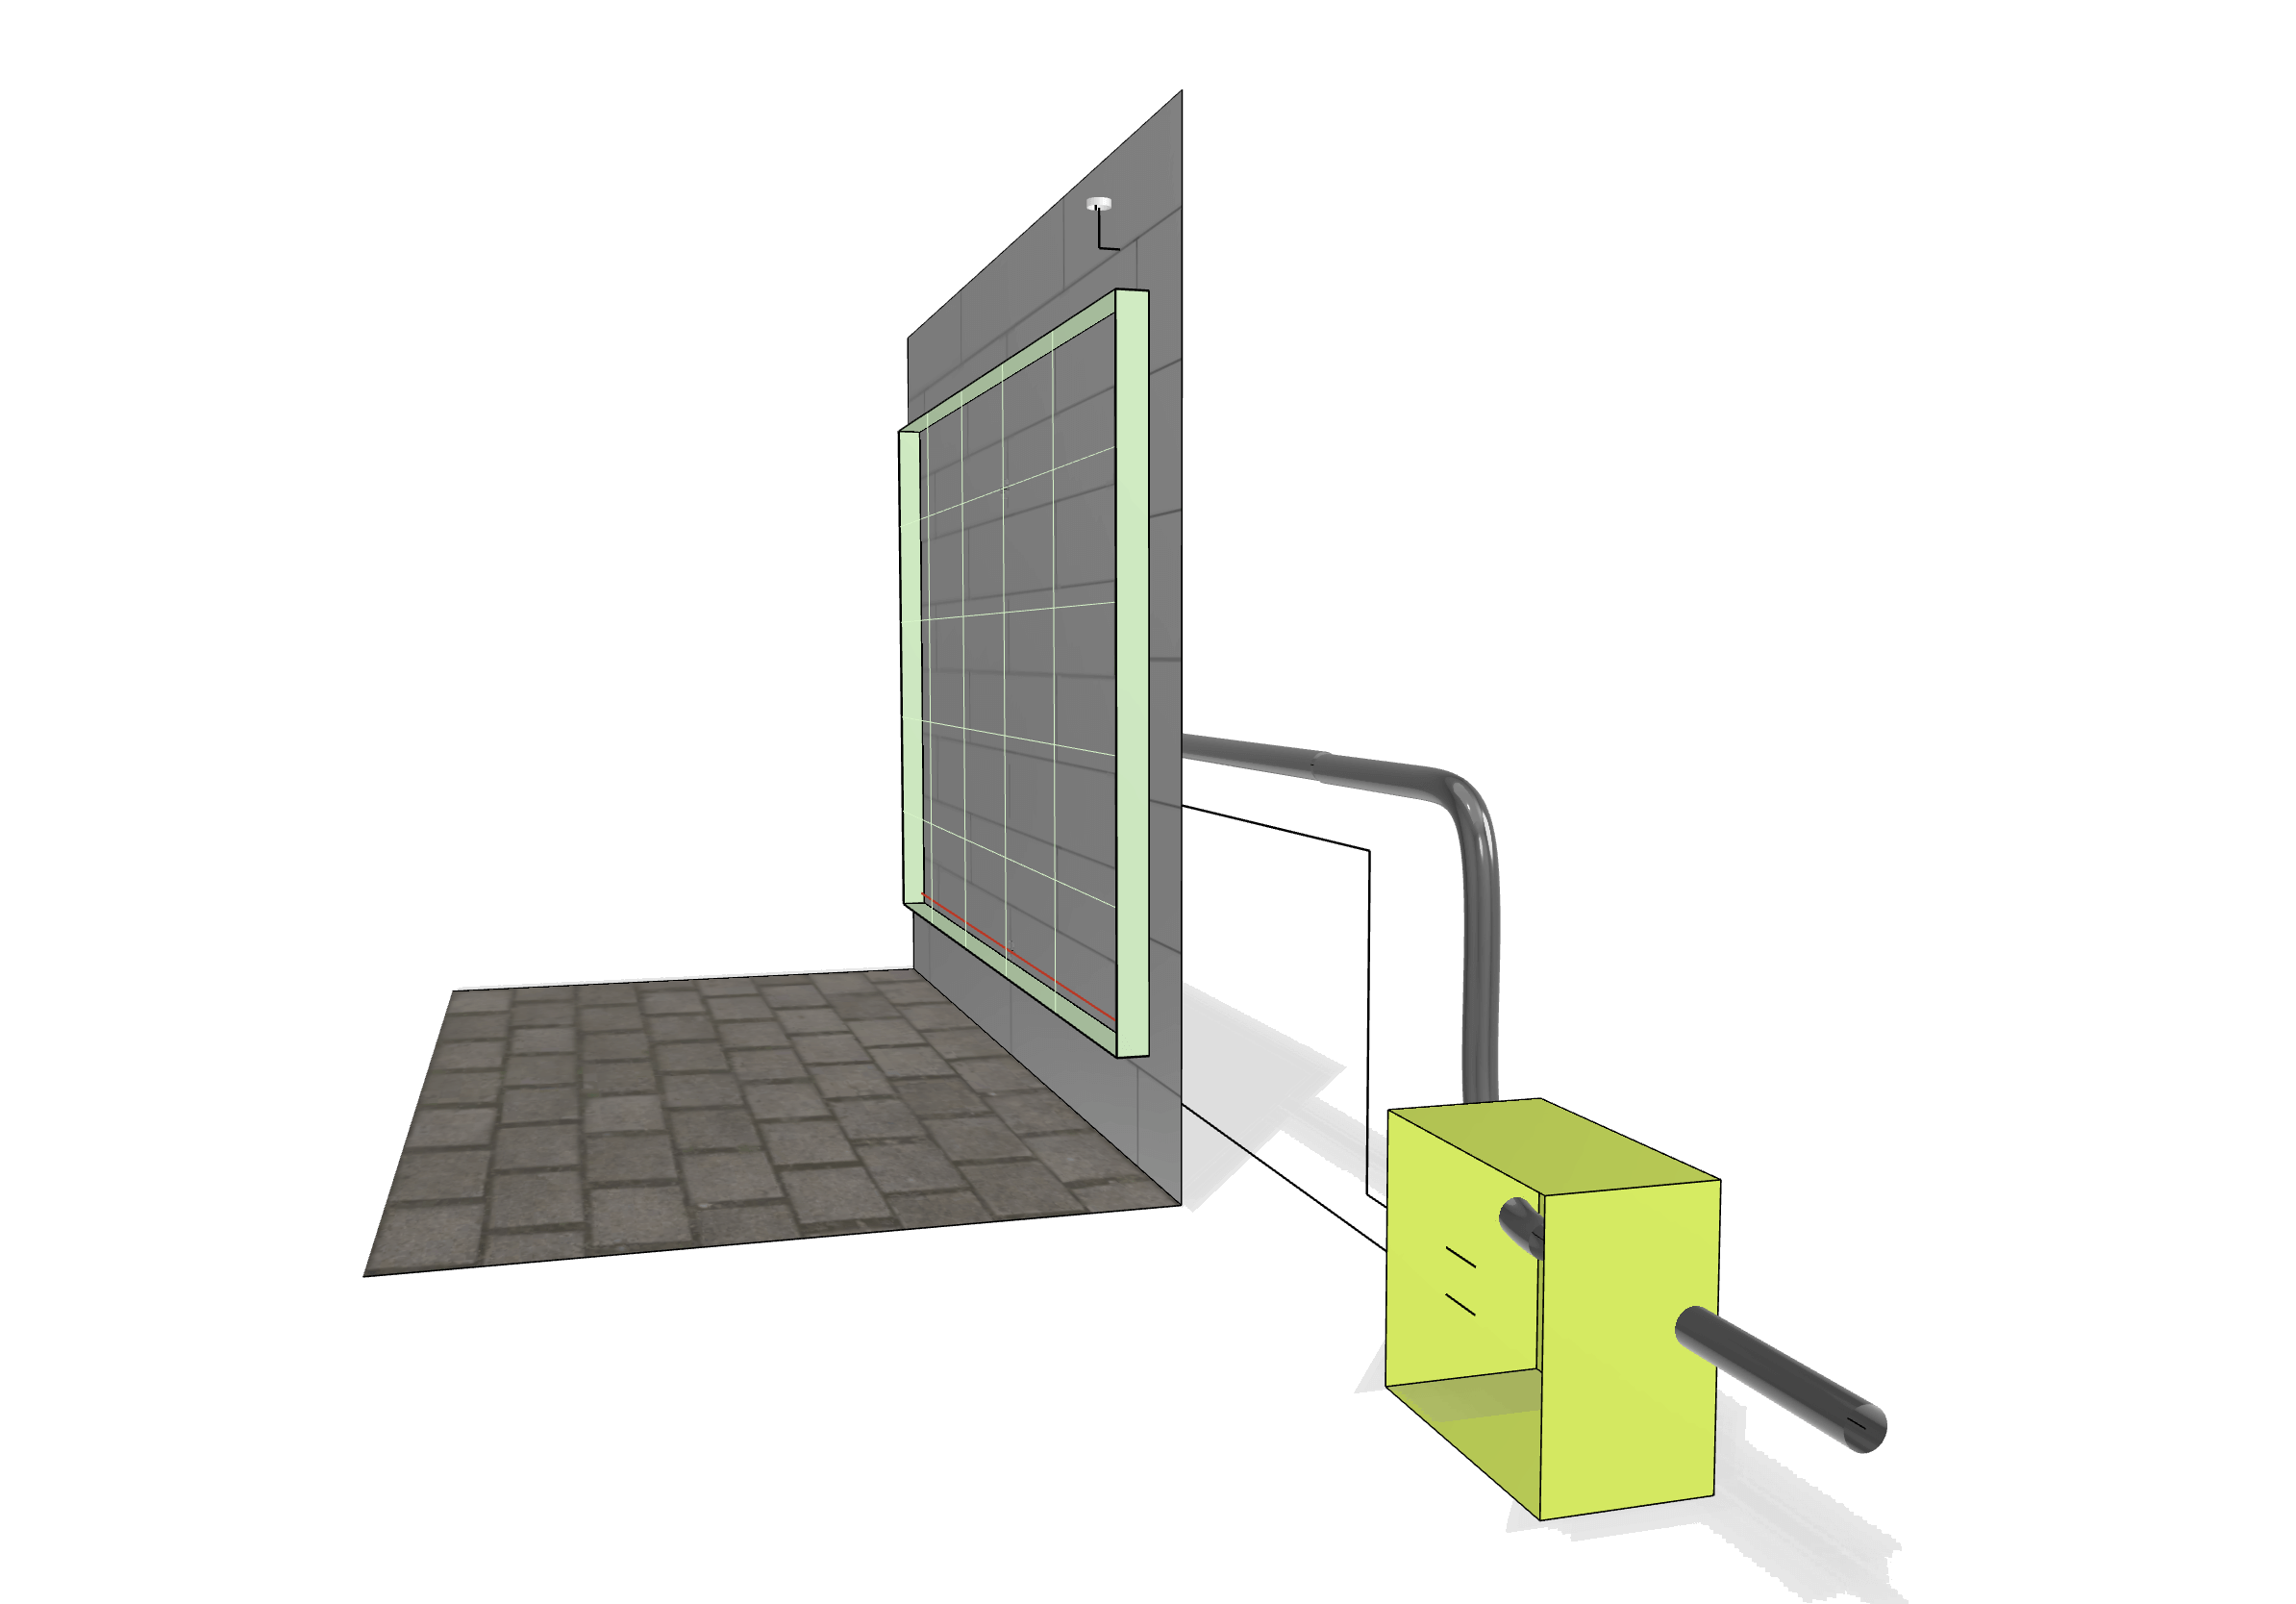
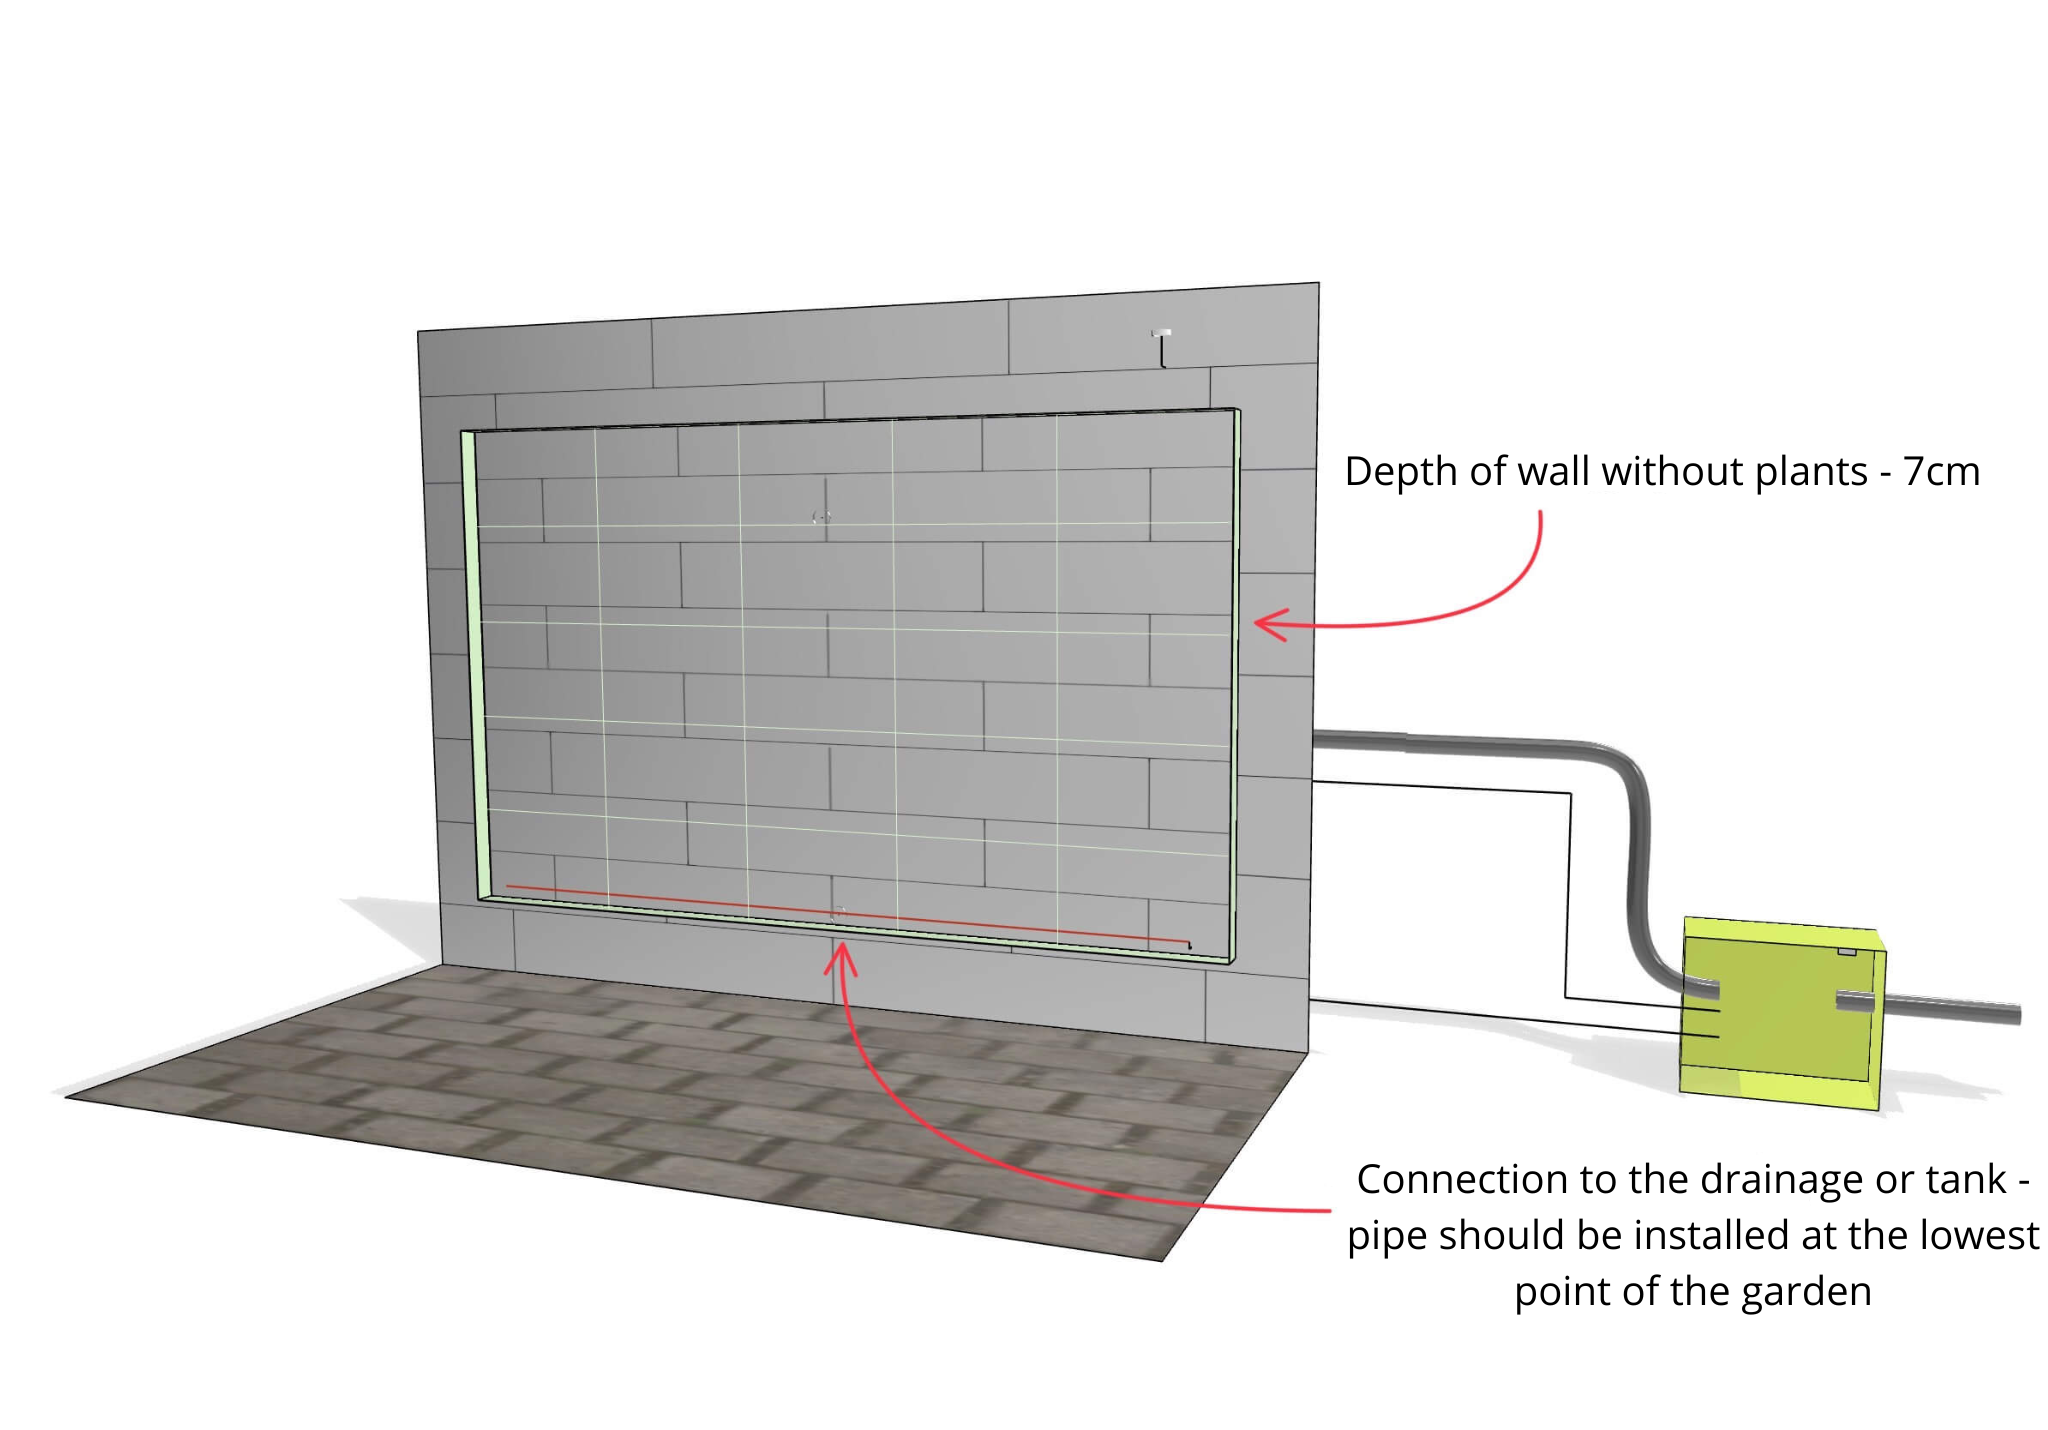
3. Drainage connection
- From ground level (level zero)
- Above ground level (+ X cm above ground level)
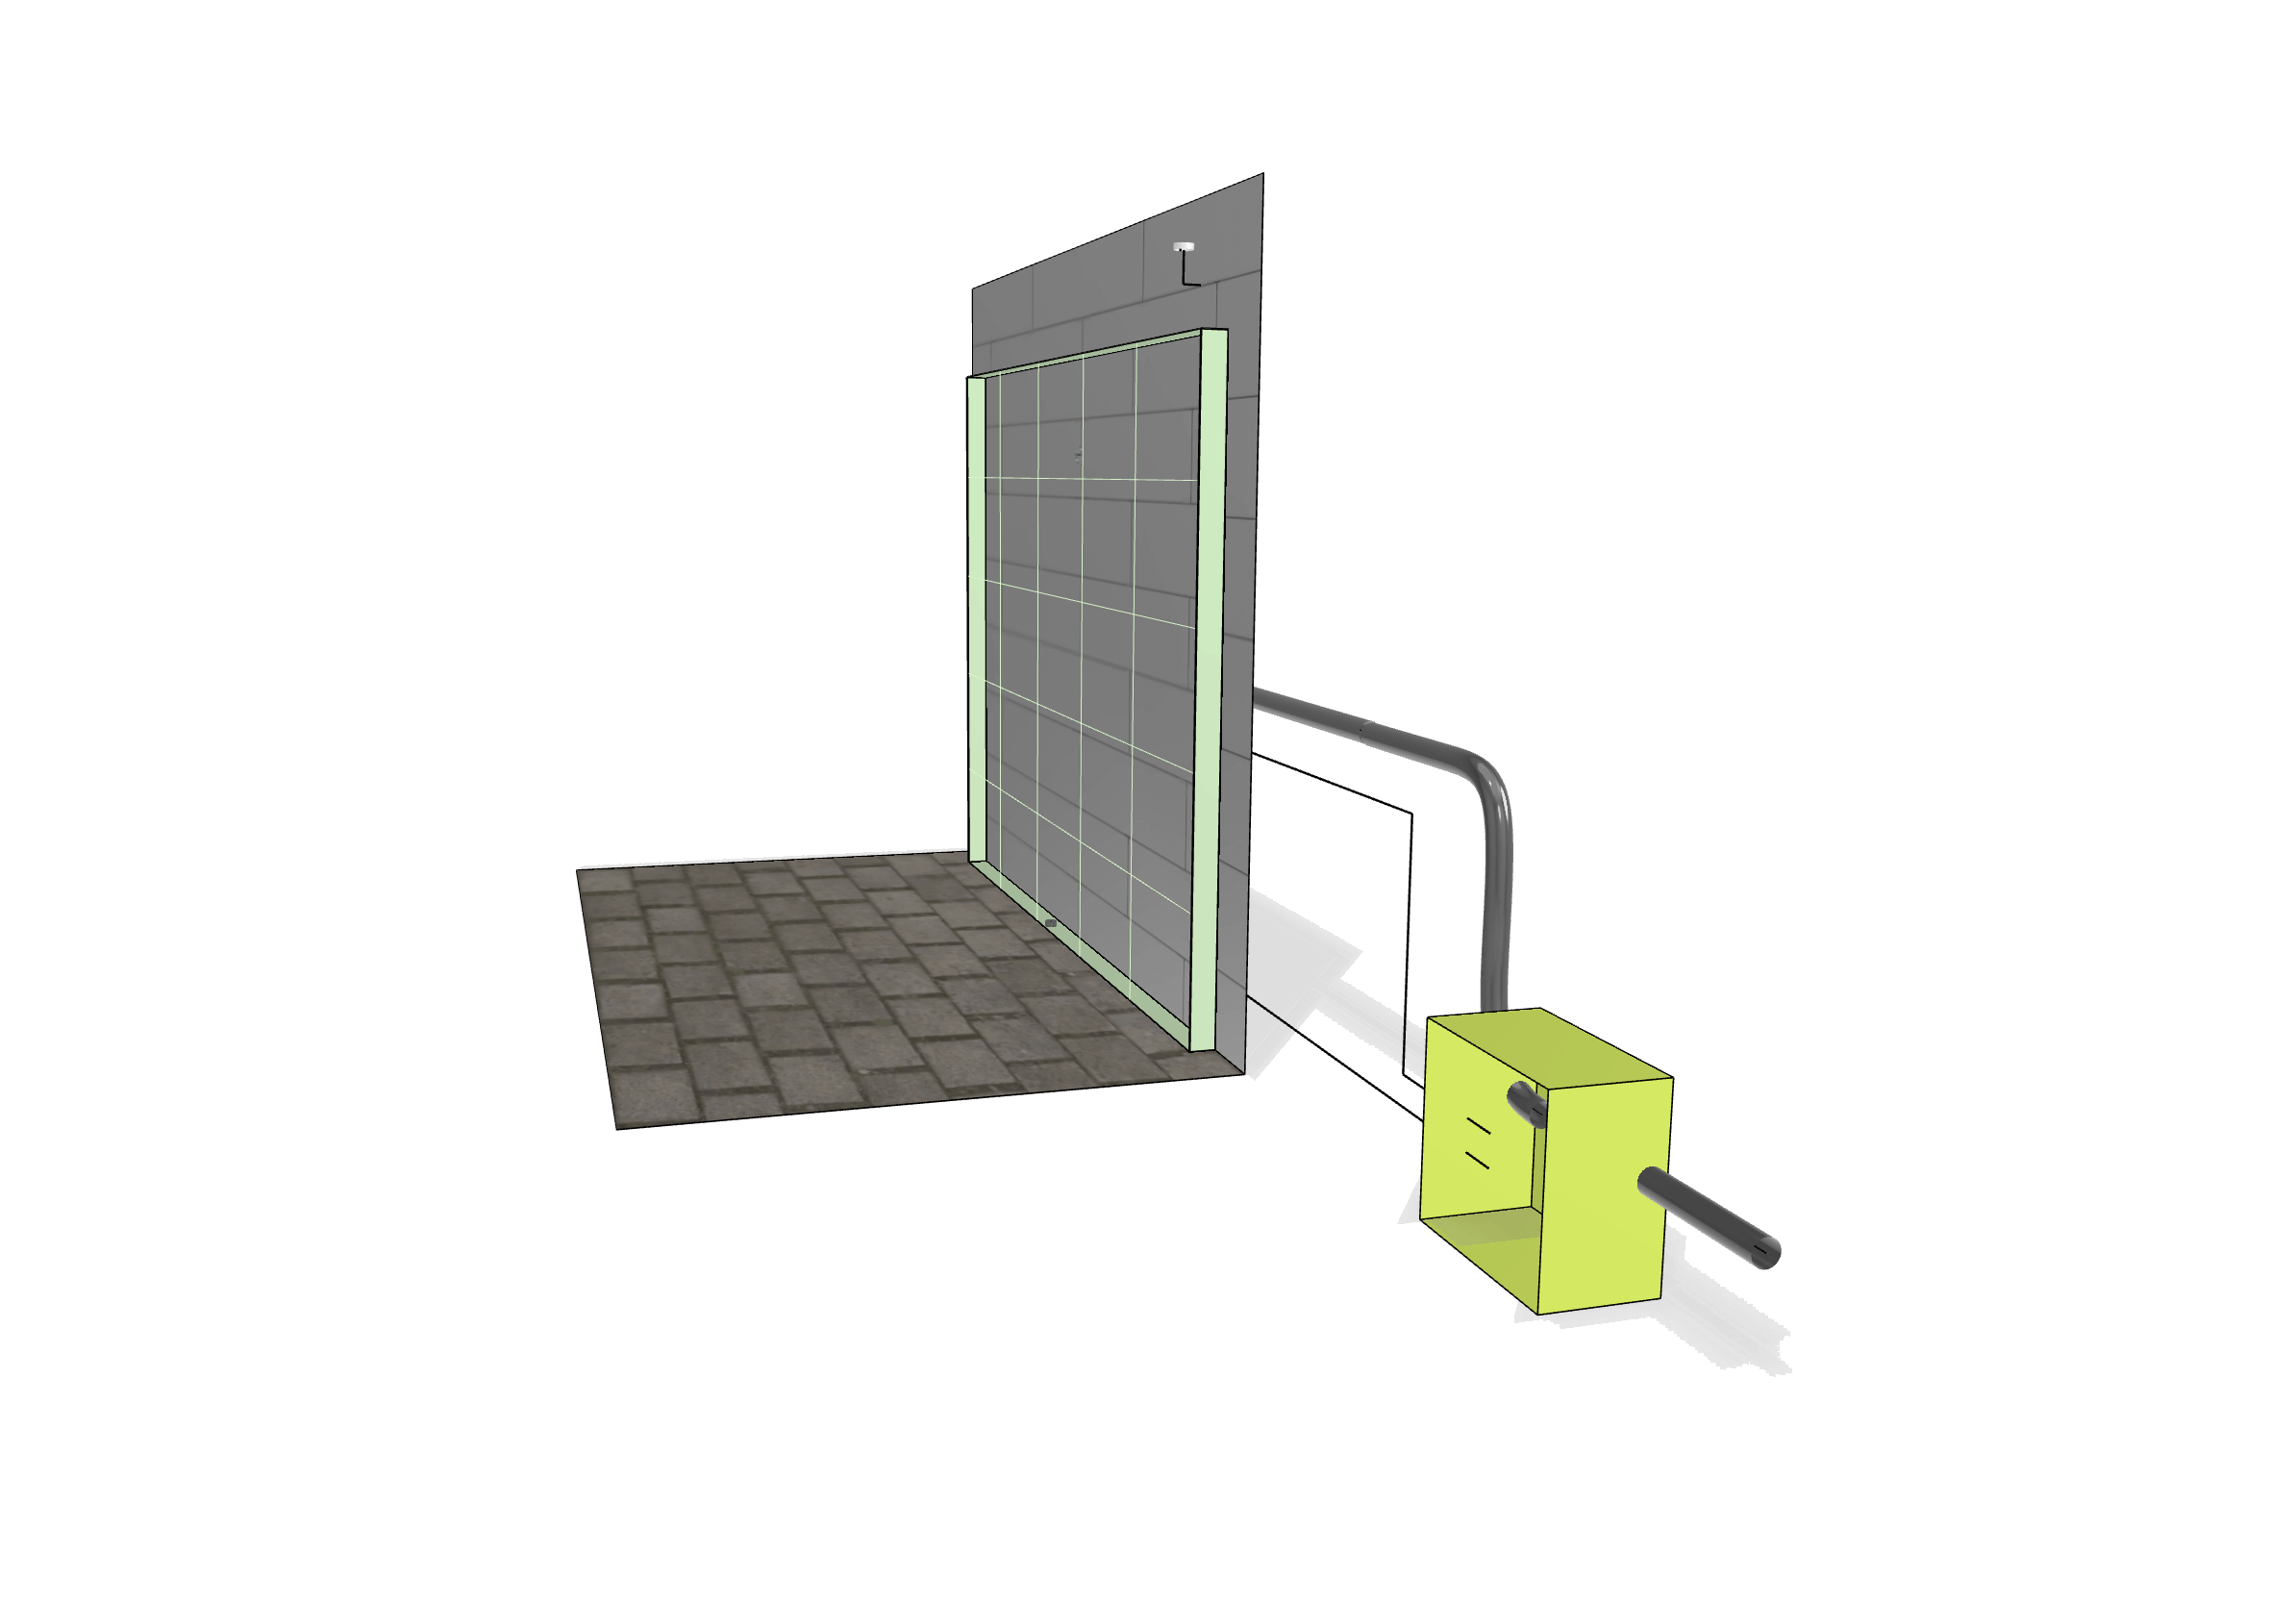
Outdoor vertical garden from ground level (level zero)

Outdoor vertical garden from point 0 – floor level
Outdoor vertical garden from point 0 – floor level – cross-section
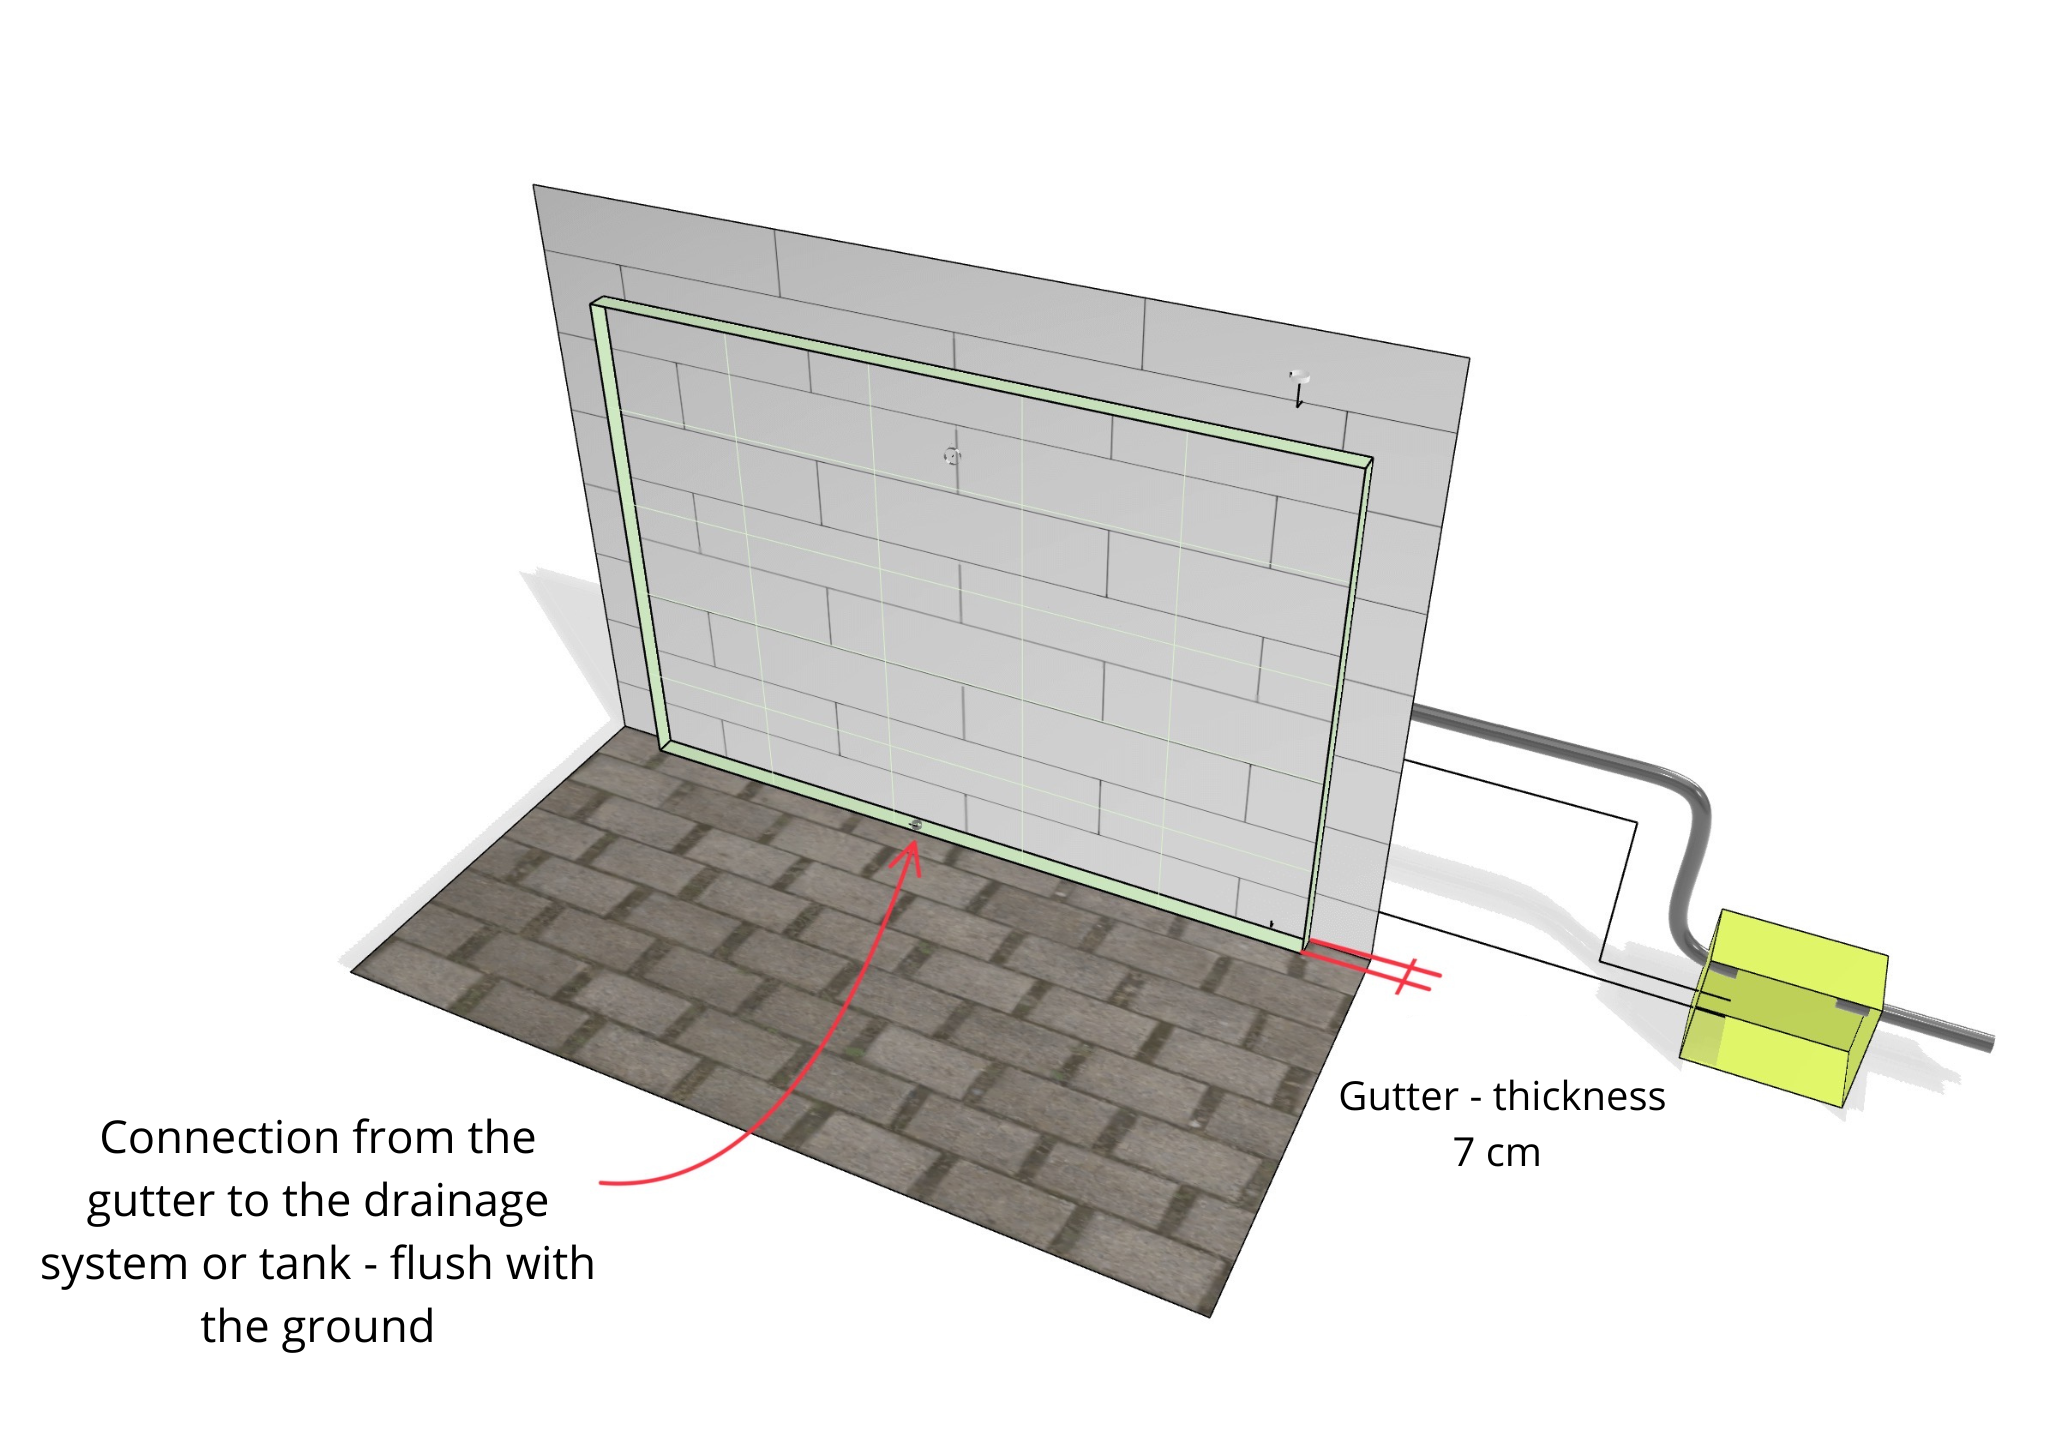
Drainage – the outdoor green wall starts from point 0 – floor level – cross-section
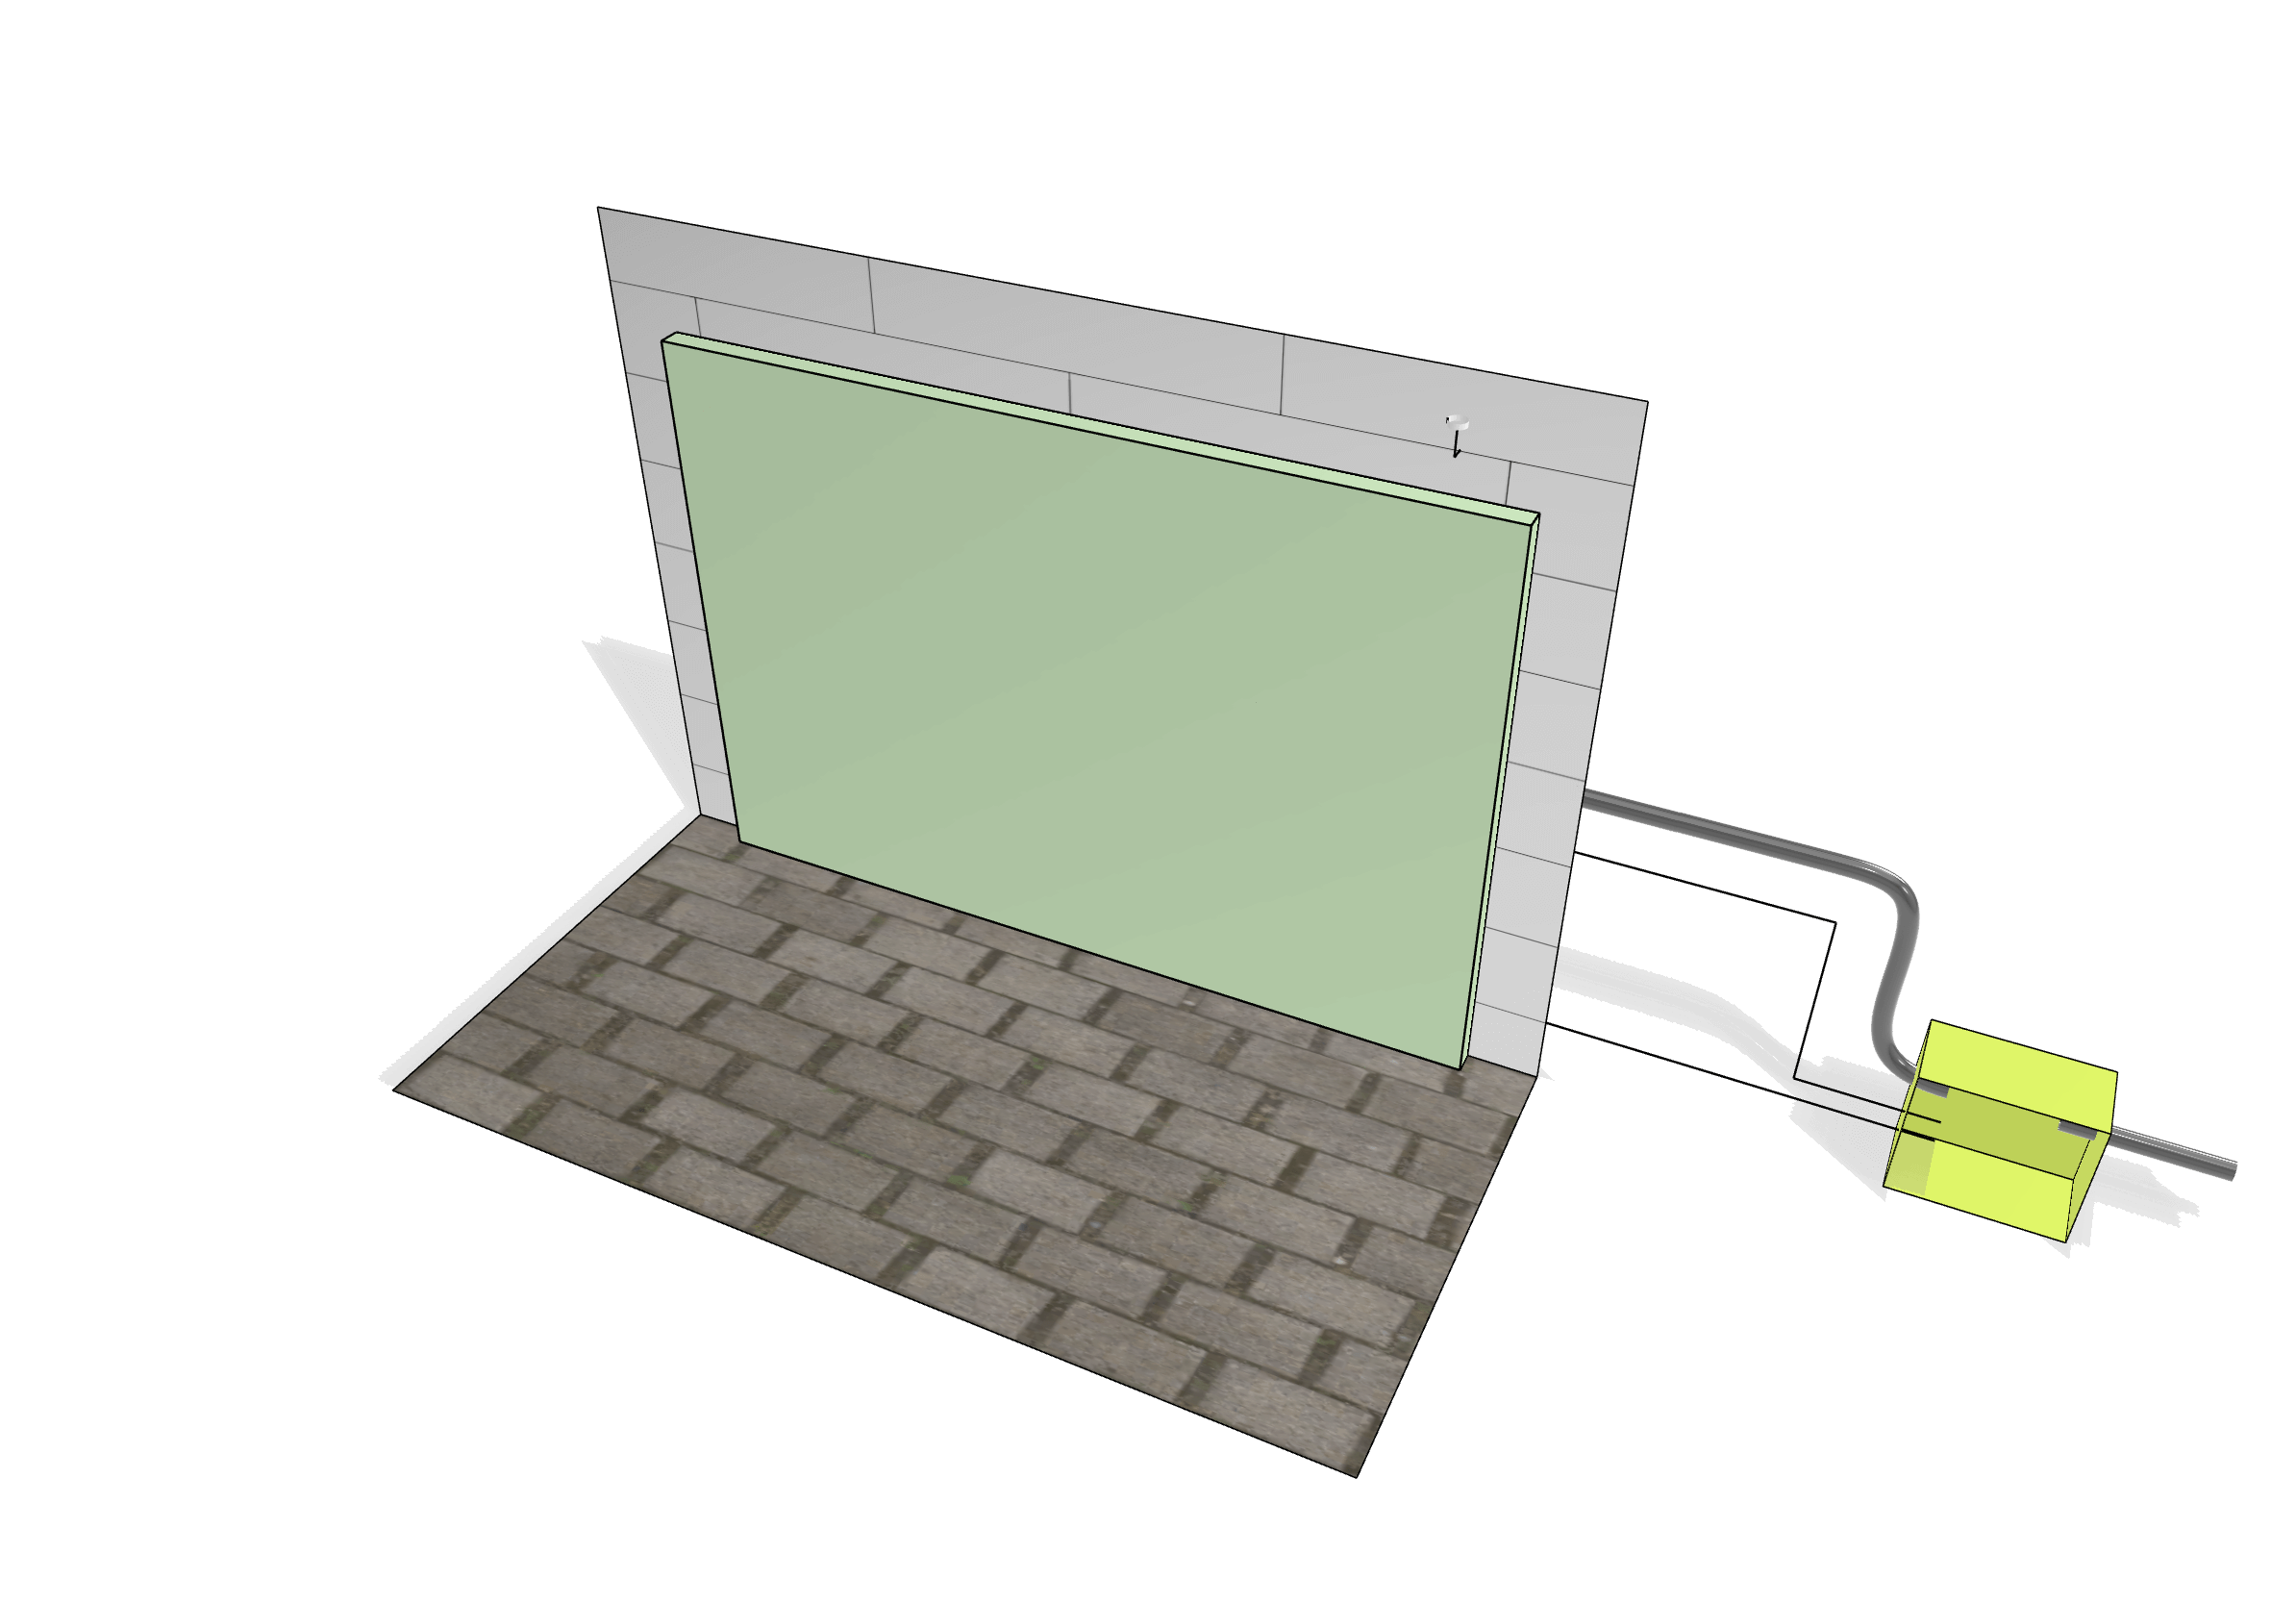
Outdoor vertical garden from point 0 – ground level
Vertical garden above ground level (+ X cm above ground level) – option one
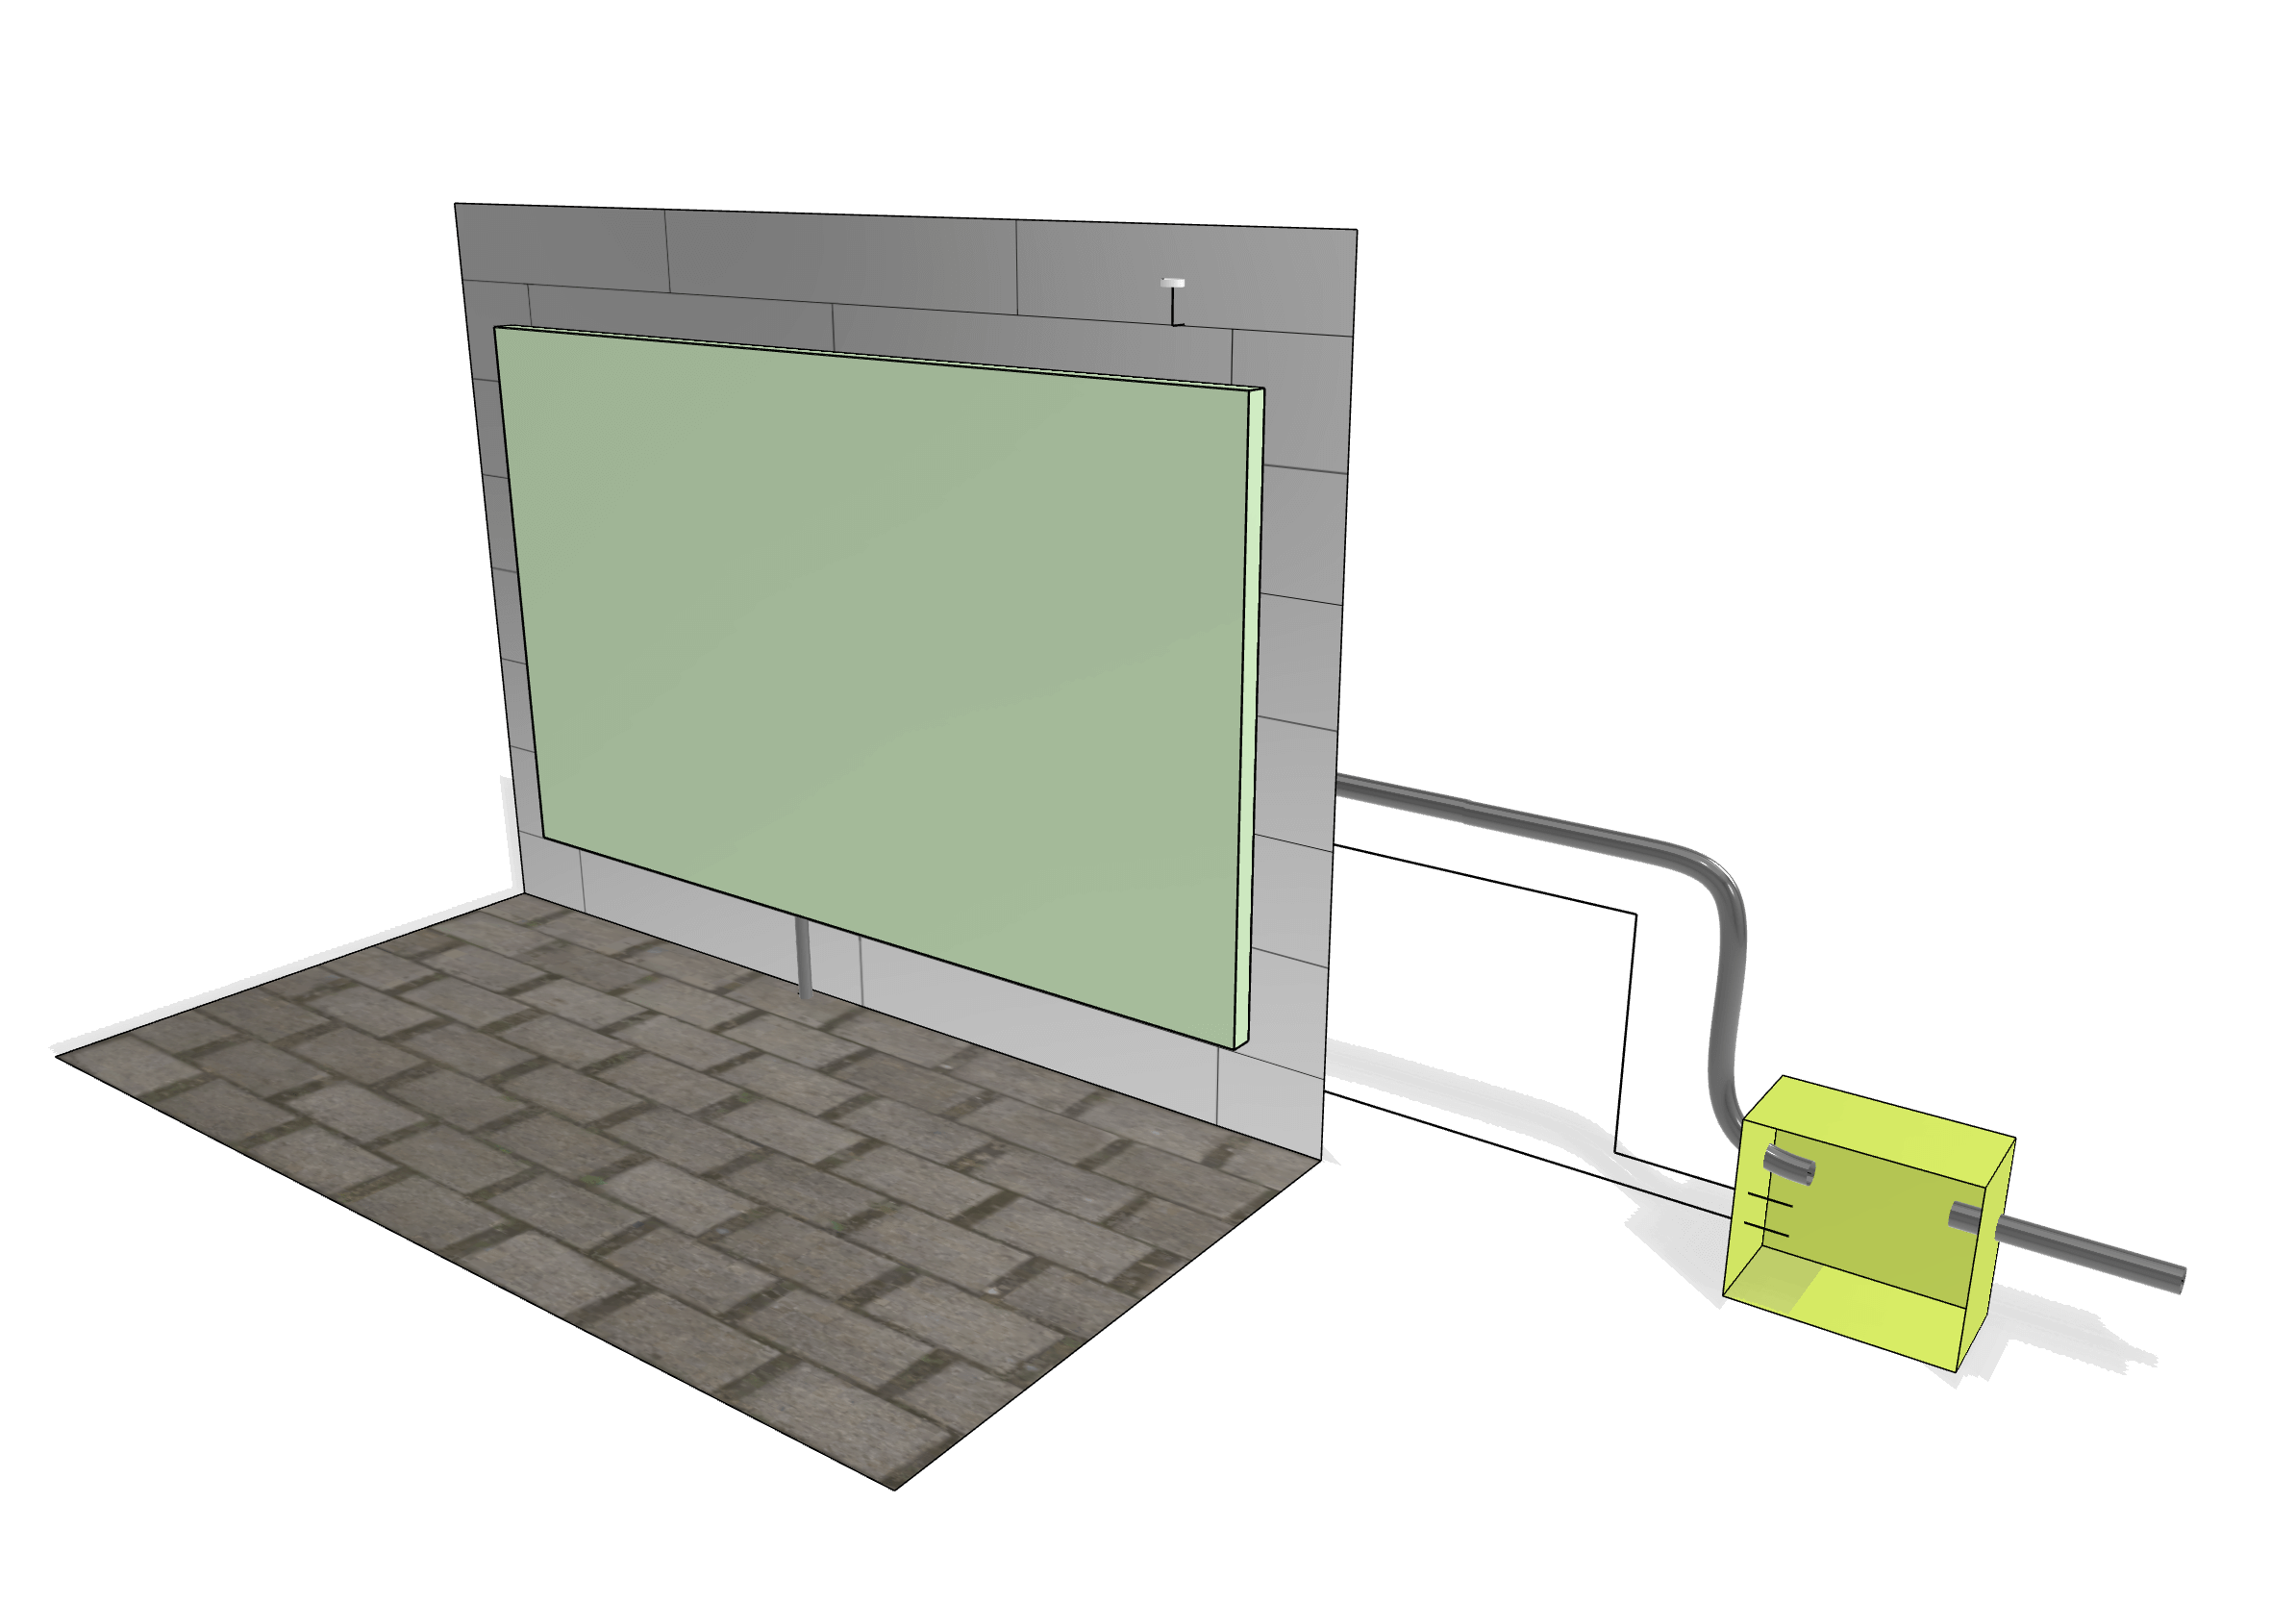
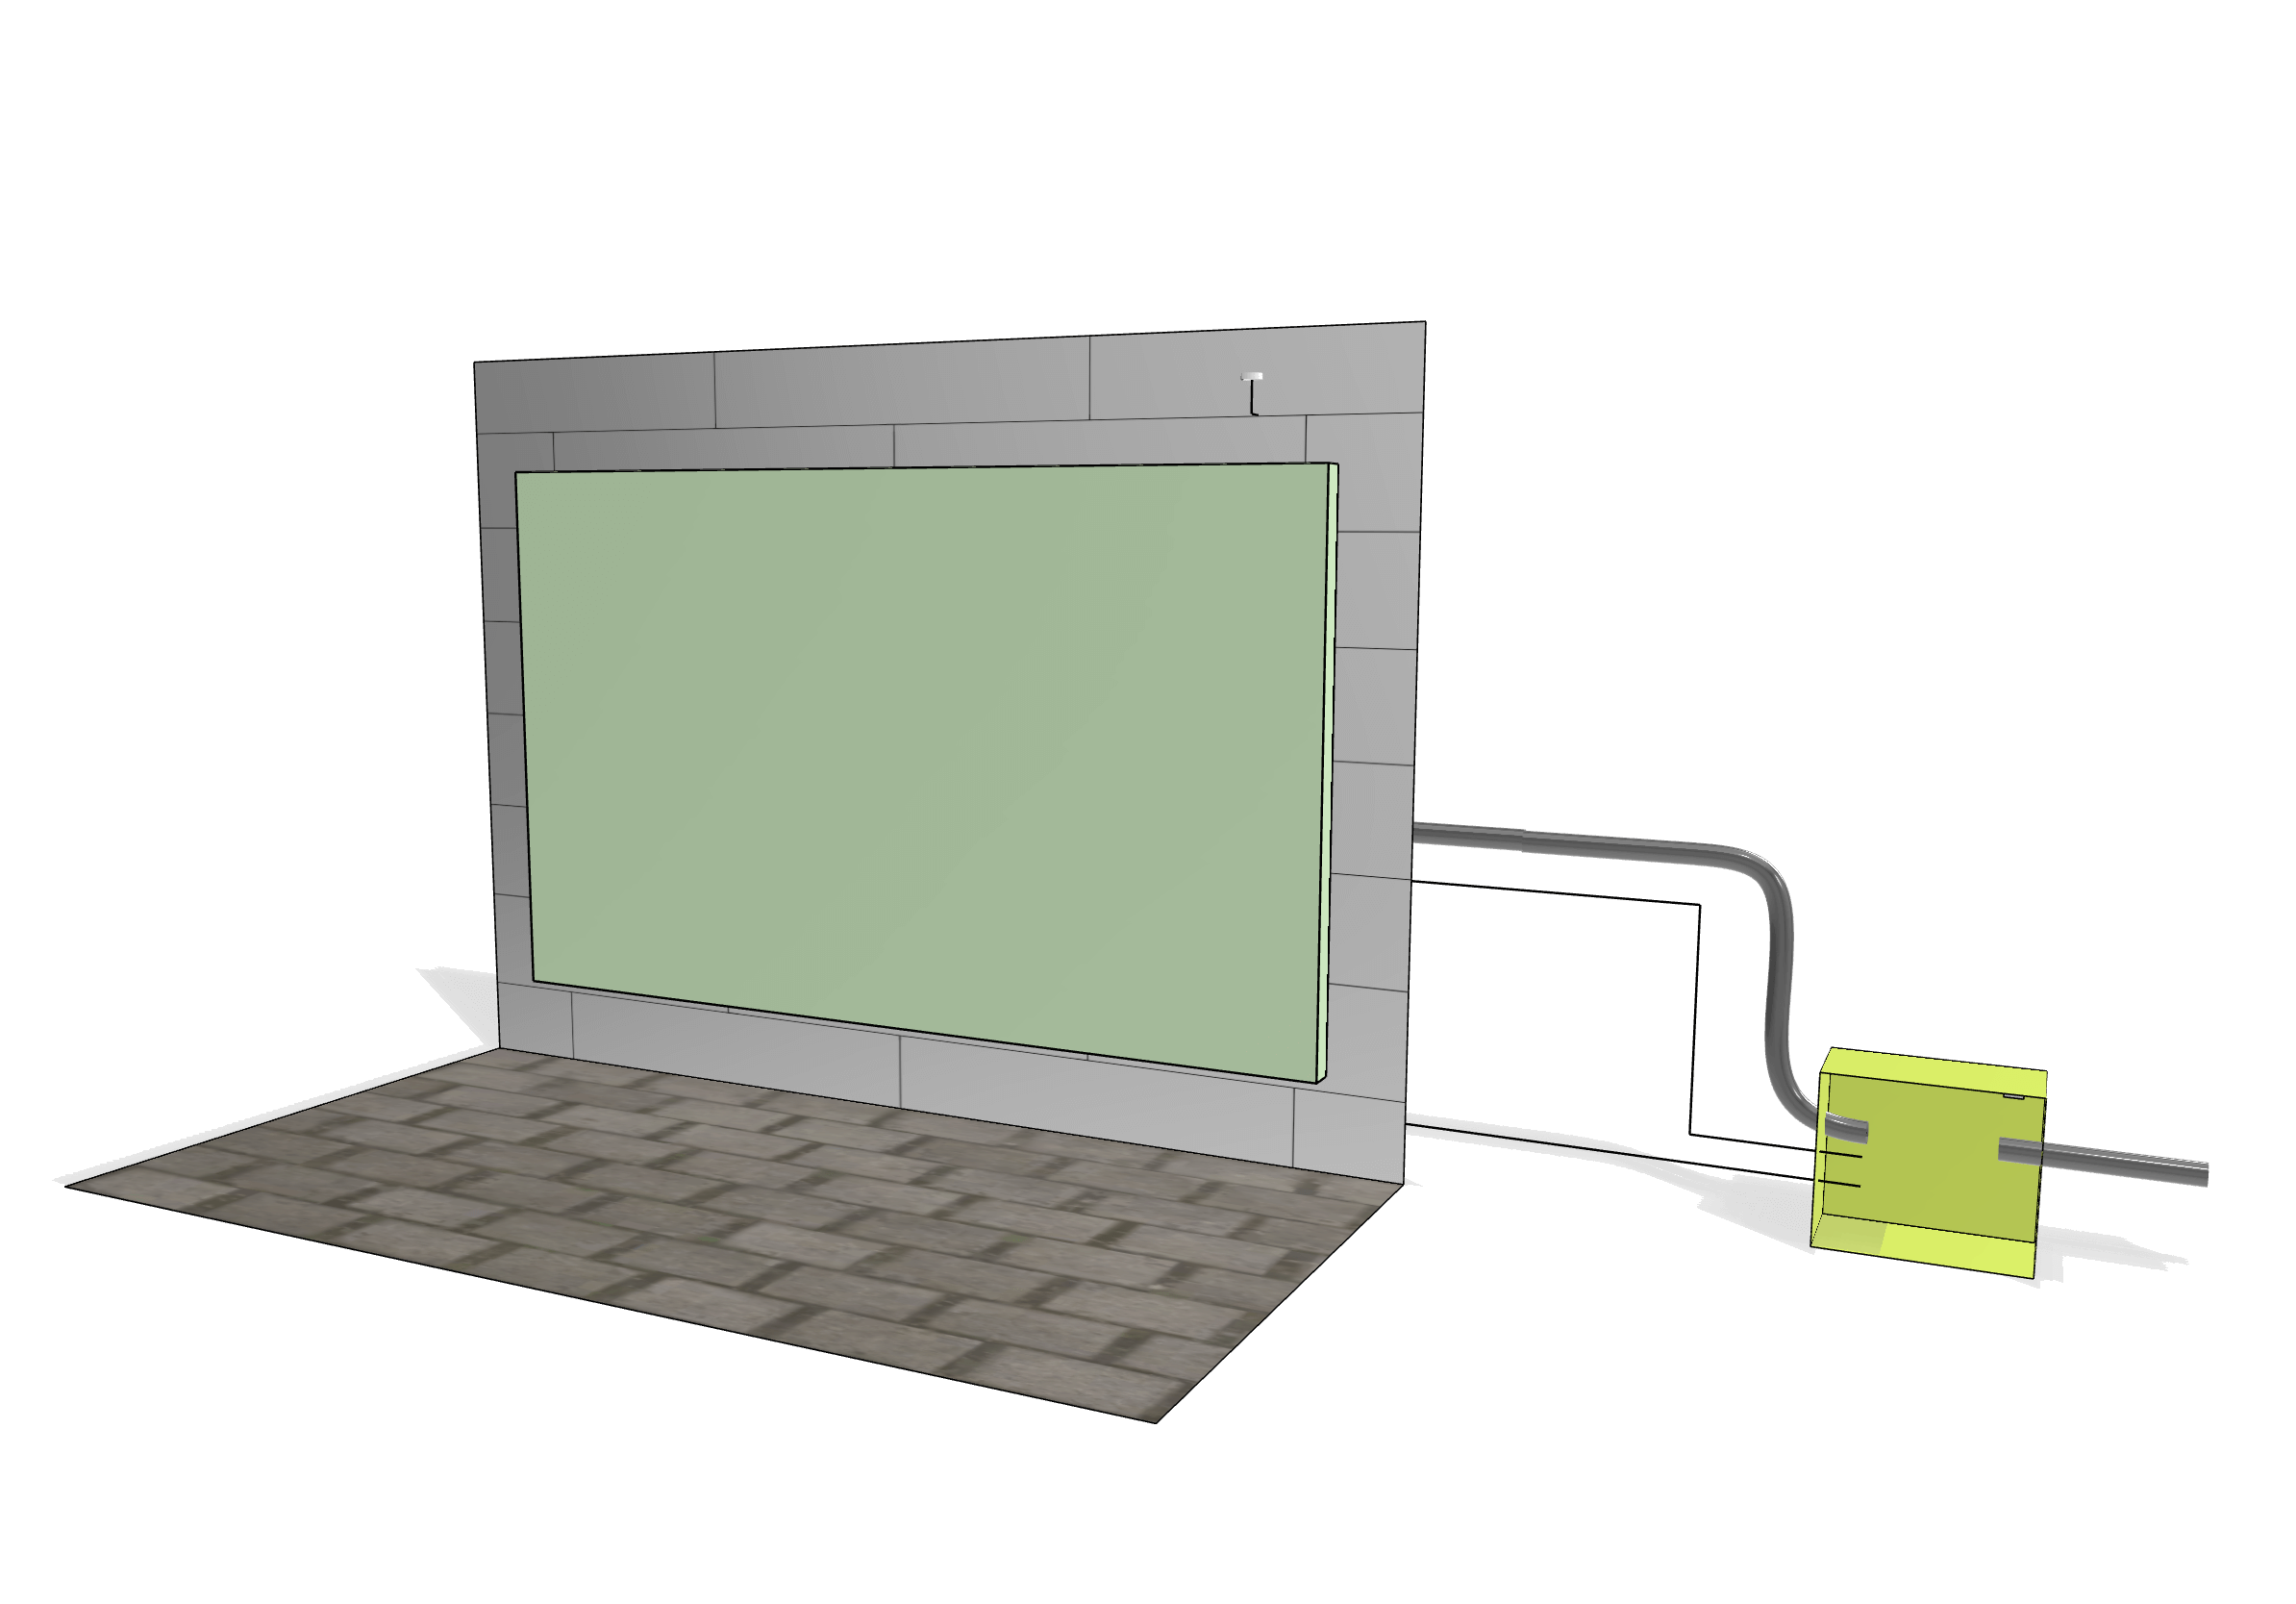
Outdoor vertical garden above ground level – option one 1
Outdoor vertical garden above ground level – option one 2
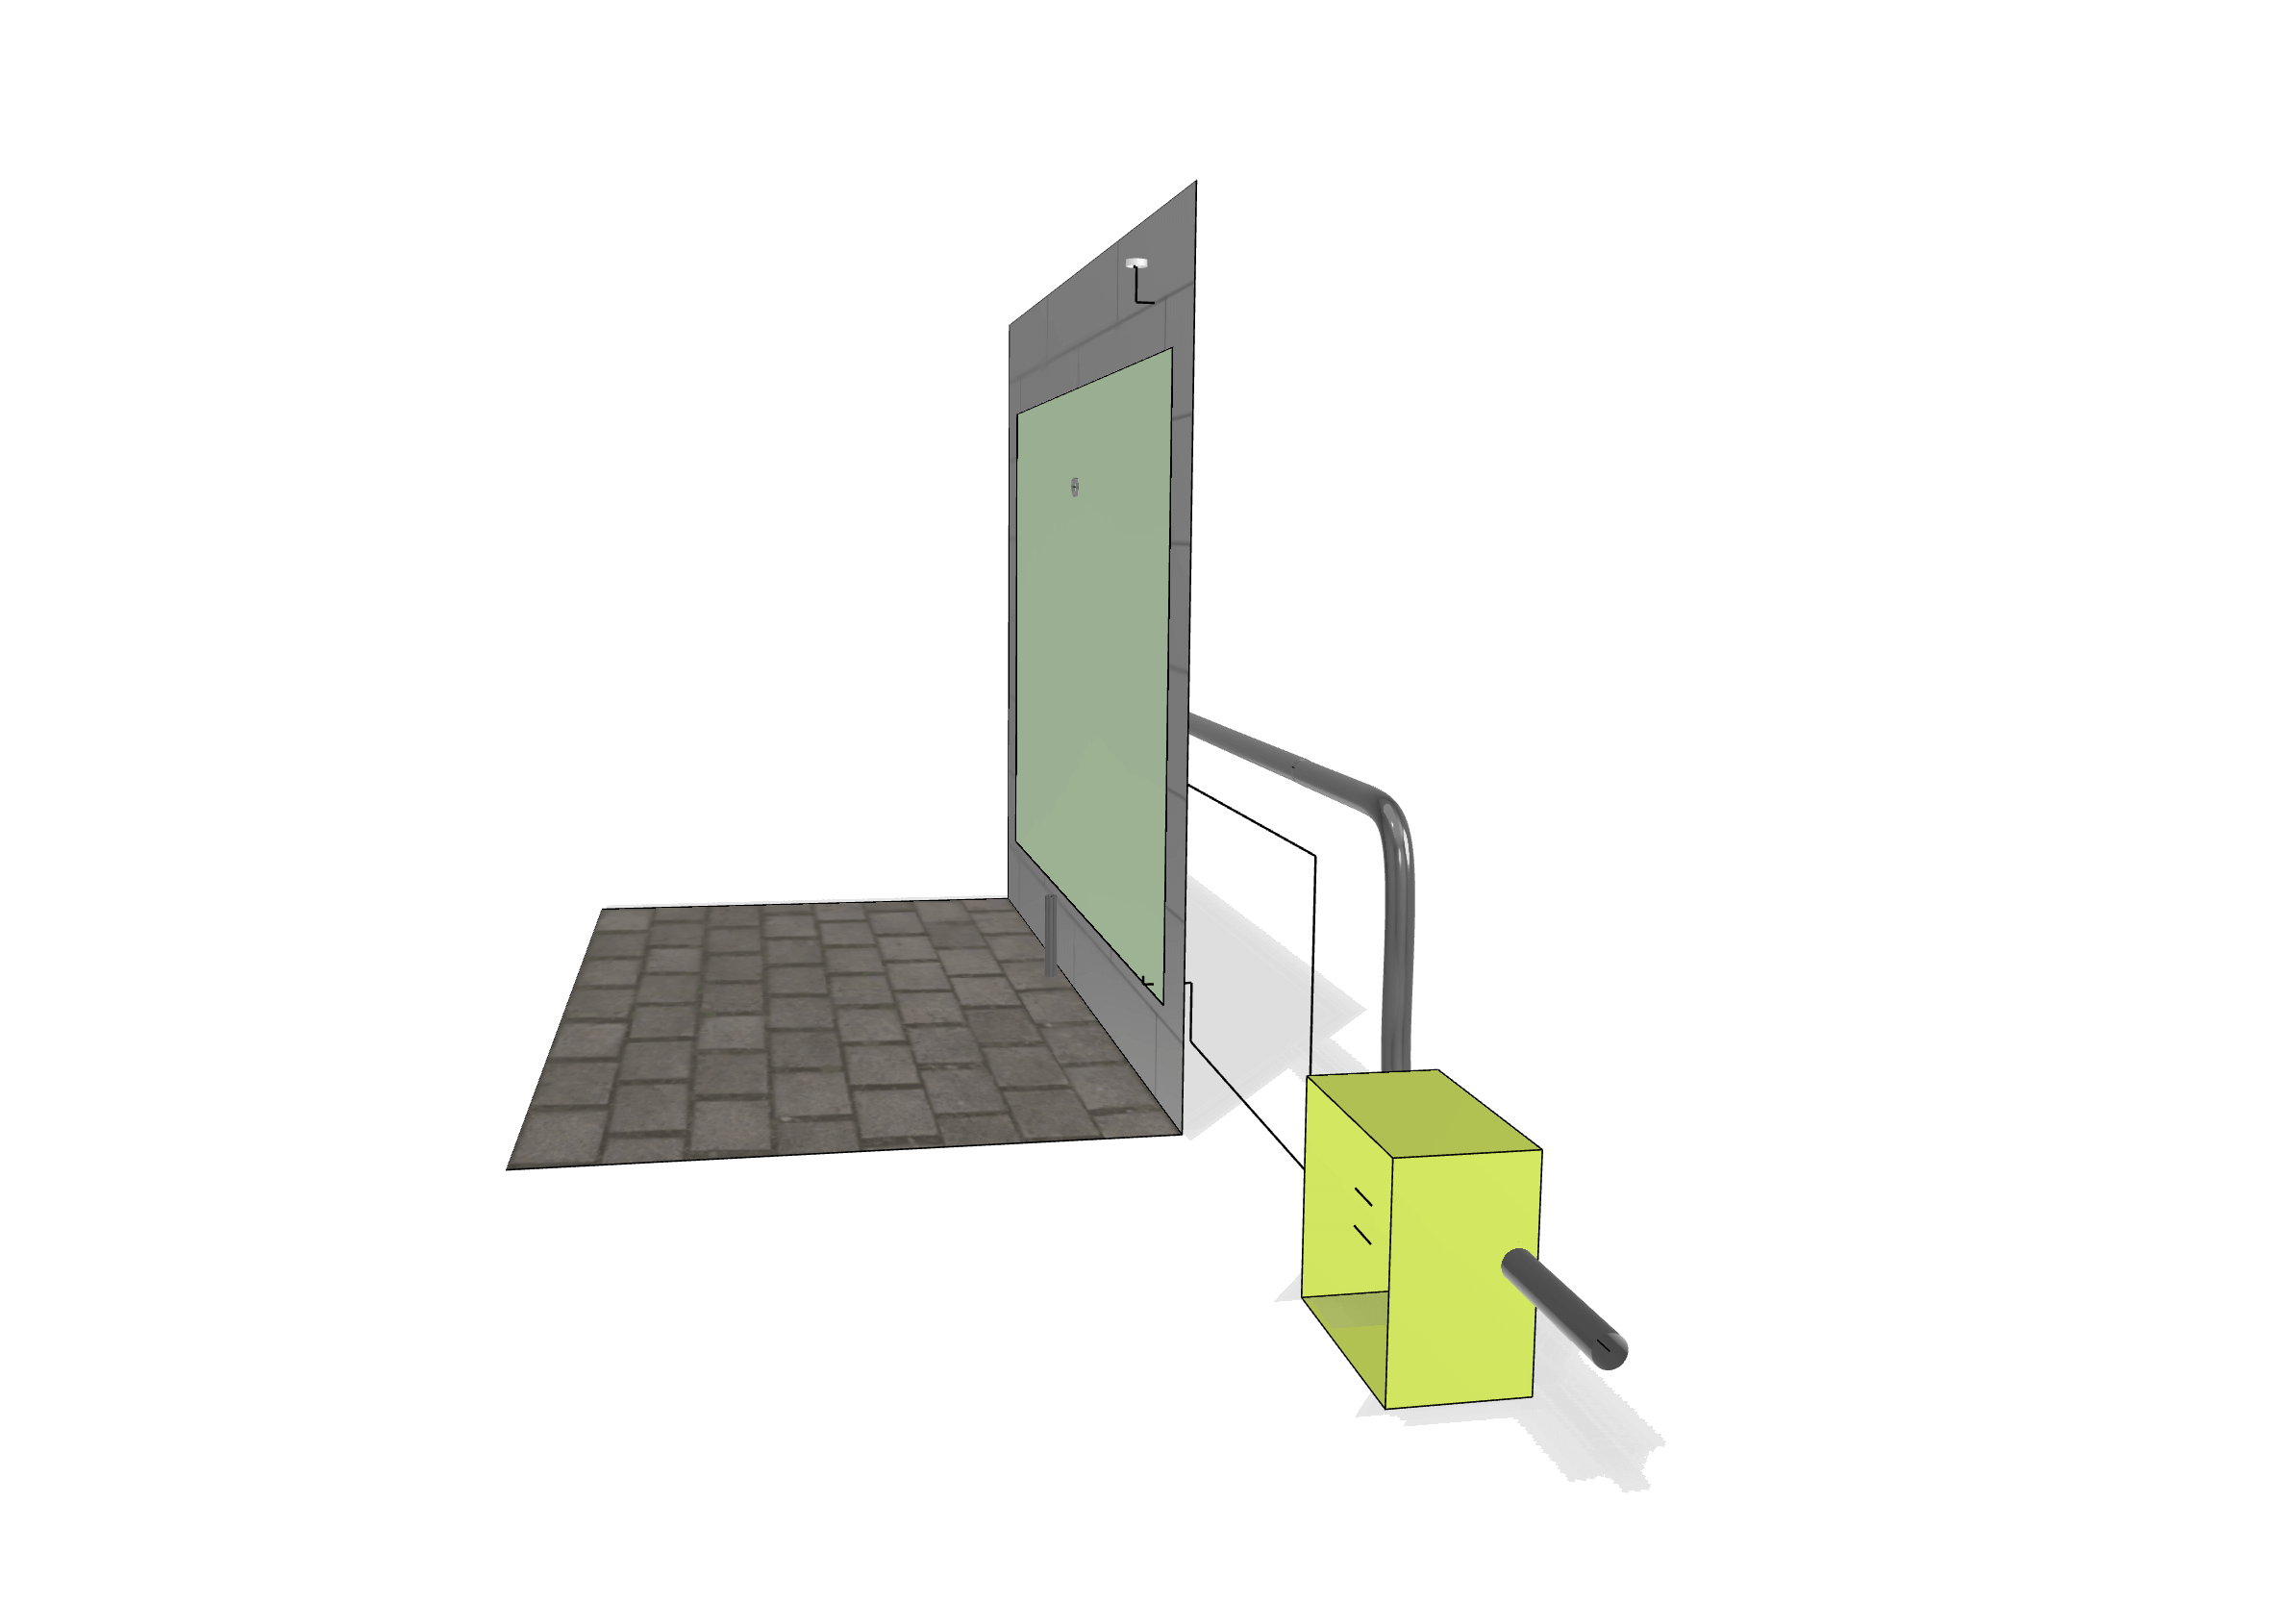
Outdoor vertical garden above ground level – option one 3
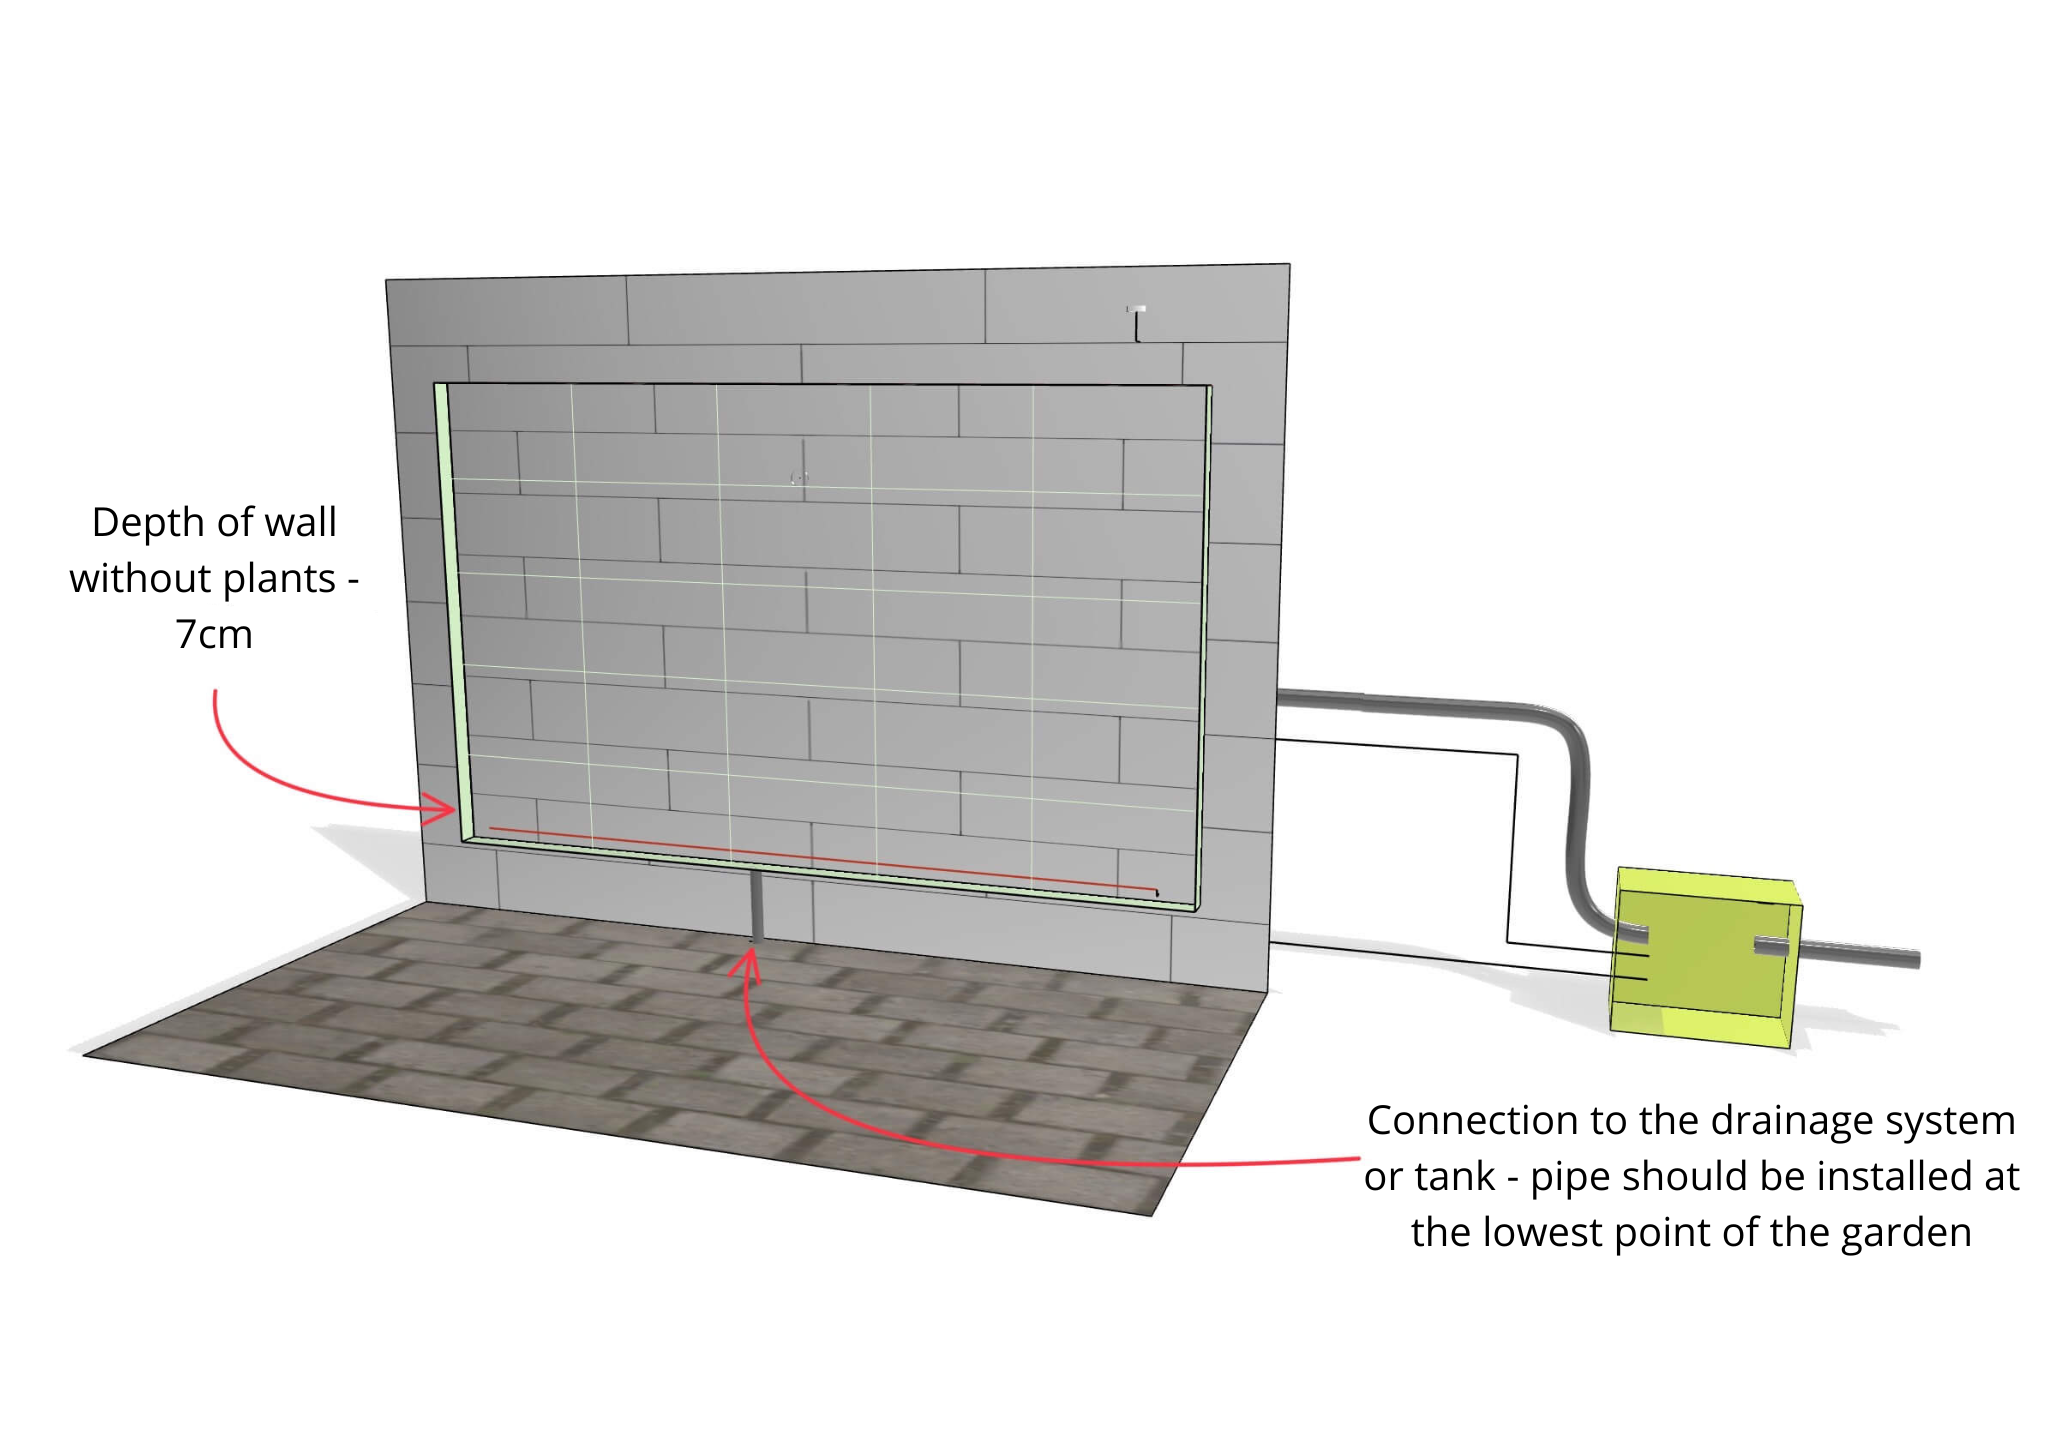
Outdoor green wall above ground level – option one – cross-section
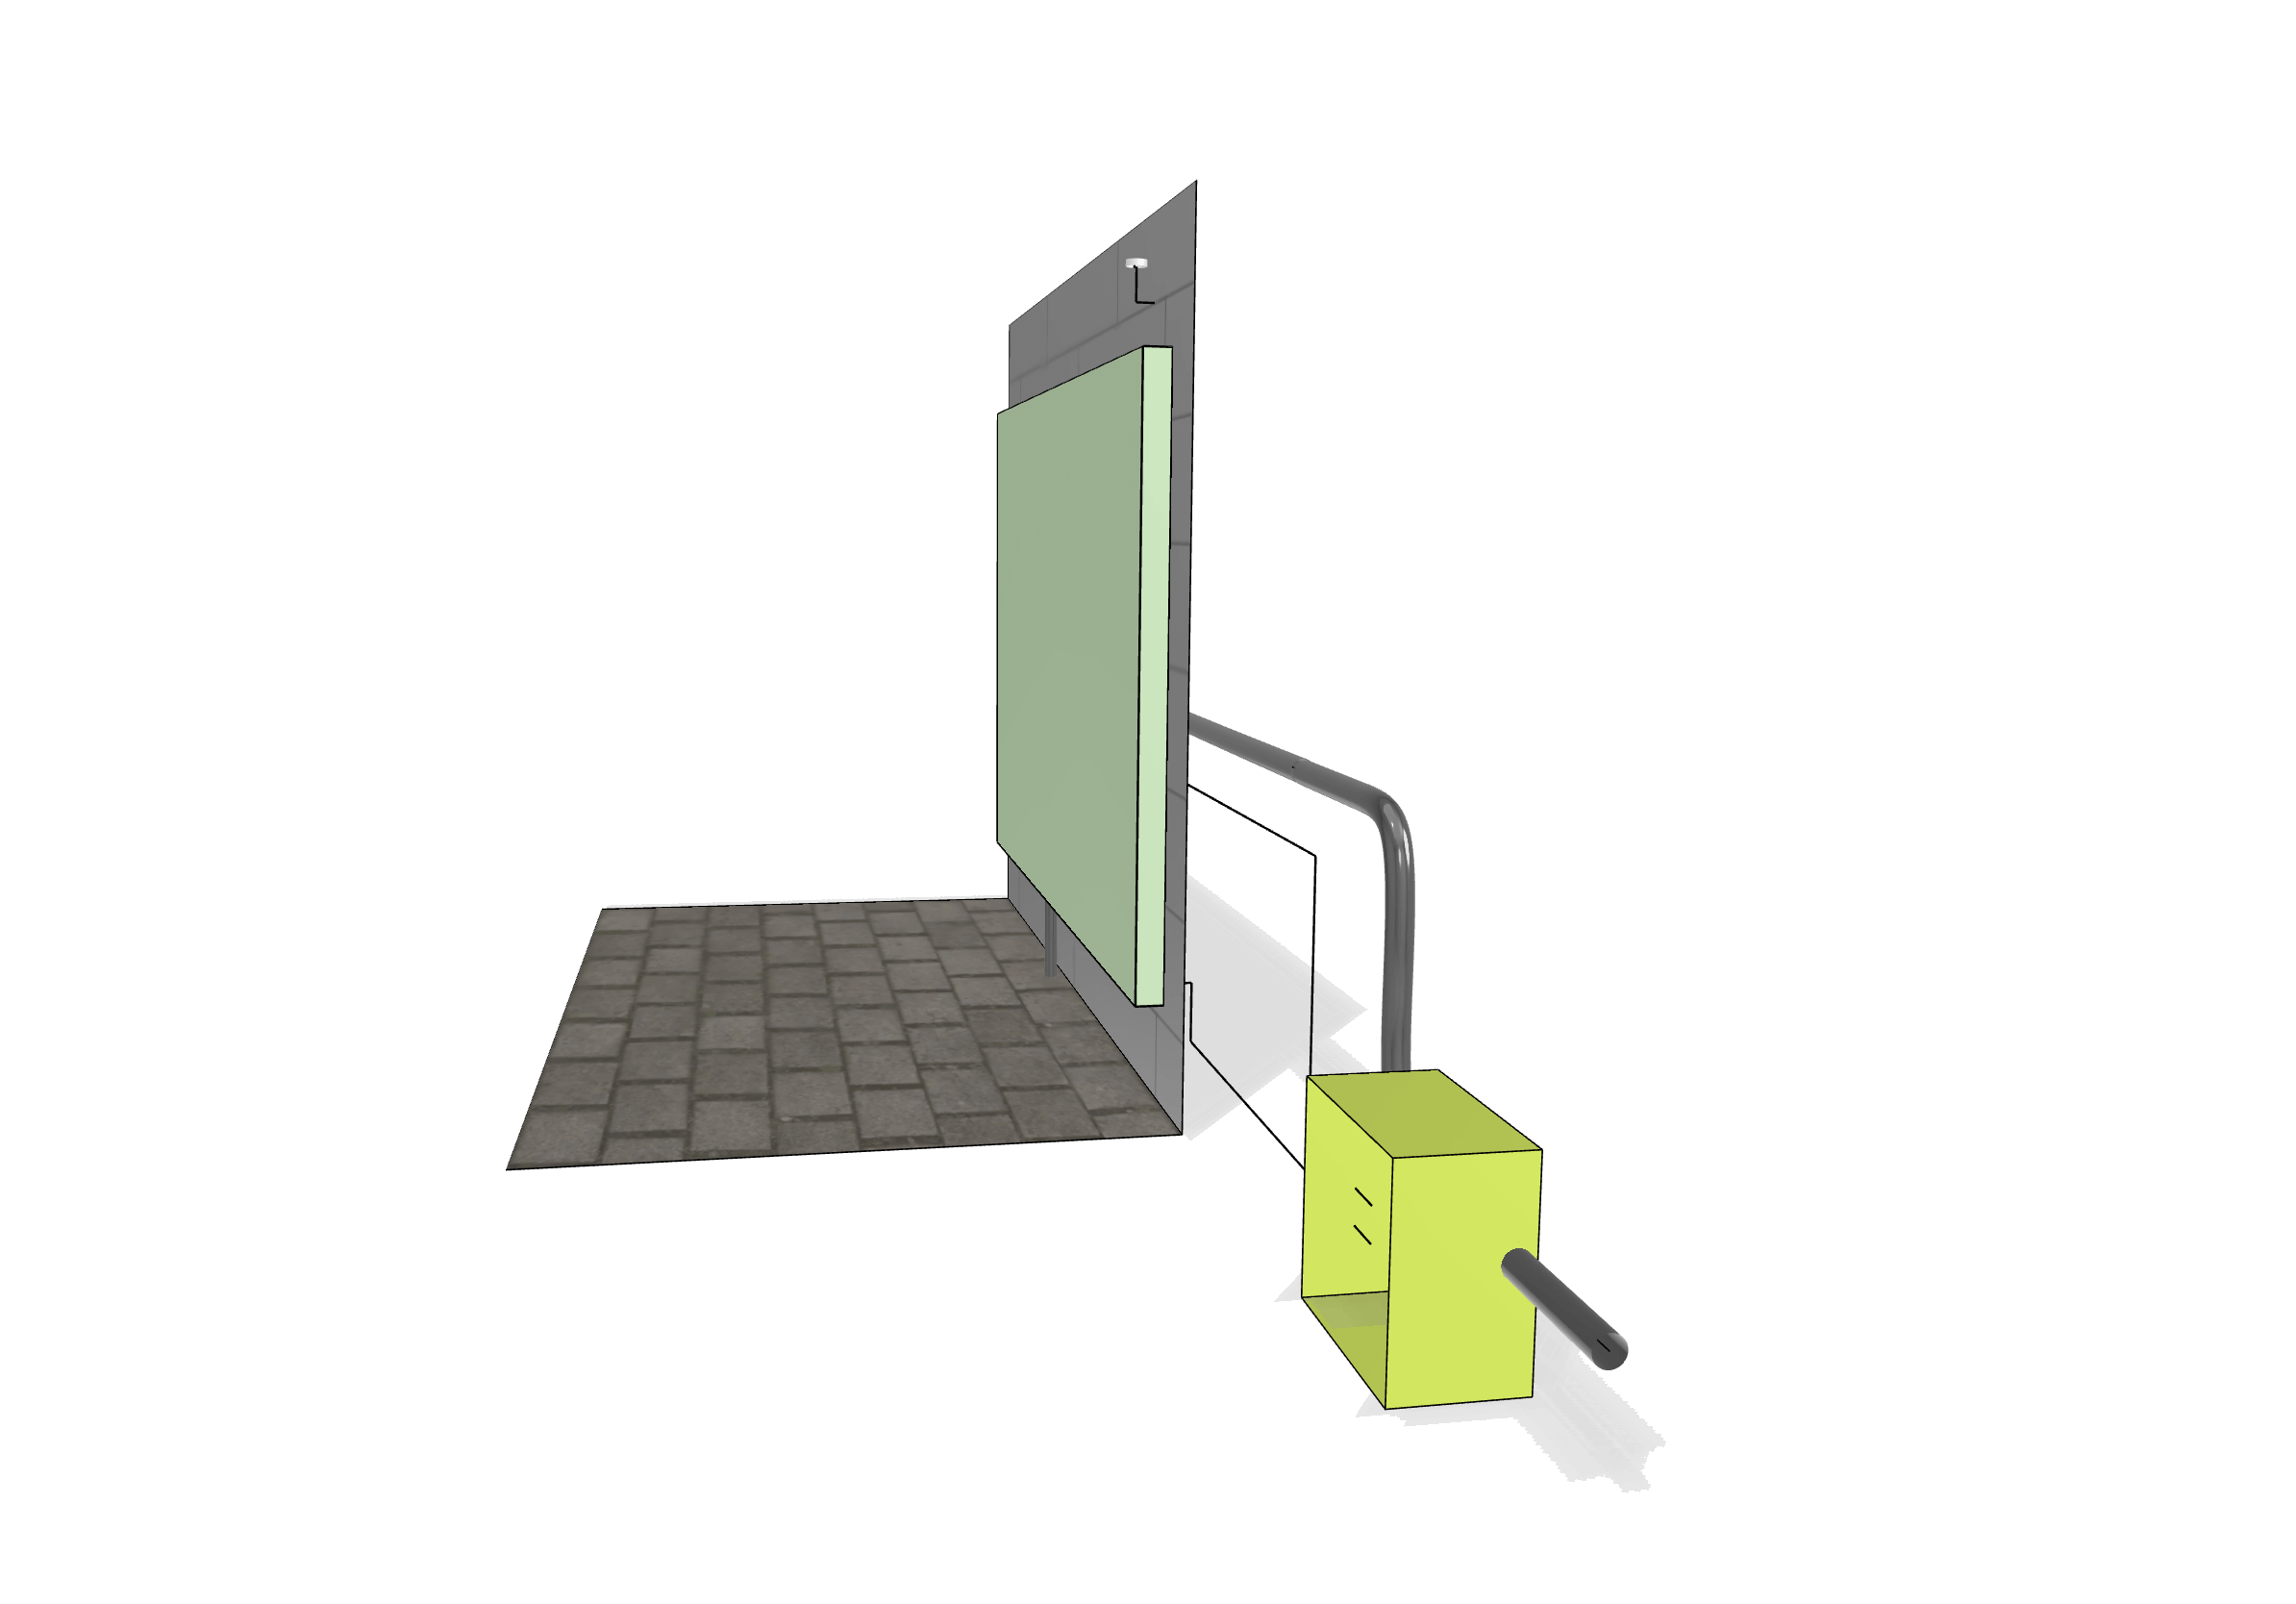
Vertical garden above ground level (+ X cm above ground level) – option two
Vertical garden above ground level – option two
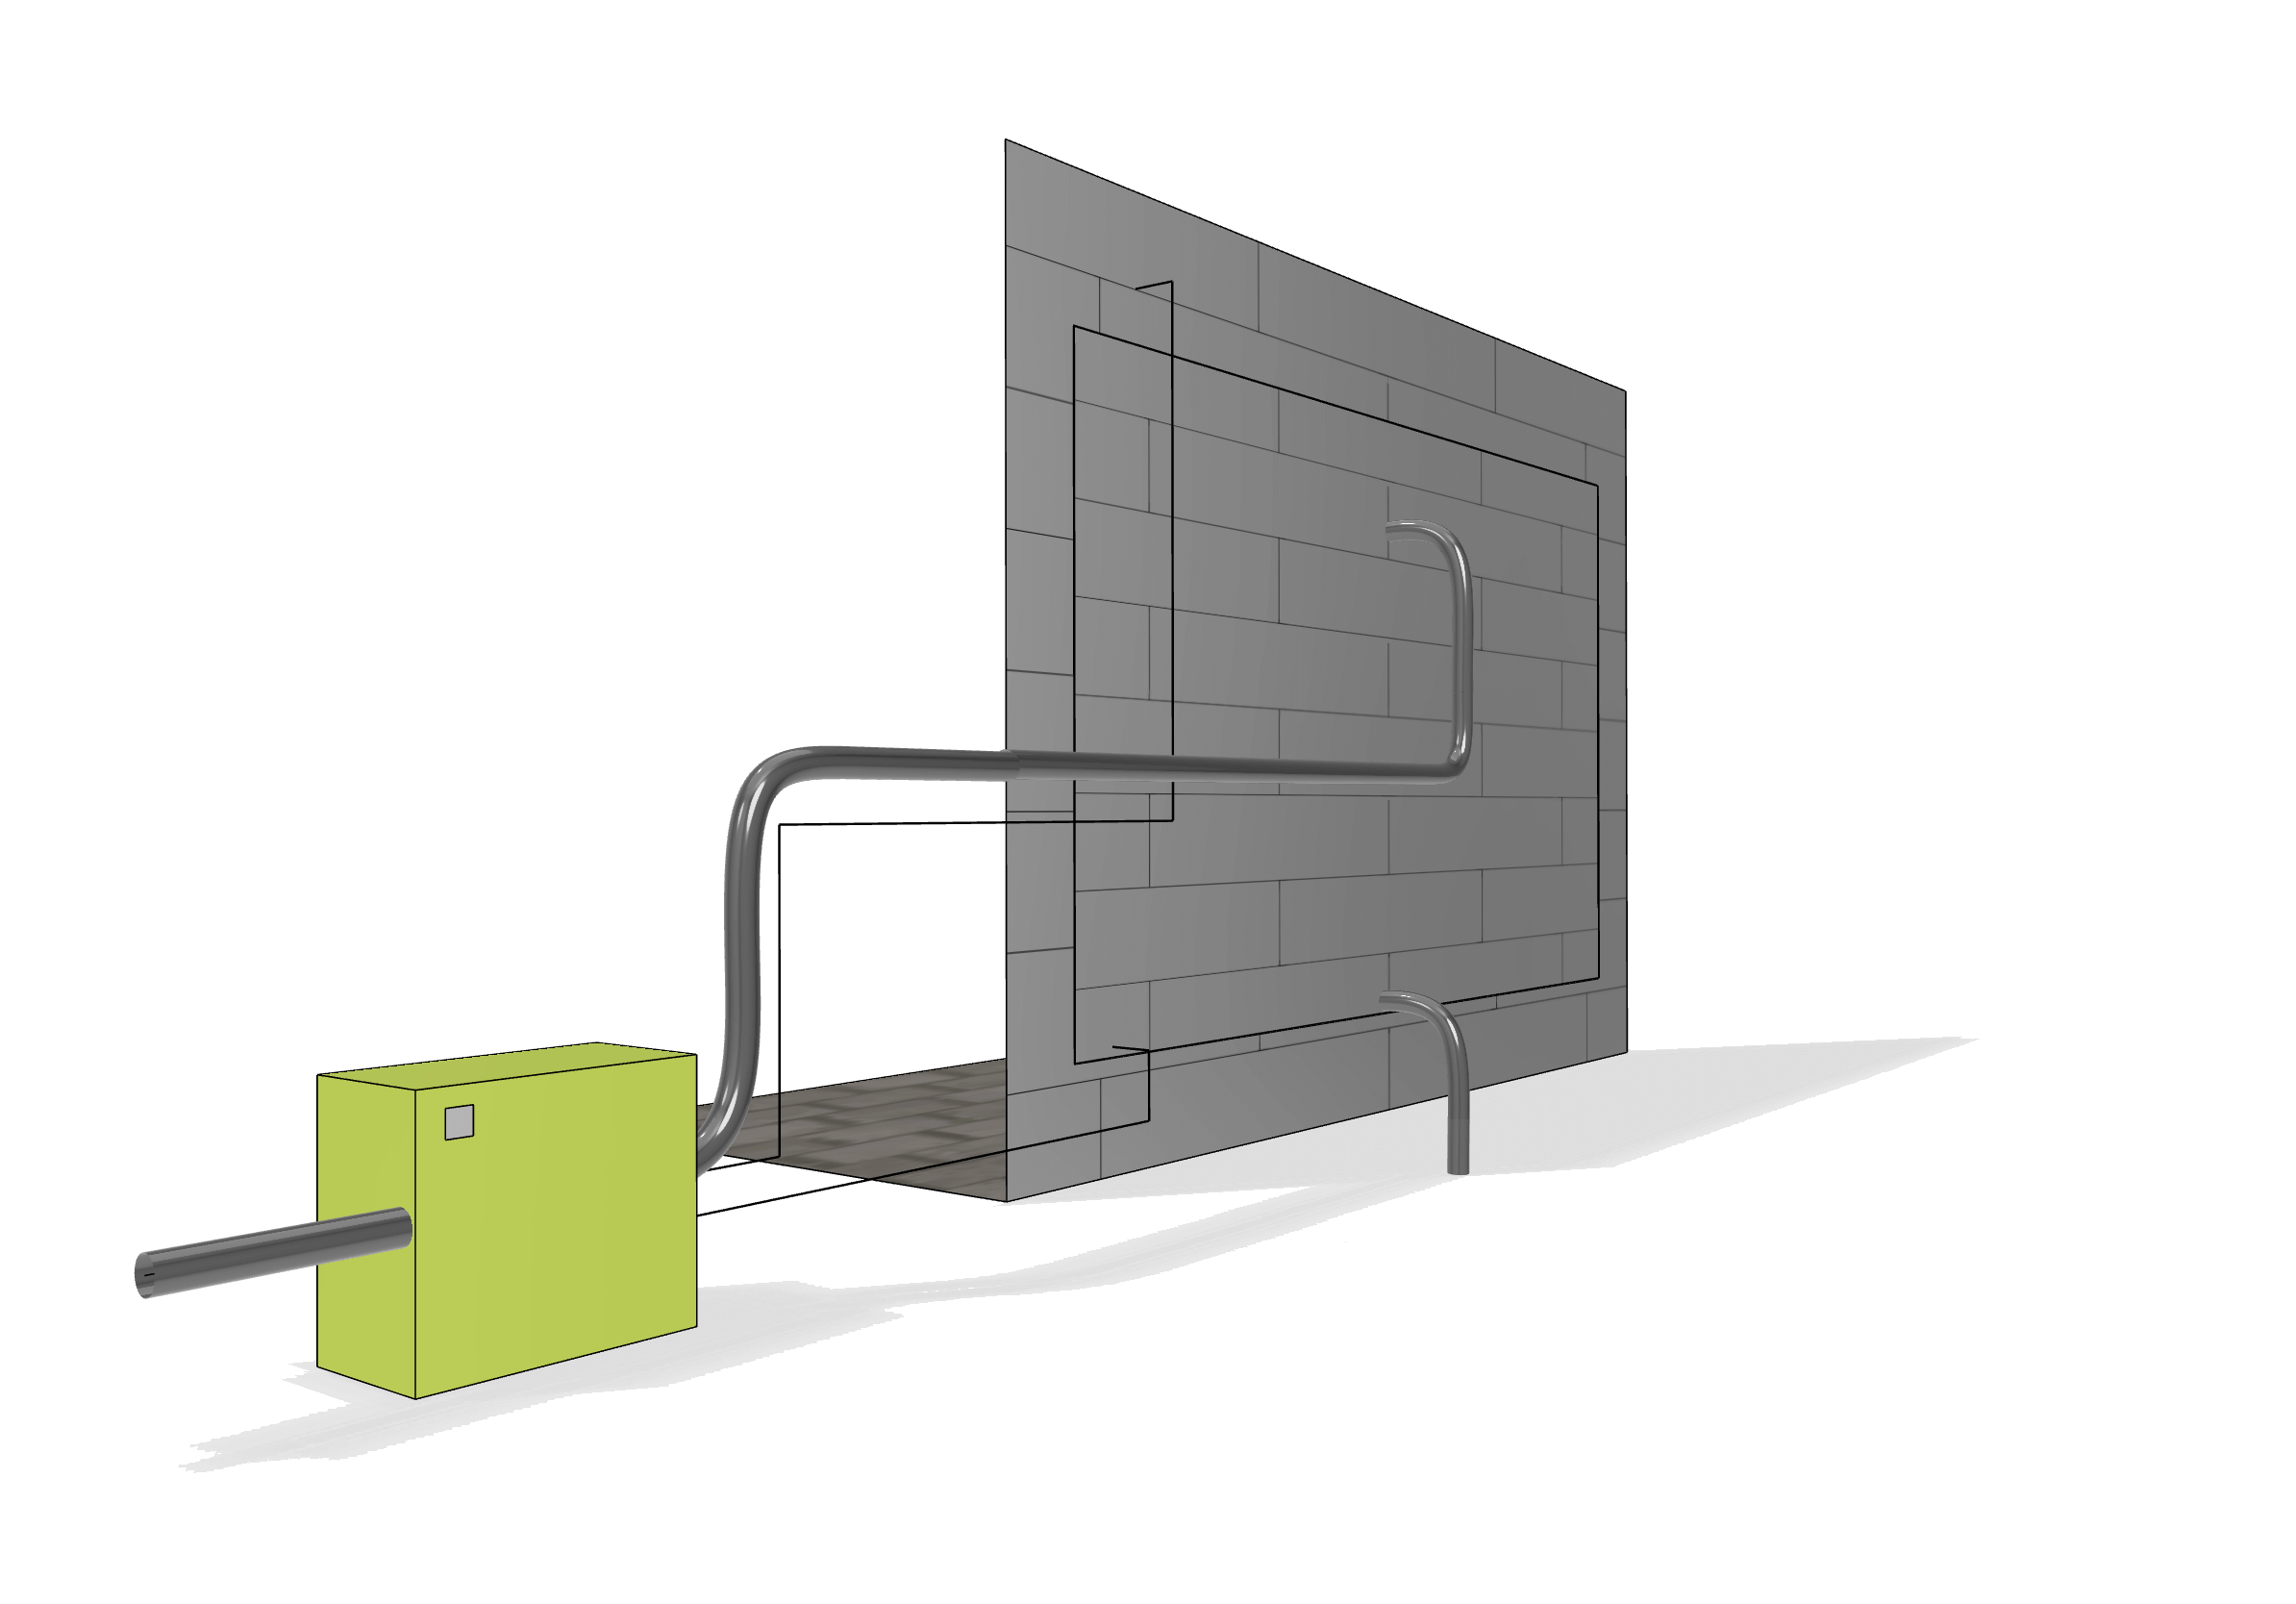
Vertical garden above ground level – option two – back view
Vertical garden above ground level – option two – cross-section 1
Outdoor vertical green wall above ground level – option two – cross-section
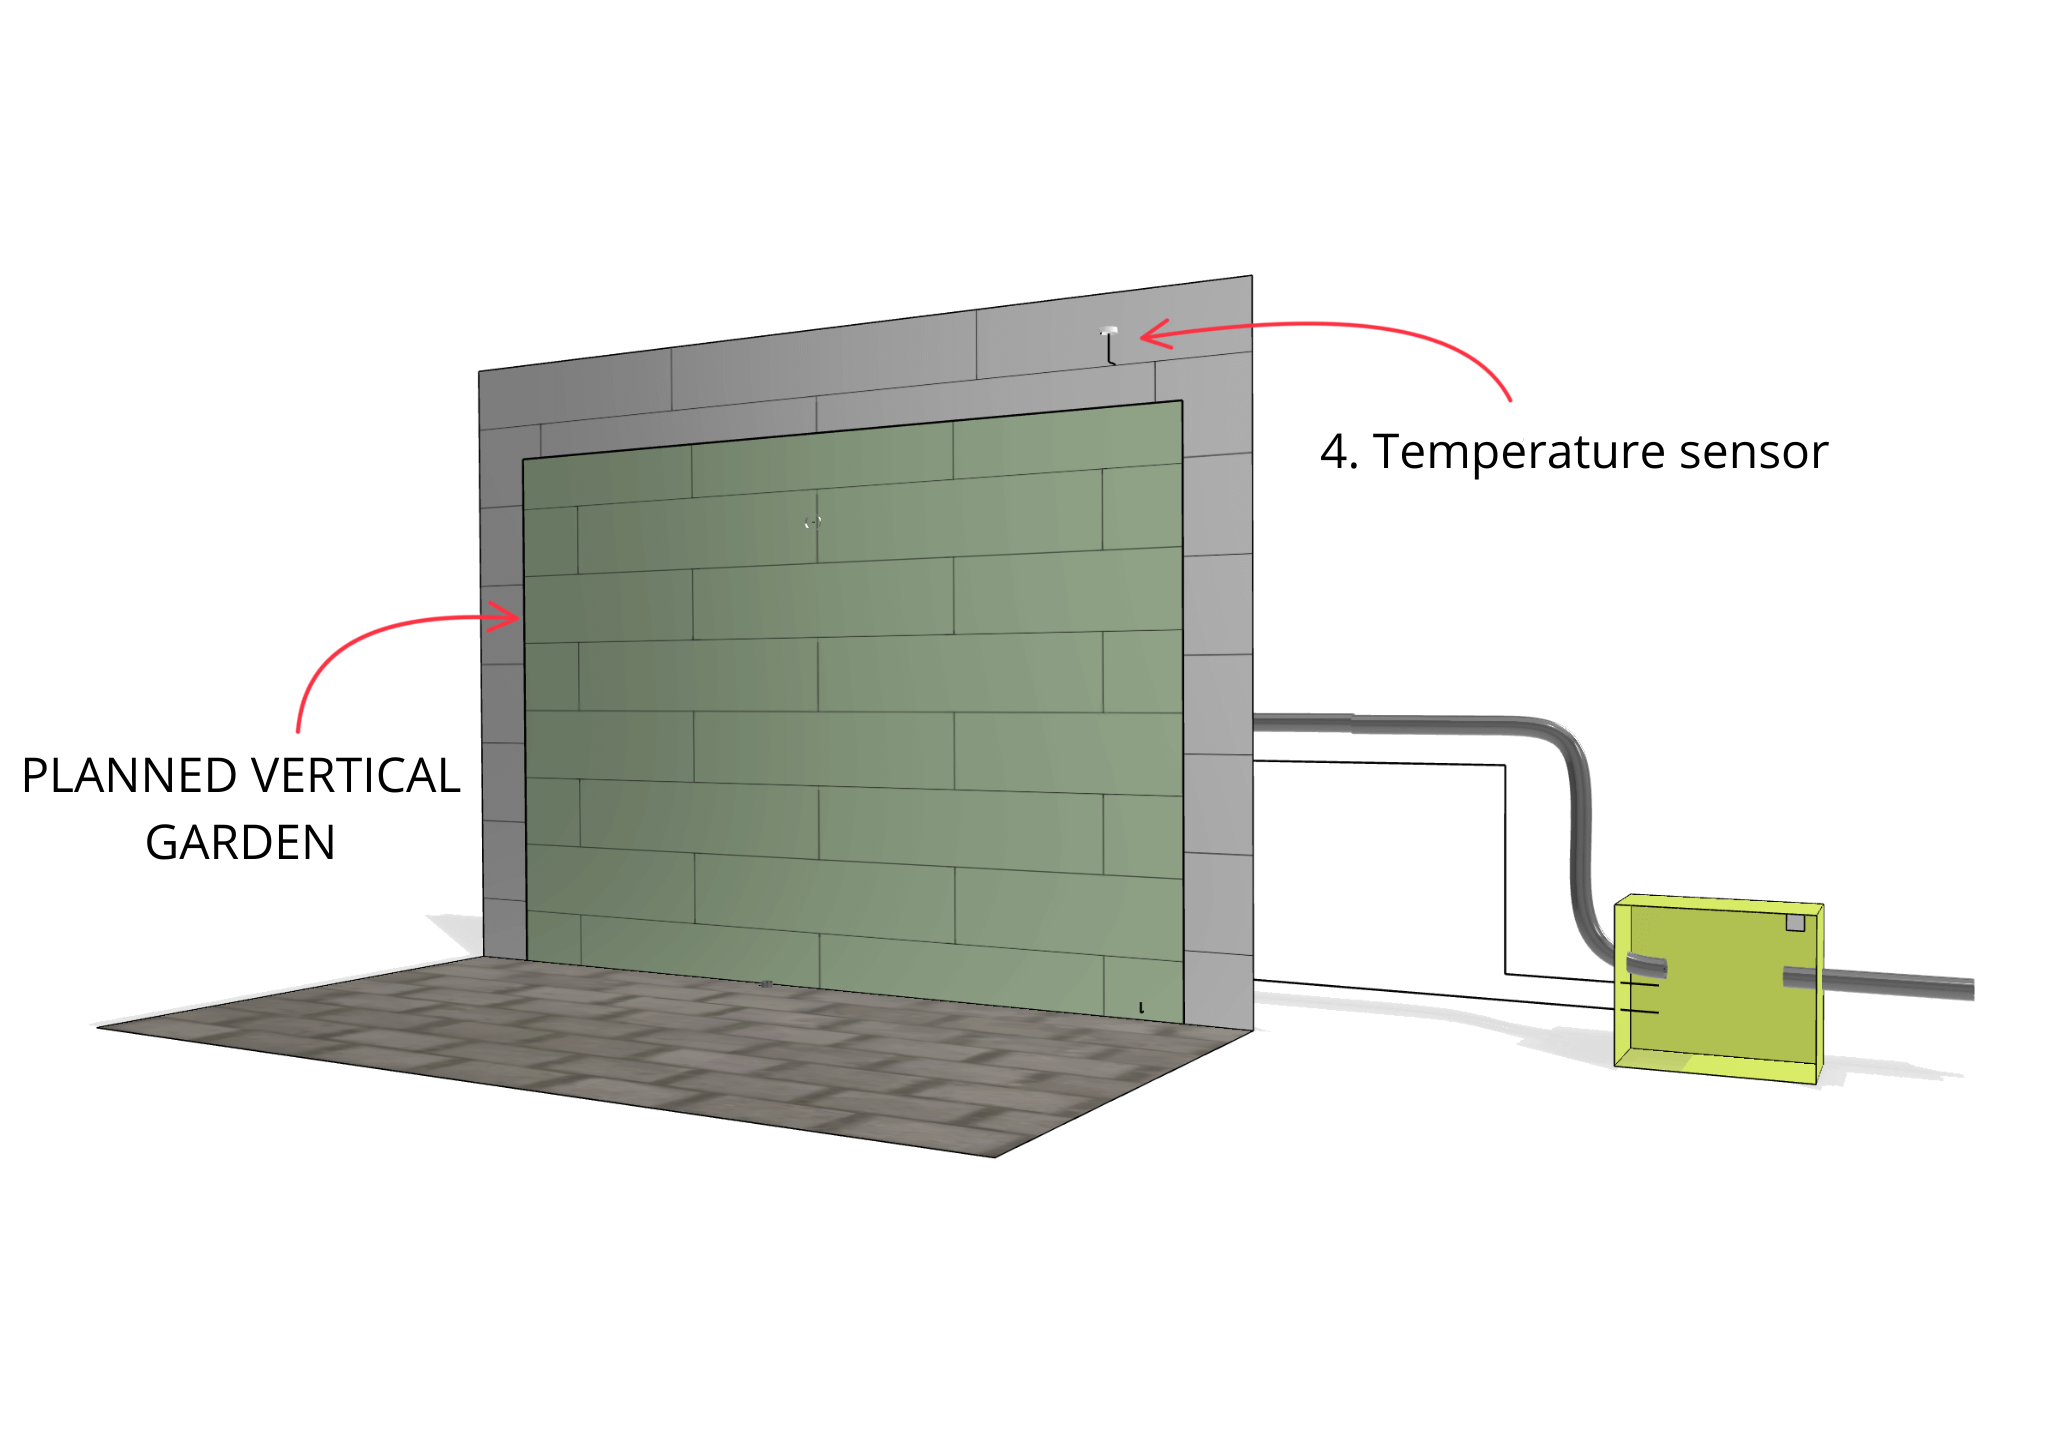
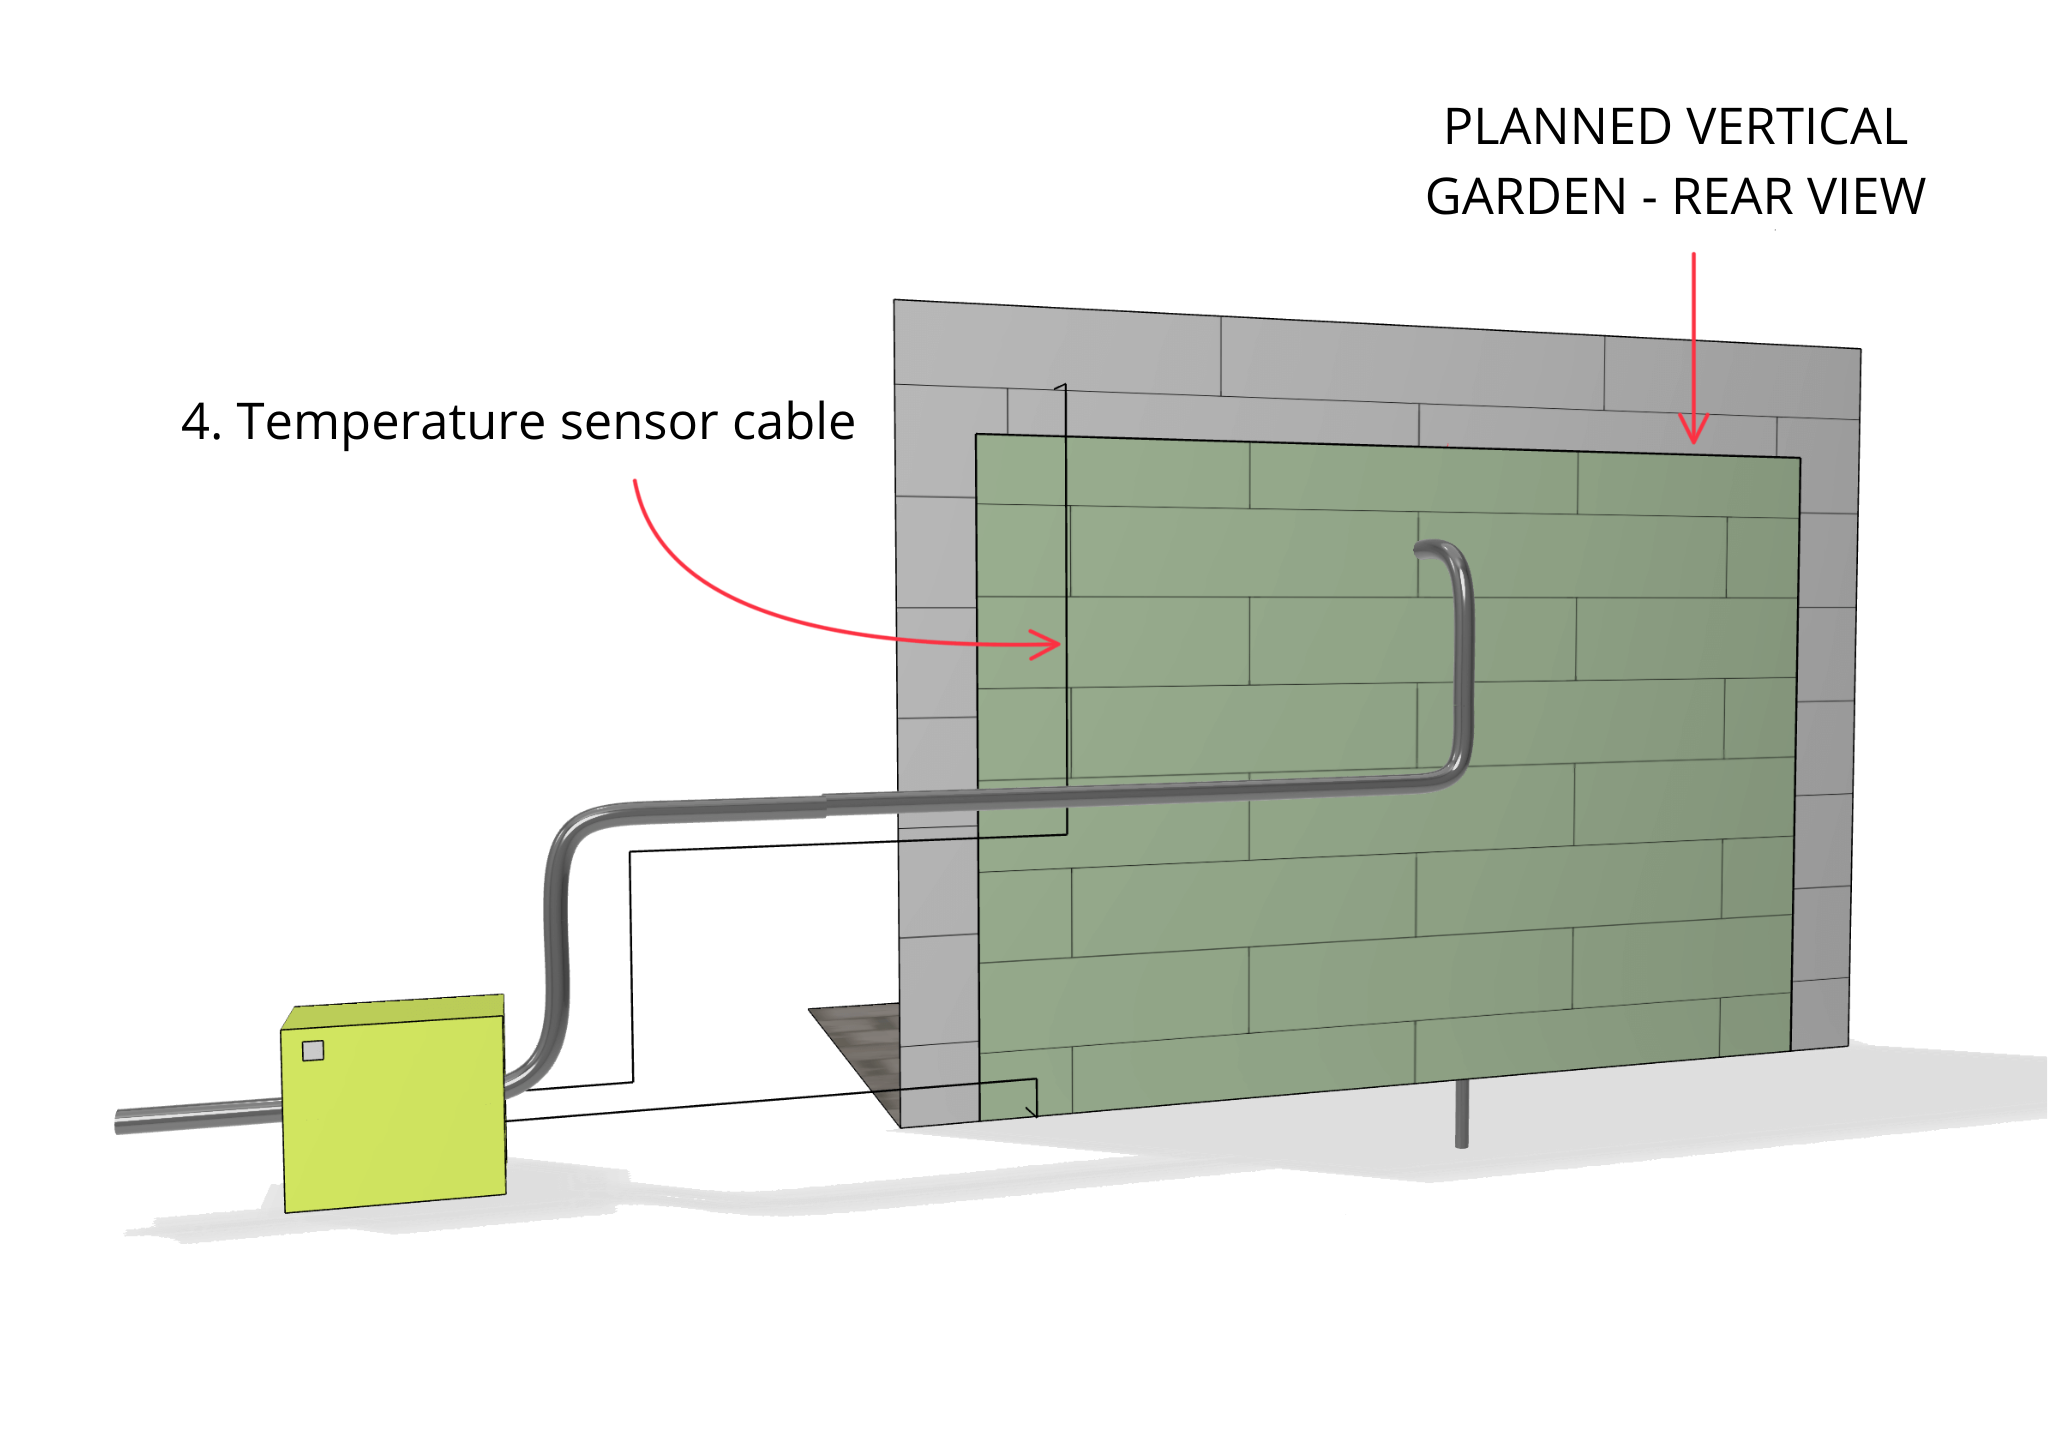
4. Temperature sensor
A temperature sensor is used to monitor air temperature (in the shade) around the vertical garden. Preparing the temperature sensor installation involves running a 0.5mm x 2 wire from the control location (indoors) to the outside, near the vertical garden.
During winter, if the temperature falls below 4°C the sensor will stop the irrigation system, restarting the system once the temperature returns above 4°C.
By using the sensor, we help to avoid the control panel and watering system being damaged as a result of freezing water.
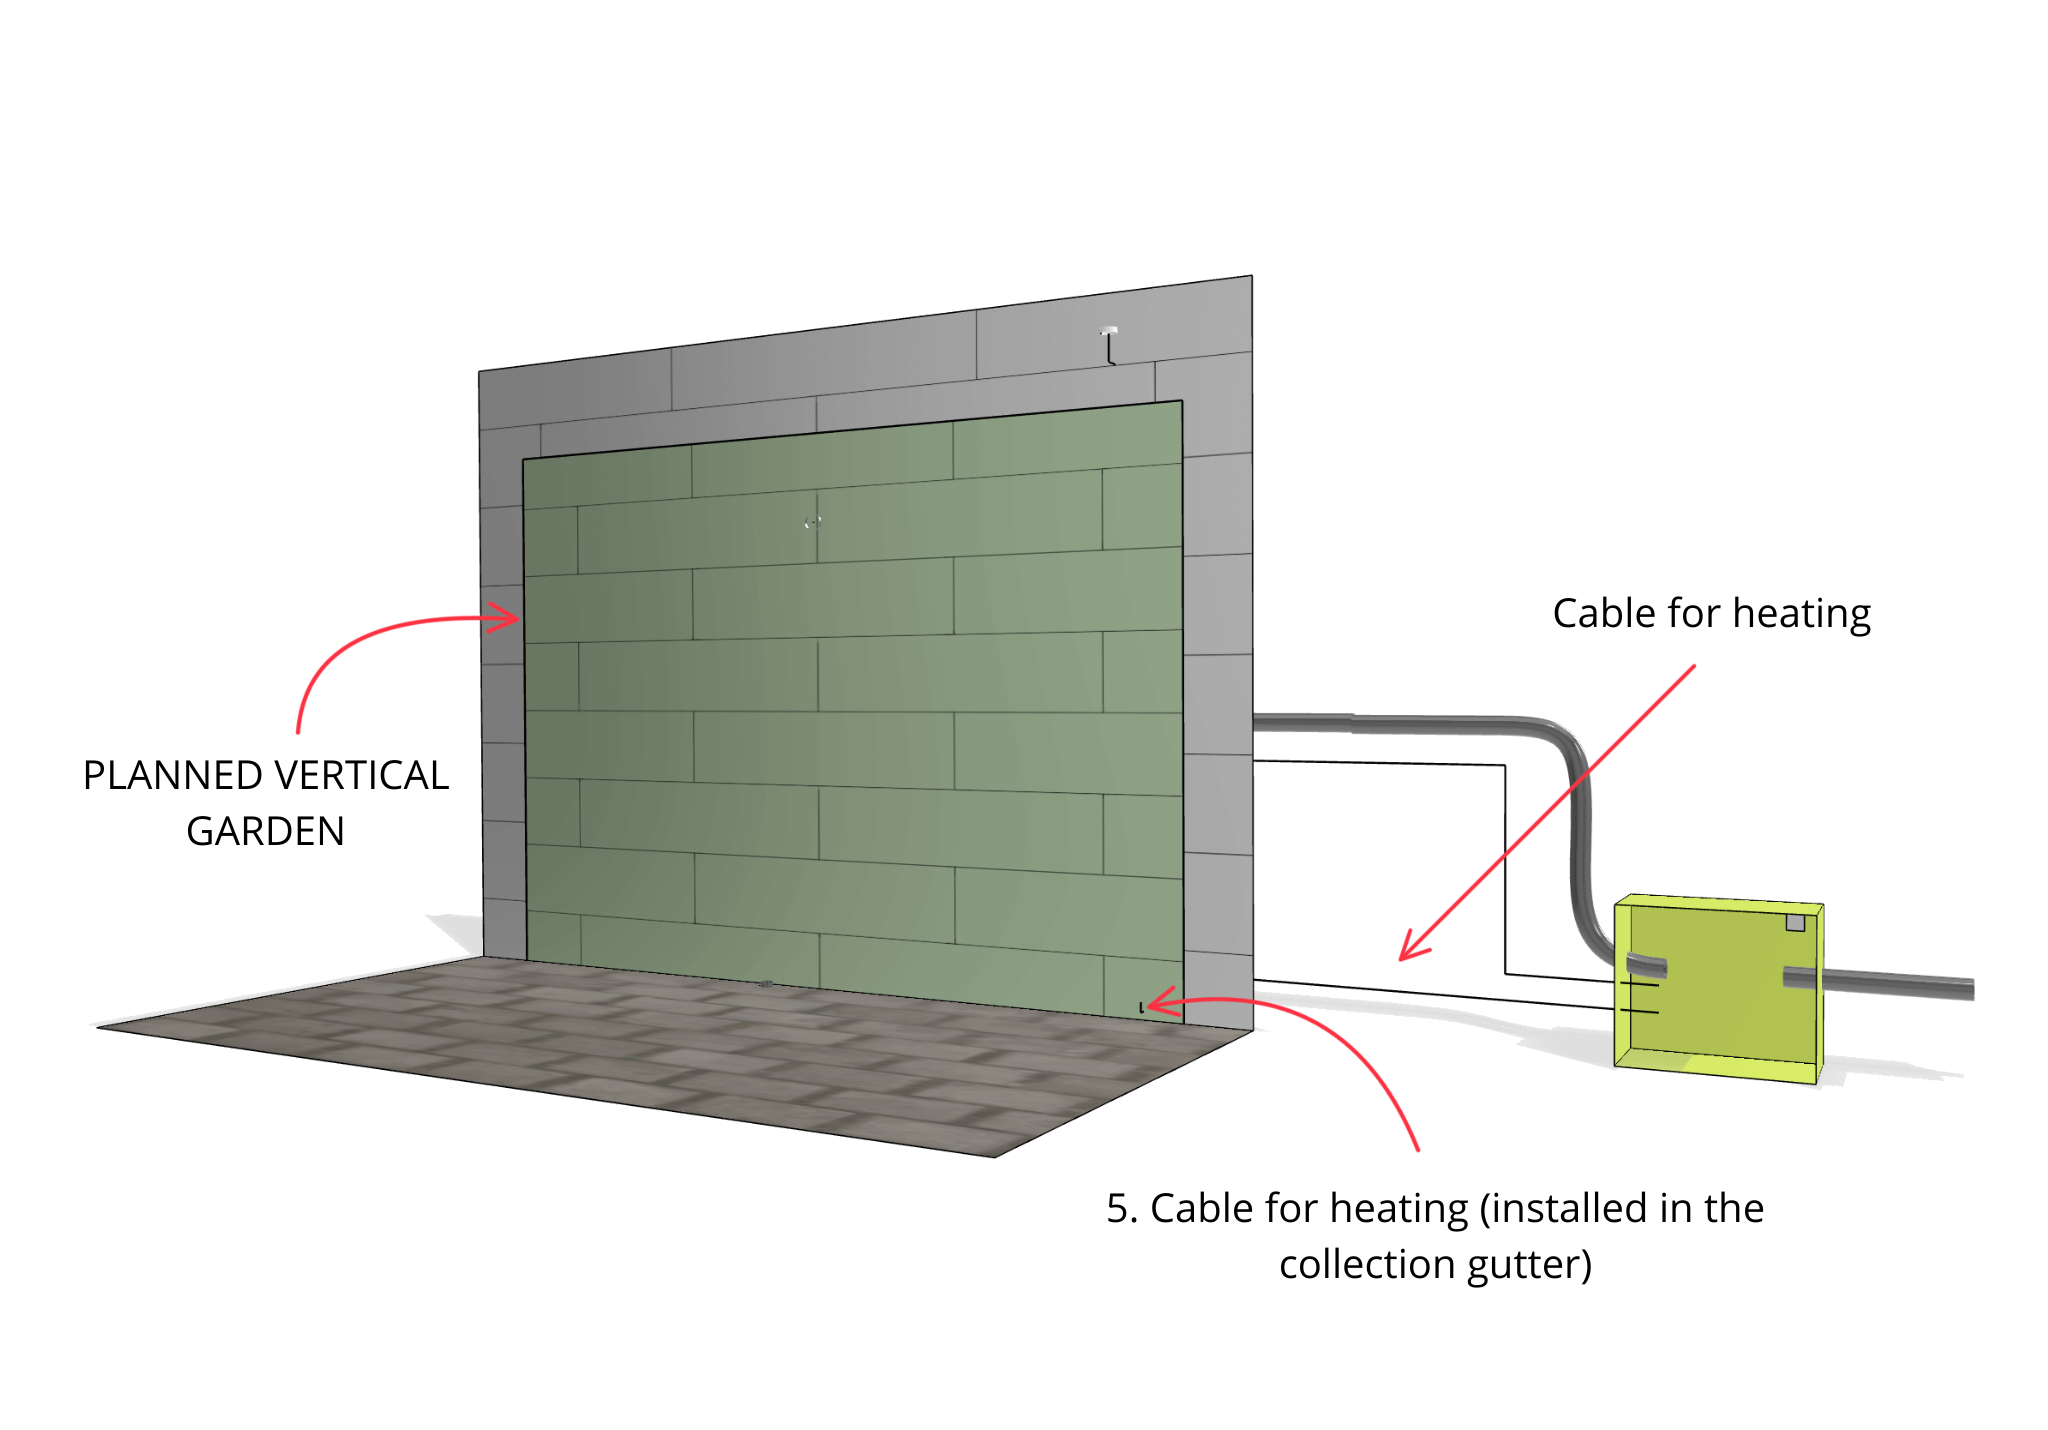
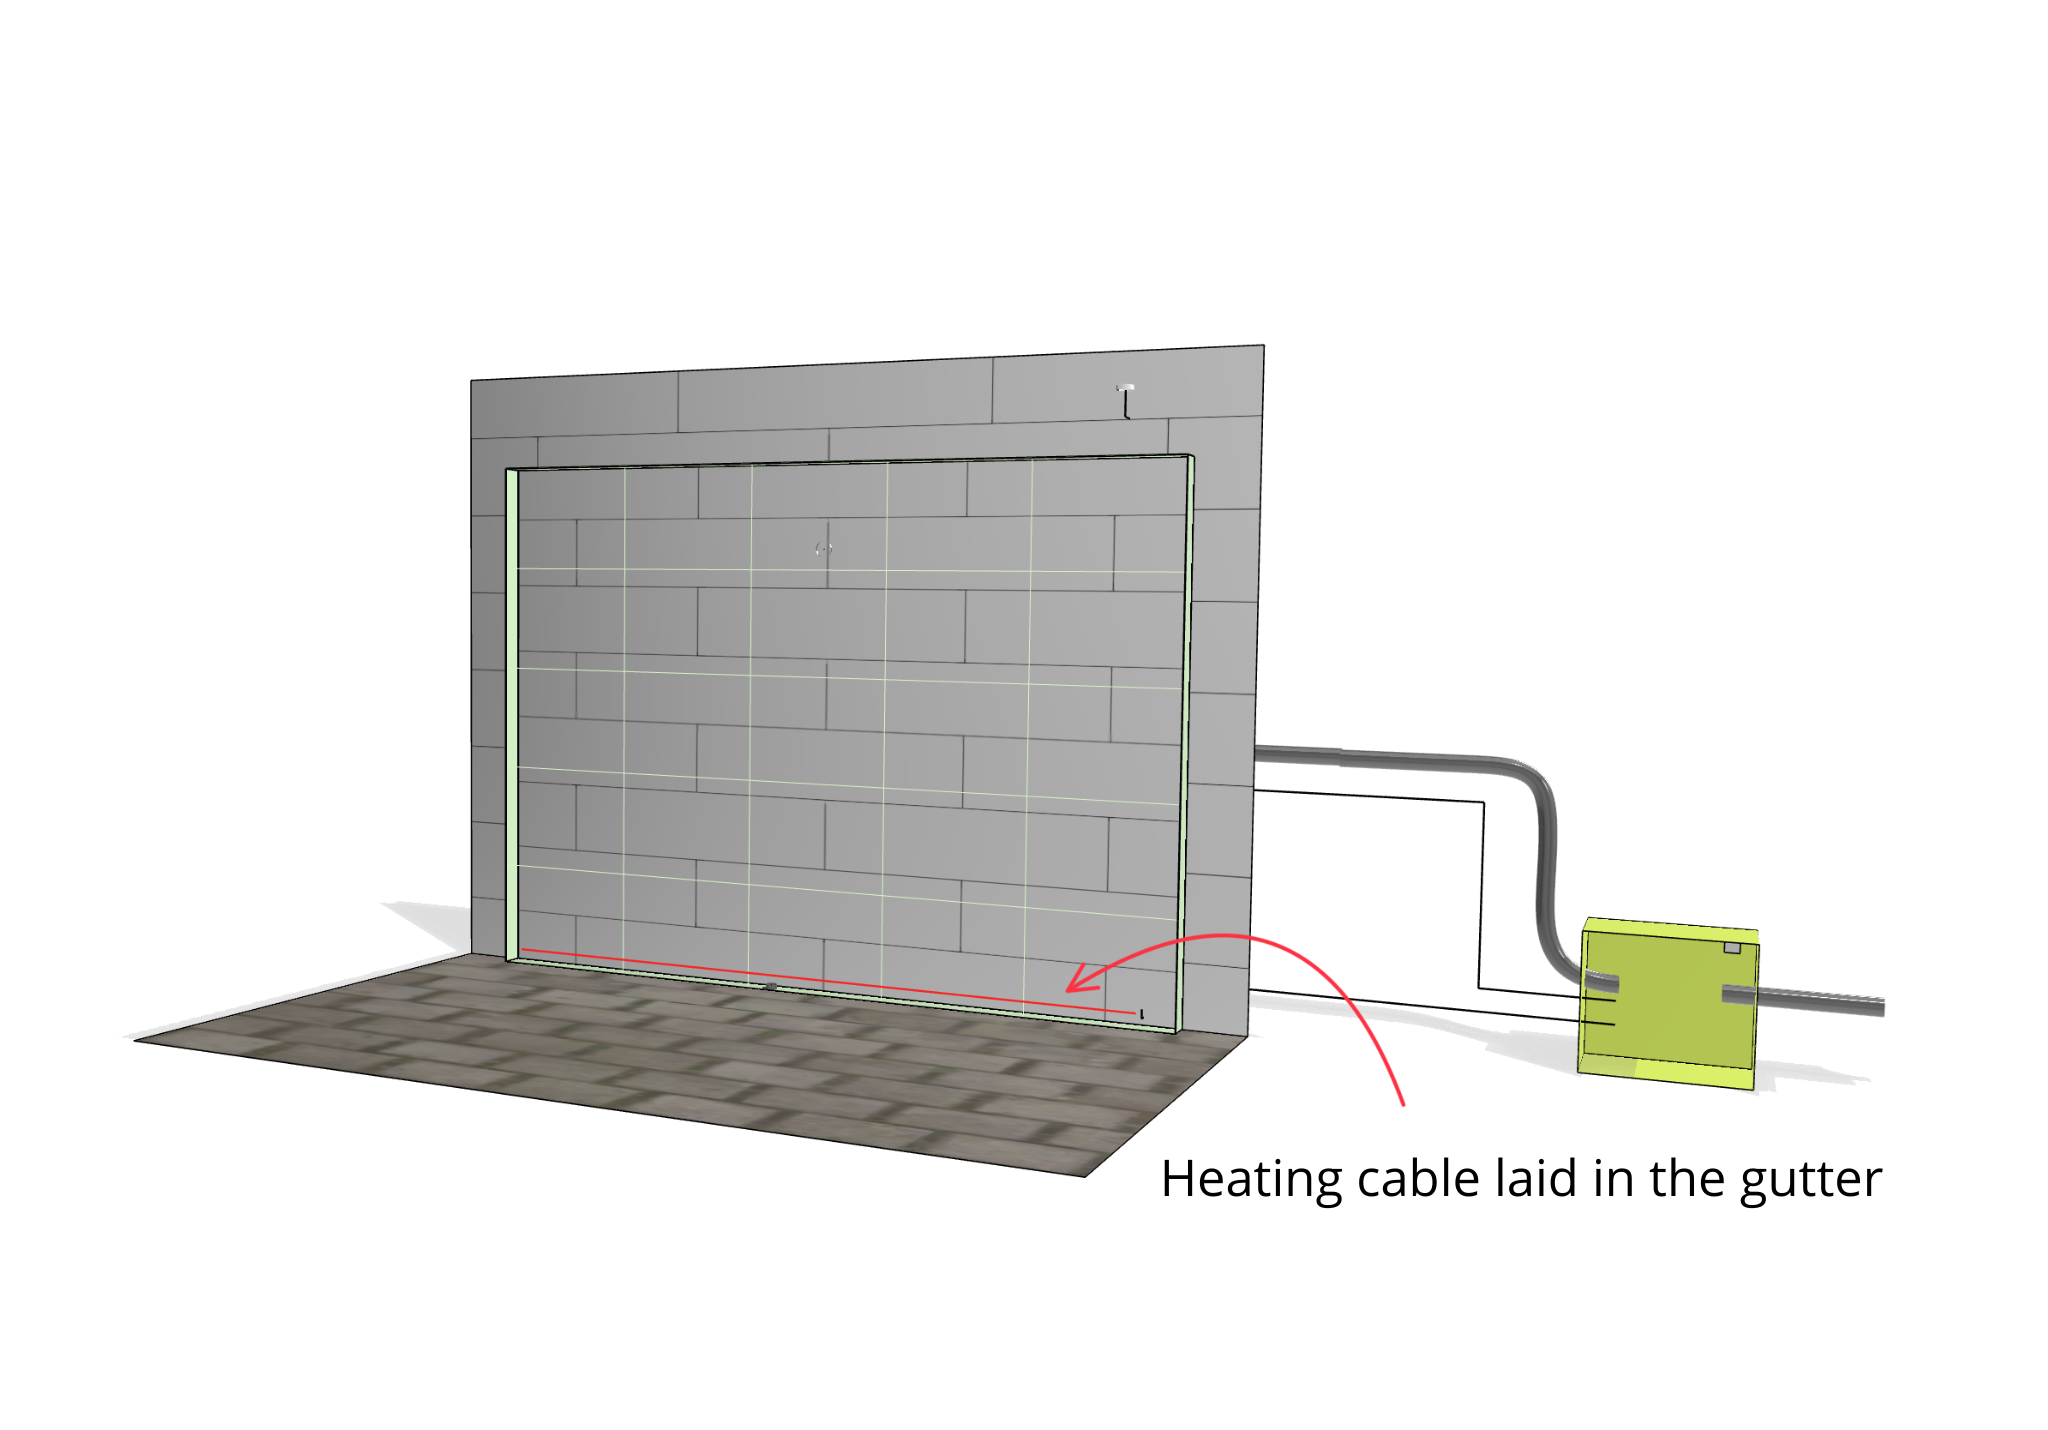
5. Heating cable
To protect the gutter from freezing, a heating cable should be installed in it. To prepare for installation, an electrical cable with a cross-section of 3 x 1.5 mm should be connected from the control location (indoor) to where the gutter is to be installed. During winter watering, the heating cable will protect the drainage and the gutter from freezing.

We invite you to view our projects in the green wall gallery. If you are interested in building an outdoor vertical garden, please contact us through the contact form below.
